Easy Pickled Red Onions Instructions
There are certain kitchen staples that, once you start making them yourself, you can never go back to the shop-bought versions. For me, at the top of that list, are pickled red onions. That vibrant magenta jar in the fridge is more than just a condiment; it’s a secret weapon. It’s the finishing touch that transforms a good meal into something truly memorable, adding a bright, tangy crunch that cuts through richness and elevates simple dishes. The process itself is wonderfully satisfying, watching the sharp, raw onion slices soften and blush a brilliant pink in the warm, aromatic brine.
This isn’t just another onion recipe; it’s a foundational technique that opens up a world of flavour. We’re not talking about the intensely sharp, tear-inducing pickled onions of old. These are quick-pickled, meaning they retain a satisfying crispness while their fiery bite is tamed into a delightful sweet-and-sour tang. I’ve been making this for over 3 years, and it never disappoints. Whether piled onto a juicy burger, scattered over avocado toast, or tossed into a fresh salad, they provide a pop of acidity and colour that makes everything taste a little more considered, a little more delicious.
This particular set of pickled red onions instructions is designed for home cooks who appreciate the impact of small details. It’s for anyone looking to add a versatile, homemade element to their cooking repertoire that comes together in about 30 minutes. Once you have a jar of these on hand, you’ll find yourself reaching for them constantly, turning everyday meals into something special.
Recipe Overview
This pickling guide will walk you through creating beautifully balanced, crisp, and tangy red onions. The flavour profile is a delightful dance between the sharpness of the vinegar and a subtle sweetness from the sugar, with the onion’s natural pungency mellowed to a pleasant, savoury note. I’ve tested various vinegar-to-water ratios over the years, and I find that a 1:1 ratio provides the perfect level of acidity without being overpowering, allowing the onion’s flavour to shine through.
- Prep Time: 10 minutes
- Cook Time: 5 minutes
- Total Time: 15 minutes (plus at least 30 minutes for pickling)
- Makes: 1 medium jar (approx. 500ml)
- Difficulty: Easy
Why You’ll Love These Pickled Red Onions Instructions
- Genuine Flavour: We achieve a fantastic balance here. The onions lose their harsh raw bite but keep a wonderful crunch. The brine is sharp, slightly sweet, and aromatic, infusing the onions with a complex tang that complements so many other foods.
- Ready in Under 30 Minutes: The active preparation and cooking time is just 15 minutes. After a short 30-minute rest in the brine, they are ready to eat, though their flavour continues to develop and deepen the longer they sit.
- A Flexible Recipe: This is a brilliant base recipe. You can easily customise it by adding a few black peppercorns, a smashed garlic clove, a bay leaf, or even a sprig of fresh dill or thyme to the jar for an extra layer of flavour.
- Works Brilliantly for Countless Meals: These are ideal for brightening up rich dishes. Think pulled pork sandwiches, creamy pasta dishes like this Creamy Garlic Penne Pasta, or as a vibrant topping for tacos and grain bowls.
- Family Tested: My whole family enjoys these. Even the kids, who would normally turn their noses up at raw onion, love the milder, sweeter taste and the fun pink colour they add to their meals.
Ingredients You’ll Need
For the best results, start with fresh, firm red onions. The quality of your vinegar also makes a difference; I often use Aspall’s white wine vinegar because it has a clean, crisp taste that doesn’t overpower the other ingredients. You can, however, use apple cider vinegar for a slightly fruitier note.
- 2 large red onions (approximately 400g)
- 250ml white wine vinegar
- 250ml water
- 1.5 tablespoons caster sugar
- 1.5 teaspoons fine sea salt
- Optional Flavourings:
- 1 teaspoon black peppercorns
- 1 bay leaf
- 2 cloves of garlic, lightly crushed
- 1 small red chilli, sliced (for a bit of heat)
Adam’s Tip: Don’t be tempted to use malt vinegar for this recipe. Its flavour is far too strong and will dominate everything else. A clear, light vinegar like white wine, cider, or rice vinegar is what you want for this style of quick pickle.
How to Make Pickled Red Onions
The process is very straightforward. The main goal is to slice the onions evenly so they pickle at the same rate and to ensure the sugar and salt are fully dissolved in the warm brine before you pour it over. This ensures every slice is perfectly seasoned.
- Prepare the Onions: First, peel the red onions. Slice them in half from root to tip, then slice them thinly into half-moons. Aim for slices that are about 3-5mm thick. What works best for me is using a mandoline slicer for perfectly uniform slices, but a sharp chef’s knife and a steady hand will work just as well.
- Pack the Jar: Tightly pack the sliced onions into a clean, sterilised 500ml glass jar. If you’re using any of the optional flavourings like peppercorns, garlic, or a bay leaf, add them to the jar now, scattering them amongst the onion slices.
- Make the Brine: In a small saucepan, combine the white wine vinegar, water, caster sugar, and sea salt. Place the pan over a medium heat.
- Heat Gently: Warm the brine mixture, stirring occasionally, for about 3-5 minutes. You are not trying to boil it vigorously; you just want to heat it enough for the sugar and salt to dissolve completely. Once you can no longer see any granules, remove it from the heat.
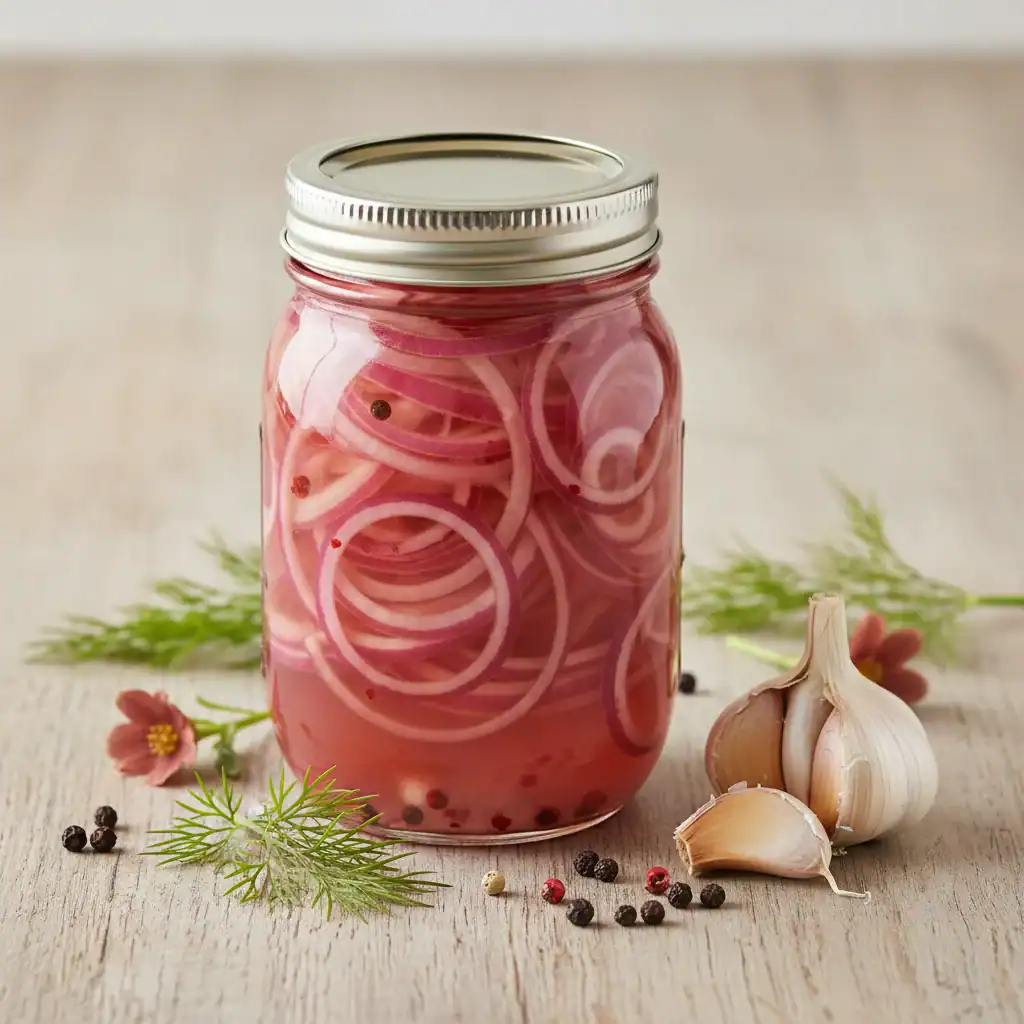
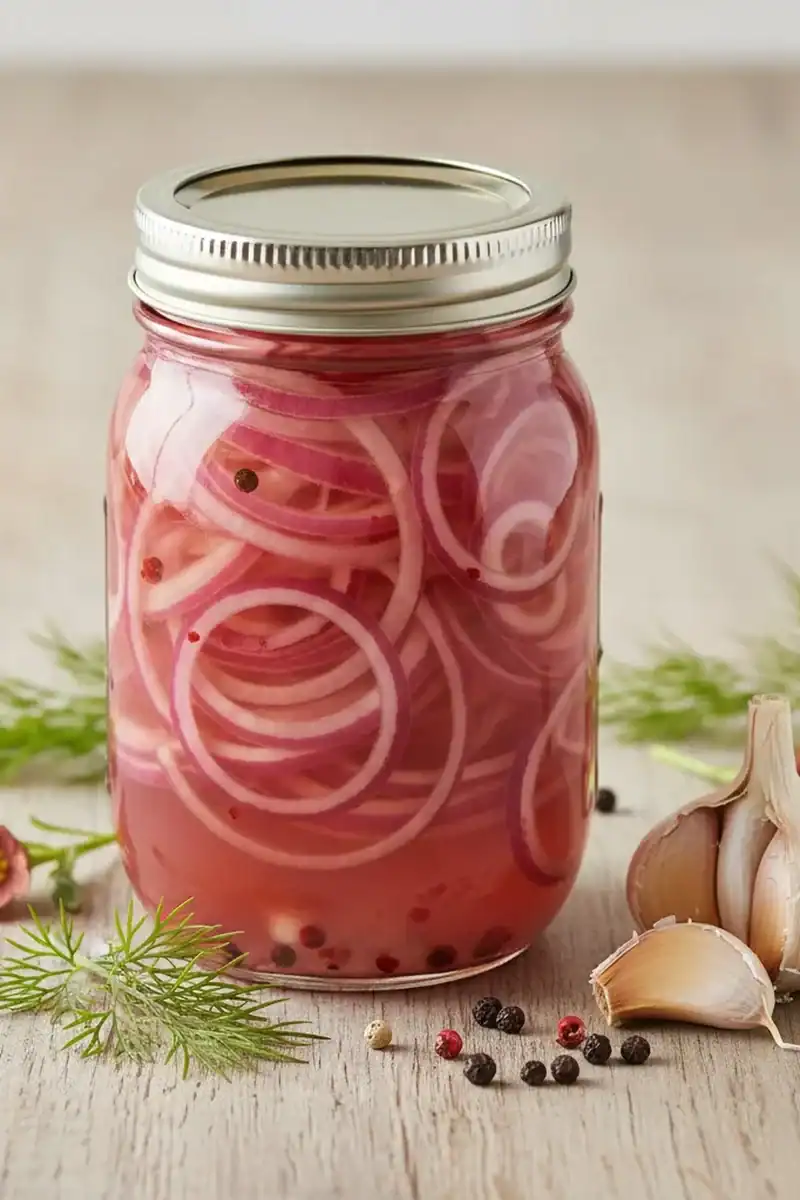
- Combine and Pickle: Carefully pour the hot brine directly over the onions in the jar, ensuring they are fully submerged. You’ll almost immediately see the onions begin to turn a beautiful, vibrant pink.
- Cool and Steep: Use a spoon to gently press the onions down to remove any trapped air bubbles. Screw the lid on the jar and let it cool on the countertop for about 30-60 minutes. Once cooled, they are ready to serve, or you can transfer the jar to the fridge for storage.
Tips From My Kitchen
Over the years, I’ve picked up a few key details that ensure perfect pickled onions every time. These small adjustments can make a big difference to the final texture and flavour.
- Brine Temperature is Key: Pouring the brine over the onions while it’s hot is what “cooks” them slightly, softening their texture just enough to take away the raw crunch. If the brine is too cool, they’ll stay too crisp and won’t absorb the flavours as effectively.
- The Secret to a Milder Flavour: I learned that if you find red onions particularly pungent, you can mellow them out first. Simply place the raw slices in a sieve and pour boiling water over them, then drain immediately before packing them into the jar. This is a technique called blanching. Personally, I skip this as I enjoy the slight bite, but it’s a great option if you prefer a gentler flavour. For a deeper dive into the science, Serious Eats has a great article on how pickling works.
- Make-Ahead Magic: These are designed to be made ahead. In fact, their flavour is even better after a day or two in the fridge, as the onions have more time to marinate in the brine. I always try to have a jar ready to go.
- Proper Storage: Store your pickled red onions in a sealed, airtight glass jar in the refrigerator. They will keep well and stay crisp for up to 3 weeks. Always use a clean fork to remove them from the jar to avoid introducing any bacteria.
Equipment You’ll Need
You don’t need any fancy gadgets for this recipe, just a few kitchen basics.
- A clean 500ml glass jar with a tight-fitting lid (like a Kilner or Mason jar)
- Sharp knife and cutting board (or a mandoline slicer)
- Small saucepan
- Measuring cups and spoons
Delicious Variations to Try
Once you’ve mastered the basic pickled red onions instructions, feel free to experiment. The brine is a fantastic canvas for other flavours.
- Spicy Pickled Onions: Add one thinly sliced jalapeño or a teaspoon of red pepper flakes to the jar along with the onions. This adds a gentle, warming heat that builds as they sit.
- Herby and Aromatic: Tuck a few sprigs of fresh dill, thyme, or oregano into the jar. For a Mexican-inspired flavour, a combination of oregano and cumin seeds works wonderfully.
- Sweet and Spiced: For a warmer, spiced version ideal for autumn, add a star anise, a cinnamon stick, and a few whole cloves to the brine as it heats up. This is fantastic with roast pork or chicken.
What to Serve With Pickled Red Onions
The beauty of these onions lies in their versatility. They add a zesty, acidic counterpoint to so many dishes. Friends always ask me for this recipe after trying it at dinner parties, usually when I’ve served it with one of these.
- Tacos and Burgers: This is the classic pairing. They cut through the richness of grilled meats and cheese beautifully. Try them with our Parmesan Garlic Beef Bowtie Pasta for a surprising twist.
- Salads and Bowls: Scatter them over any salad for a pop of flavour and colour. They are particularly good in a hearty grain bowl or a simple Classic House Salad with Red Wine Vinaigrette.
- Sandwiches and Toast: Liven up your lunchtime sandwich, especially with fillings like cheese, ham, or tuna mayonnaise. They are also my favourite topping for avocado toast, along with a sprinkle of chilli flakes.
- Drink Pairing: Their bright acidity pairs well with a crisp, cold lager or a zesty white wine like a Sauvignon Blanc.
Frequently Asked Questions
Pickled Red Onions
Ingredients
Method
- Prepare the Onions: First, peel the red onions. Slice them in half from root to tip, then slice them thinly into half-moons. Aim for slices that are about 3-5mm thick. What works best for me is using a mandoline slicer for perfectly uniform slices, but a sharp chef's knife and a steady hand will work just as well.
- Pack the Jar: Tightly pack the sliced onions into a clean, sterilised 500ml glass jar. If you're using any of the optional flavourings like peppercorns, garlic, or a bay leaf, add them to the jar now, scattering them amongst the onion slices.
- Make the Brine: In a small saucepan, combine the white wine vinegar, water, caster sugar, and sea salt. Place the pan over a medium heat.
- Heat Gently: Warm the brine mixture, stirring occasionally, for about 3-5 minutes. You are not trying to boil it vigorously; you just want to heat it enough for the sugar and salt to dissolve completely. Once you can no longer see any granules, remove it from the heat.
- Combine and Pickle: Carefully pour the hot brine directly over the onions in the jar, ensuring they are fully submerged. You'll almost immediately see the onions begin to turn a beautiful, vibrant pink.
- Cool and Steep: Use a spoon to gently press the onions down to remove any trapped air bubbles. Screw the lid on the jar and let it cool on the countertop for about 30-60 minutes. Once cooled, they are ready to serve, or you can transfer the jar to the fridge for storage.
Notes
Making your own pickled red onions is one of the most rewarding small efforts you can make in the kitchen. For just a few minutes of work, you get a stunning, flavour-packed condiment that will make your meals sing. I hope you give this onion recipe a try and discover just how much a little jar of pink magic can do. Let me know how you get on and what delicious dishes you pair them with in the comments below!