
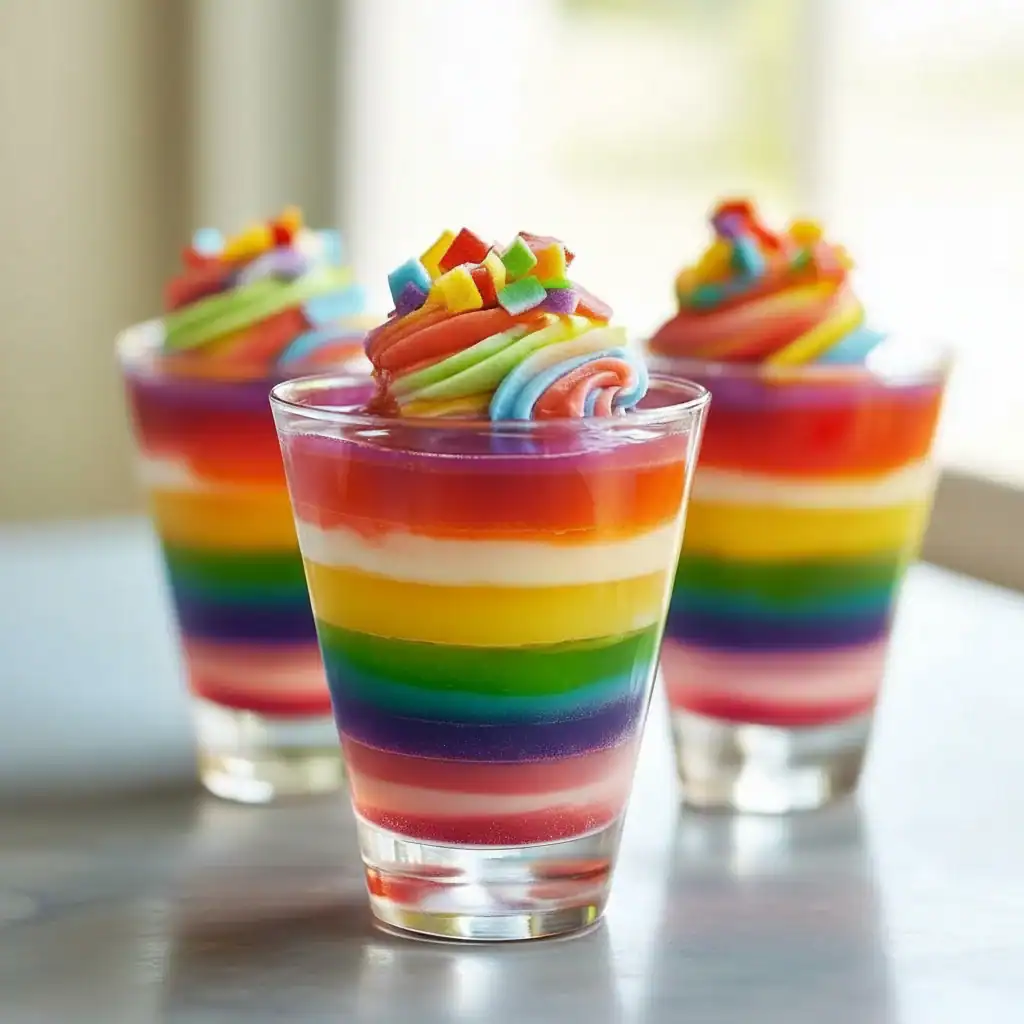
Layered Rainbow Jello Cups Dessert
There’s something wonderfully nostalgic about jelly. It brings back memories of childhood parties, wobbly spoons, and pure, simple joy. But we’re taking that classic treat and giving it a vibrant, modern twist with these Layered Rainbow Jello Cups. Each spoonful is a journey through distinct, fruity layers, from deep purple blackcurrant to bright red strawberry. Friends always ask me for this recipe after trying it at our summer barbecues; the distinct, separate layers look so impressive, yet the process is wonderfully methodical and relaxing.
This isn’t just a dessert; it’s a colourful centrepiece that gets everyone talking. The beauty of these Jello Cups is in their precision—each layer is chilled just enough to set before the next is gently poured on top, creating a stunning spectrum of colour that shines through the glass. While “Jello” is the brand name many people use, especially in the US, here in the UK we’d typically call this dessert jelly. Whatever its name, this recipe is a fantastic project for a quiet afternoon and the end result is well worth the patience.
These individual portions are ideal for kids’ parties, garden get-togethers, or simply as a cheerful dessert to brighten up a weeknight. They are light, refreshing, and the fruity flavours are a pure delight. We’ll walk through exactly how to get those clean, sharp lines between each colour, ensuring your Rainbow Jello looks as good as it tastes.
Recipe Overview
This recipe guides you through creating six distinct, fruity jelly layers in individual glass cups. The key is patience, allowing each layer to partially set before adding the next to avoid the colours bleeding into one another. When I first tested this, I rushed the second layer and learned that a lukewarm jelly poured onto a barely-set layer results in a muddled colour. Letting the new layer cool completely is the secret to success! The final result is a wobbly, vibrant dessert with layers of strawberry, orange, lemon, lime, blackcurrant, and raspberry.
- Prep Time: 15 minutes (active)
- Cook Time: 3-4 hours (chilling time)
- Total Time: 4 hours 15 minutes
- Servings: 6 cups
- Difficulty: Medium
Why You’ll Love This Layered Rainbow Jello Cups Recipe
- Vibrant Fruit Flavours: Each layer has its own distinct taste, from the zesty tang of lime to the sweet burst of strawberry. It’s a progression of fruity notes that is genuinely refreshing.
- A Stunning Visual Treat: This isn’t just a dessert, it’s a showstopper! The clear, colourful layers are visually striking and look fantastic on any party table.
- A Methodical and Fun Process: While it requires chilling time, the active steps are straightforward. It’s a relaxing recipe to make, and watching the rainbow build is incredibly satisfying.
- Great for Celebrations: This recipe works beautifully for birthday parties, summer picnics, and Pride celebrations. Any event that calls for a bit of colour and fun is the right time for these Jello cups.
- Family Tested: My kids absolutely adore these and love helping to make them (and picking the order of the colours!). My husband, who’s usually picky about desserts, asked for seconds!

Ingredients You’ll Need
For this recipe, we’re using standard jelly cubes, which are readily available in most UK supermarkets. I find that brands like Hartley’s or Rowntree’s set reliably and have great, strong fruit flavours that don’t taste artificial. Make sure you have six different colours to create the full rainbow effect.
- 135g packet of strawberry or raspberry jelly (red)
- 135g packet of orange jelly (orange)
- 135g packet of lemon jelly (yellow)
- 135g packet of lime jelly (green)
- 135g packet of blackcurrant jelly (purple/blue)
- 135g packet of raspberry jelly (pink/another red shade) – or a blue raspberry if you can find it!
- 1710ml boiling water (285ml per packet)
- Optional: Whipped cream and sprinkles, for decorating
Adam’s Tip: To get the most vibrant colours, try to find the brightest jelly packets you can. If you can’t find a blue jelly, a deep purple blackcurrant jelly works as a brilliant substitute for the darker end of the spectrum.
How to Make Layered Rainbow Jello Cups
The process for creating these Jello cups is all about timing and temperature. We’ll work layer by layer, starting with purple at the bottom and building our way up to red. Having a clear workspace and your serving cups ready is the best way to start.
- Prepare Your First Layer (Purple): Start with the blackcurrant jelly. Break the jelly cubes into a heatproof measuring jug. Pour in 285ml of boiling water and stir continuously until the cubes have completely dissolved. Let the liquid cool at room temperature for about 20-30 minutes. It should be lukewarm, not hot.
- Pour and Chill Layer One: Arrange six clear glasses or plastic cups on a small baking tray (this makes it easier to move them in and out of the fridge). Carefully divide the cooled purple jelly liquid evenly between the cups. Place the tray in the fridge and chill for 20-30 minutes, or until the jelly is just set but still a bit sticky to the touch. It shouldn’t be rock solid.
- Prepare the Second Layer (Green): While the first layer is chilling, prepare the lime jelly. Repeat the process: break the cubes into a clean jug, add 285ml of boiling water, stir until dissolved, and then let it cool completely to room temperature. This is crucial – adding warm jelly will melt the layer underneath. I find that leaving it on the counter for the full 30 minutes while the first layer chills is just about right.
- Add the Second Layer: Gently check the purple layer. If you touch it lightly with your finger, it should be firm enough not to break but still have a slight tackiness. Very gently pour the cooled green jelly liquid over the purple layer. The best way to do this is by pouring it over the back of a spoon to soften its landing and prevent it from breaking the layer below. Return to the fridge for another 20-30 minutes.
- Continue Layering: Repeat the process for the remaining colours in this order: yellow (lemon), orange (orange), and finally red (strawberry). For each step, dissolve the jelly, let it cool completely, and pour it gently over the previously set layer before chilling again for 20-30 minutes.
- Final Chill: Once you’ve added the final red layer, the cups need a longer chill. Place them in the fridge for at least 2-3 hours, or until all the layers are fully and firmly set.
- Serve: Just before serving, you can top your Layered Rainbow Jello Cups with a swirl of whipped cream and a scattering of colourful sprinkles if you wish.
Tips From My Kitchen
- Temperature Control is Everything: The single most important tip is to ensure your next layer of jelly liquid is completely cool before pouring it. If it’s even slightly warm, it will melt the layer below and the colours will bleed together. Be patient!
- The Spoon Trick: I learned that pouring the liquid jelly directly into the cup can sometimes disturb the delicate set of the layer underneath. Pouring it slowly over the back of a teaspoon held just above the surface dissipates the stream and ensures a perfect, clean line every time.
- Make-Ahead Magic: These Jello cups are an ideal dessert to prepare in advance. You can make them a full day or even two days before your event. Just cover each cup with cling film once fully set to keep them fresh in the fridge.
- Storage: Leftover Jello cups should be stored in the fridge, covered. They will keep well for up to 4 days. After that, the jelly may start to get a bit watery.
Equipment You’ll Need
- 6 clear glasses or plastic cups (approx. 200ml capacity)
- Heatproof measuring jug
- Kettle
- Spoons for stirring and pouring
- Small baking tray
Delicious Variations to Try
Once you’ve mastered the basic technique, there are lots of ways to customise these cups.
- Creamy Rainbow Layers: For a different texture and look, you can add creamy layers. After dissolving a jelly packet, let it cool slightly, then whisk in 2-3 tablespoons of Greek yoghurt, evaporated milk, or condensed milk before pouring. Alternate between clear and creamy layers for a beautiful effect.
- Fruity Surprise: Add a small amount of finely diced fruit to each layer. Make sure the fruit complements the jelly flavour (e.g., small pieces of mandarin in the orange layer, finely chopped strawberries in the red). Avoid fruits like fresh pineapple, kiwi, and mango, as their enzymes can prevent the jelly from setting properly.
- Grown-Up Jello Cups: For an adult party, add a splash of vodka or a complementary liqueur to each layer as you mix it. A dash of Cointreau in the orange layer or crème de cassis in the blackcurrant layer works wonderfully. Reduce the water by the same amount of alcohol you add.
What to Serve With Layered Rainbow Jello Cups
These cups are a fantastic standalone dessert, but they also pair nicely with other party treats.
- Simple Vanilla Ice Cream: A scoop of good quality vanilla ice cream offers a creamy contrast to the fruity, wobbly jelly.
- Fresh Fruit Platter: Serve alongside a platter of fresh berries, melon slices, and grapes. The fresh fruit enhances the flavours in the jelly. For another fruity dessert idea, why not try our classic Banana Bread Recipe?
- Light Biscuits: Simple shortbread or wafer biscuits are great for adding a little crunch alongside the soft jelly.
Frequently Asked Questions
Layered Rainbow Jello Cups
Ingredients
Method
- Prepare Your First Layer (Purple): Start with the blackcurrant jelly. Break the jelly cubes into a heatproof measuring jug. Pour in 285ml of boiling water and stir continuously until the cubes have completely dissolved. Let the liquid cool at room temperature for about 20-30 minutes. It should be lukewarm, not hot.
- Pour and Chill Layer One: Arrange six clear glasses or plastic cups on a small baking tray (this makes it easier to move them in and out of the fridge). Carefully divide the cooled purple jelly liquid evenly between the cups. Place the tray in the fridge and chill for 20-30 minutes, or until the jelly is just set but still a bit sticky to the touch. It shouldn't be rock solid.
- Prepare the Second Layer (Green): While the first layer is chilling, prepare the lime jelly. Repeat the process: break the cubes into a clean jug, add 285ml of boiling water, stir until dissolved, and then let it cool completely to room temperature. This is crucial – adding warm jelly will melt the layer underneath. I find that leaving it on the counter for the full 30 minutes while the first layer chills is just about right.
- Add the Second Layer: Gently check the purple layer. If you touch it lightly with your finger, it should be firm enough not to break but still have a slight tackiness. Very gently pour the cooled green jelly liquid over the purple layer. The best way to do this is by pouring it over the back of a spoon to soften its landing and prevent it from breaking the layer below. Return to the fridge for another 20-30 minutes.
- Continue Layering: Repeat the process for the remaining colours in this order: yellow (lemon), orange (orange), and finally red (strawberry). For each step, dissolve the jelly, let it cool completely, and pour it gently over the previously set layer before chilling again for 20-30 minutes.
- Final Chill: Once you've added the final red layer, the cups need a longer chill. Place them in the fridge for at least 2-3 hours, or until all the layers are fully and firmly set.
- Serve: Just before serving, you can top your Layered Rainbow Jello Cups with a swirl of whipped cream and a scattering of colourful sprinkles if you wish.
Notes
I really hope you enjoy making—and eating—these vibrant Layered Rainbow Jello Cups. They bring so much colour and fun to the table and are always a huge hit with both kids and adults in my home. If you give this recipe a go, please let me know how they turned out in the comments below. I’d love to hear from you!
Happy cooking,
Adam Henderson


