
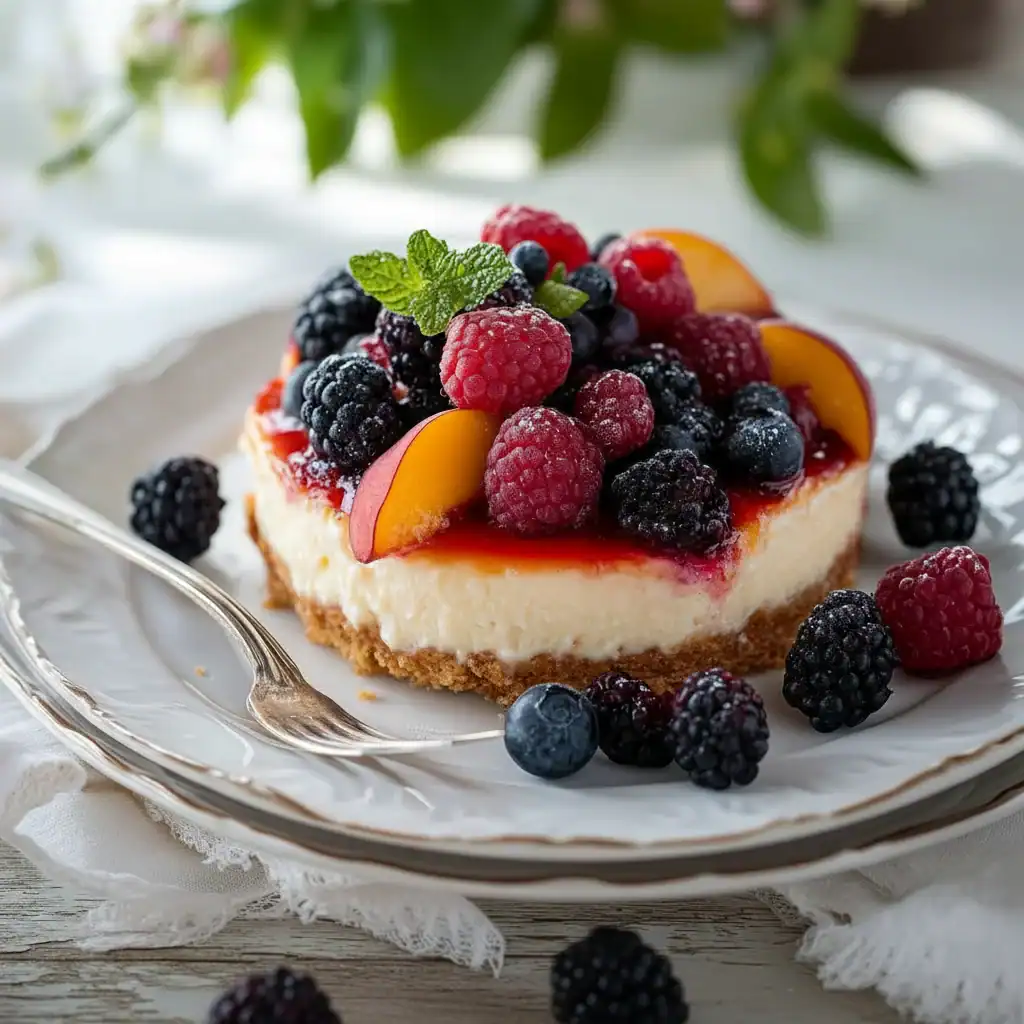
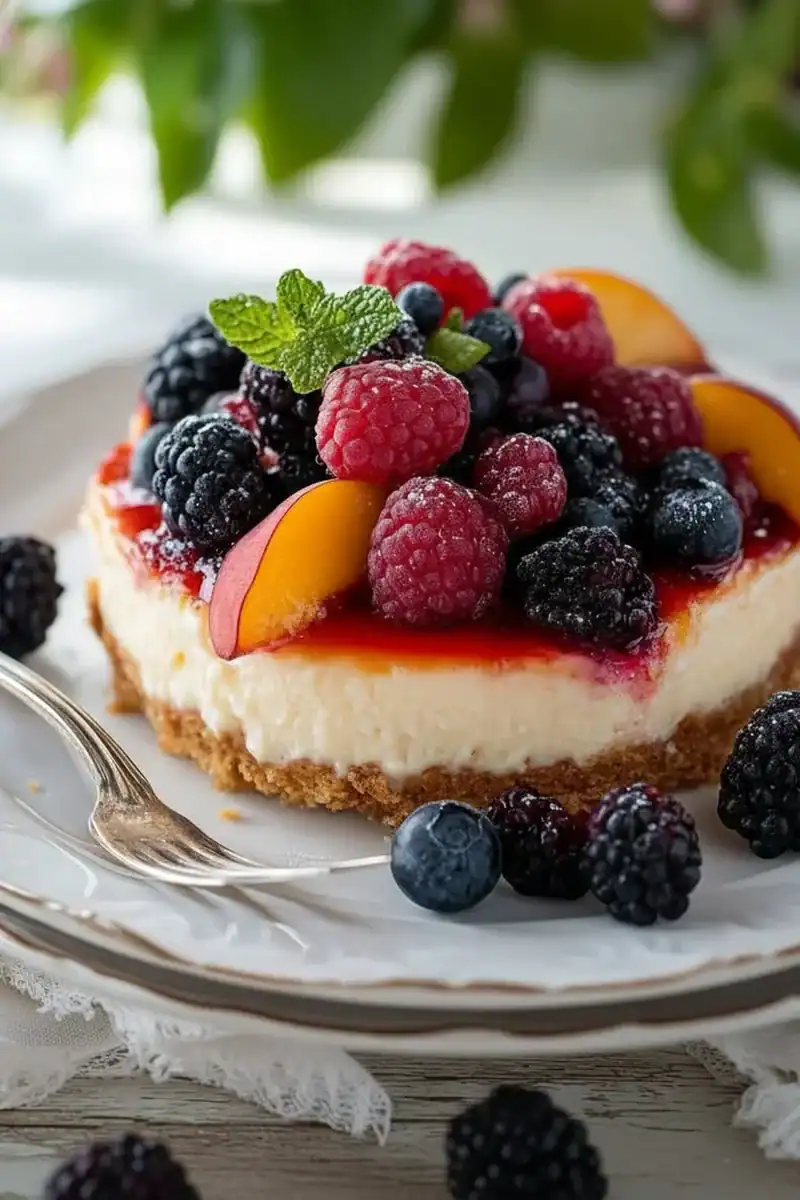
Summer Berry Peach Cheesecake
There’s something truly special about a dessert that captures the essence of a season on a single plate. For me, that’s what this Summer Berry Peach Cheesecake is all about. It’s the taste of a sun-drenched British afternoon, with ripe, juicy peaches and a medley of sharp, sweet berries all nestled on a creamy, decadent cheesecake filling. I used to find no-bake cheesecakes a bit hit-or-miss, often ending up too soft, until I discovered the stabilising power of properly whipped double cream. This recipe is the culmination of that discovery, a straightforward yet utterly show-stopping dessert that lets the beautiful fruit do all the talking.
This is the kind of dessert we make for garden parties, lazy Sunday barbecues, or whenever we need a spectacular centrepiece that doesn’t require turning on the oven during a heatwave. It combines the buttery crunch of a digestive biscuit base with a silky, rich cream cheese filling that has just a hint of vanilla. The topping is where the magic really happens: a vibrant compote of fresh peaches and mixed summer berries, cooked just enough to release their juices but still retain their shape and character. It’s a fruit cheesecake that tastes as good as it looks, and it always gets compliments from our friends and family.
Whether you’re an experienced baker or just looking for a reliable no-bake dessert, this recipe is designed to give you a perfect result every time. It’s ideal for making ahead, meaning less stress when you have guests. We’ll walk through each step together, ensuring your cheesecake sets beautifully and slices like a dream. Let’s get started on what might just become your new favourite summer dessert.
Recipe Overview
This No Bake Summer Berry Peach Cheesecake brings together a classic buttery biscuit base, a rich and velvety cream cheese filling, and a stunning topping of fresh, seasonal fruit. The flavour is a delightful balance of creamy sweetness from the filling, cut through by the slight tartness of the berries and the fragrant sweetness of ripe peaches. After testing this recipe five times, I finally got the cream cheese to double cream ratio just right for a filling that’s firm enough to slice cleanly but still melts in your mouth. It’s a truly beautiful dessert for any warm-weather occasion.
- Prep Time: 30 minutes
- Chilling Time: 6 hours (or overnight)
- Total Time: 6 hours 30 minutes
- Servings: 10-12 slices
- Difficulty: Medium
Why You’ll Love This Summer Berry Peach Cheesecake
- Genuine Fruit Flavour: The topping isn’t an overly sweet jam. We gently cook fresh peaches and berries with a touch of sugar and lemon, so their natural, vibrant flavours are the star of the show. You get distinct notes of raspberry, blueberry, and fragrant peach in every bite.
- No Oven Needed: This is a completely no-bake recipe, which is a blessing on a hot summer day. The entire dessert comes together on the stovetop and in the fridge, keeping your kitchen cool.
- Flexible Recipe: You can easily adapt the fruit to what’s in season. Swap the peaches for nectarines, or use only raspberries if they’re particularly good. You can also switch the digestive biscuits for gingernuts for a bit of spice.
- Works Beautifully for Gatherings: Because it needs to be made ahead of time, it’s a fantastic dessert for dinner parties or family barbecues. All the work is done hours before your guests arrive.
- Family Tested: My kids, who can be fussy about fruit, absolutely adore this cheesecake. They love the contrast between the creamy filling and the juicy topping, and it’s a great way to get them enjoying seasonal produce.
Ingredients You’ll Need
For a cheesecake this good, using quality ingredients makes a real difference. I always opt for full-fat Philadelphia cream cheese as I find it gives the creamiest, most stable result. Cheaper alternatives can sometimes be a bit watery and affect how well the cheesecake sets. Here’s what we’ll need:
- For the Biscuit Base:
- 250g digestive biscuits
- 125g unsalted butter, melted
- For the Cheesecake Filling:
- 600g full-fat cream cheese (like Philadelphia), at room temperature
- 100g icing sugar, sifted
- 1 tsp vanilla bean paste or vanilla extract
- 300ml double cream, cold
- For the Berry & Peach Topping:
- 3 ripe peaches, stoned and chopped into 2cm pieces
- 250g mixed summer berries (raspberries, blueberries, blackberries work well)
- 50g caster sugar
- 1 tbsp lemon juice
- 1 tbsp cornflour mixed with 2 tbsp cold water (a slurry)
Adam’s Tip: Ensure your cream cheese is genuinely at room temperature. Cold cream cheese is the number one cause of lumpy cheesecake filling. I take mine out of the fridge at least two hours before I start.
How to Make Summer Berry Peach Cheesecake
The process for this peach and berry cheesecake is quite straightforward. We’ll make it in three stages: creating the base, whipping up the filling, and then cooking the fruity topping. The key is to be patient and allow for proper chilling time.
- Prepare the Tin and Base: Lightly grease a 23cm (9-inch) springform cake tin and line the base with baking parchment. Place the digestive biscuits in a food processor and blitz until they form fine crumbs. Alternatively, put them in a sealed bag and bash with a rolling pin. Pour in the melted butter and pulse or mix until the crumbs are evenly coated and resemble wet sand.
- Press the Base: Tip the buttery crumbs into the prepared tin. Using the back of a spoon or the base of a glass, press the mixture down firmly and evenly across the bottom. Make sure to compact it well, especially around the edges, to create a solid foundation. Place the tin in the fridge to chill for at least 30 minutes while you make the filling.
- Start the Filling: In a large bowl, beat the room temperature cream cheese with an electric mixer (or by hand with a whisk) for a minute until it’s smooth and free of lumps. Sift in the icing sugar and add the vanilla paste. Beat again until everything is smooth and well combined, scraping down the sides of the bowl as needed.
- Whip the Cream: In a separate, clean bowl, pour in the cold double cream. Whip it using an electric mixer on a medium-high speed until it forms soft peaks. Be careful not to over-whip it. You want it to be thick and hold its shape, but still have a soft, pillowy texture. Over-whipping can make it grainy. For a deeper dive into whipping cream, BBC Good Food has a great guide.
- Combine the Filling: Gently fold the whipped double cream into the cream cheese mixture in two or three additions. Use a large metal spoon or spatula to fold carefully, trying to keep as much air in the mixture as possible. What works best for me is a gentle figure-of-eight motion until it’s just combined and no white streaks remain.
- Fill and Chill: Spoon the creamy filling onto the chilled biscuit base. Spread it out evenly with an offset spatula or the back of a spoon, creating a smooth, level surface. Return the cheesecake to the fridge and let it chill for a minimum of 6 hours, but overnight is even better for a really firm set.
- Make the Fruit Topping: About an hour before you plan to serve, make the topping. Place the chopped peaches, mixed berries, caster sugar, and lemon juice in a medium saucepan over a medium heat. Cook for 5-7 minutes, stirring gently, until the sugar has dissolved and the fruit has started to soften and release its juices.
- Thicken the Topping: Give the cornflour slurry a quick stir, then pour it into the simmering fruit. Continue to cook for another 1-2 minutes, stirring constantly, until the sauce thickens and becomes glossy. Remove from the heat and allow it to cool completely to room temperature. A warm topping will melt your cheesecake filling.
- Assemble and Serve: Once the topping is completely cool, carefully spoon it over the top of the chilled cheesecake, spreading it gently to the edges. You can now serve it immediately or return it to the fridge for up to an hour. To serve, run a thin knife around the edge of the cheesecake before releasing the springform tin.
Tips From My Kitchen
- Room Temperature is Key: For the filling, having your cream cheese at room temperature is non-negotiable. If it’s too cold, it will not blend smoothly with the sugar and you’ll end up with small lumps throughout your cheesecake, which ruins the silky texture.
- The Secret to a Clean Slice: I learned that for the cleanest possible slices, you should dip a large, sharp knife in a jug of hot water and wipe it dry between each cut. The warm blade glides through the cheesecake without dragging the filling.
- Make-Ahead Magic: The cheesecake base and filling can be made up to two days in advance and kept covered in the fridge. The fruit topping can also be made a day ahead and stored in an airtight container in the fridge. Just assemble before serving.
- Storage: Leftover cheesecake will keep beautifully in the fridge for up to 3 days. Cover it well (a cake dome is ideal) or store it in an airtight container to prevent it from absorbing any fridge odours. I don’t recommend freezing this cheesecake as the texture of the filling can become grainy upon thawing.
Common Mistakes to Avoid
- Using Cold Cream Cheese: I’ve mentioned it before, but it’s the most common pitfall. Cold cream cheese results in a lumpy filling. Take it out of the fridge a couple of hours before you begin for a perfectly smooth texture.
- Under-chilling the Cheesecake: Patience is a virtue with no-bake cheesecakes. If you try to slice it too early, you’ll have a soft, sloppy mess. A minimum of 6 hours is needed for the fats in the cream and cream cheese to solidify properly, and overnight is best.
- Adding Warm Topping: Pouring even a slightly warm fruit compote onto your beautifully chilled cheesecake will cause the top layer of the filling to melt. Ensure your topping has cooled completely to room temperature before assembling.
Delicious Variations to Try
Once you’ve mastered the basic recipe, it’s great fun to experiment. This Summer Dessert is wonderfully adaptable. Here are a few ideas we’ve enjoyed at home:
- Gingernut and Lime: Swap the digestive biscuits for gingernuts and add the zest of one lime to the cheesecake filling. The spicy warmth of the ginger and the zesty lime work brilliantly with the peaches.
- White Chocolate and Raspberry: Omit the peaches and use only raspberries for the topping. Melt 100g of good-quality white chocolate, let it cool slightly, and fold it into the cream cheese mixture before adding the whipped cream for an extra-decadent filling.
- Almond and Cherry: Use cherries instead of berries for the topping and add half a teaspoon of almond extract to the cheesecake filling. For the base, you could even try swapping the digestives for amaretti biscuits. It’s a lovely combination, much like a Bakewell tart. For other fruity desserts, you might also like my easy Banana Bread Recipe.
What to Serve With This Summer Berry Peach Cheesecake
This dessert is a true standalone star, but a few simple additions can elevate it even further. It is a fantastic end to a light summer meal, like my Garlic Parmesan Chicken Pasta.
- A Dollop of Cream: A spoonful of lightly whipped double cream or a scoop of quality vanilla ice cream alongside a slice provides a lovely temperature and texture contrast.
- Fresh Mint: A few fresh mint leaves scattered over the top just before serving adds a wonderful aroma and a fresh, clean note that cuts through the richness.
- Dessert Wine: A glass of chilled Moscato d’Asti or a light, sparkling rosé complements the fruit flavours in the cheesecake beautifully without being overpowering.
Frequently Asked Questions
Summer Berry Peach Cheesecake
Ingredients
Method
- Prepare the Tin and Base: Lightly grease a 23cm (9-inch) springform cake tin and line the base with baking parchment. Place the digestive biscuits in a food processor and blitz until they form fine crumbs. Alternatively, put them in a sealed bag and bash with a rolling pin. Pour in the melted butter and pulse or mix until the crumbs are evenly coated and resemble wet sand.
- Press the Base: Tip the buttery crumbs into the prepared tin. Using the back of a spoon or the base of a glass, press the mixture down firmly and evenly across the bottom. Make sure to compact it well, especially around the edges, to create a solid foundation. Place the tin in the fridge to chill for at least 30 minutes while you make the filling.
- Start the Filling: In a large bowl, beat the room temperature cream cheese with an electric mixer (or by hand with a whisk) for a minute until it’s smooth and free of lumps. Sift in the icing sugar and add the vanilla paste. Beat again until everything is smooth and well combined, scraping down the sides of the bowl as needed.
- Whip the Cream: In a separate, clean bowl, pour in the cold double cream. Whip it using an electric mixer on a medium-high speed until it forms soft peaks. Be careful not to over-whip it. You want it to be thick and hold its shape, but still have a soft, pillowy texture. Over-whipping can make it grainy. For a deeper dive into whipping cream, BBC Good Food has a great guide.
- Combine the Filling: Gently fold the whipped double cream into the cream cheese mixture in two or three additions. Use a large metal spoon or spatula to fold carefully, trying to keep as much air in the mixture as possible. What works best for me is a gentle figure-of-eight motion until it's just combined and no white streaks remain.
- Fill and Chill: Spoon the creamy filling onto the chilled biscuit base. Spread it out evenly with an offset spatula or the back of a spoon, creating a smooth, level surface. Return the cheesecake to the fridge and let it chill for a minimum of 6 hours, but overnight is even better for a really firm set.
- Make the Fruit Topping: About an hour before you plan to serve, make the topping. Place the chopped peaches, mixed berries, caster sugar, and lemon juice in a medium saucepan over a medium heat. Cook for 5-7 minutes, stirring gently, until the sugar has dissolved and the fruit has started to soften and release its juices.
- Thicken the Topping: Give the cornflour slurry a quick stir, then pour it into the simmering fruit. Continue to cook for another 1-2 minutes, stirring constantly, until the sauce thickens and becomes glossy. Remove from the heat and allow it to cool completely to room temperature. A warm topping will melt your cheesecake filling.
- Assemble and Serve: Once the topping is completely cool, carefully spoon it over the top of the chilled cheesecake, spreading it gently to the edges. You can now serve it immediately or return it to the fridge for up to an hour. To serve, run a thin knife around the edge of the cheesecake before releasing the springform tin.
Notes
I really hope you enjoy making and sharing this Summer Berry Peach Cheesecake. It’s a recipe that has brought a lot of joy to our summer gatherings, and I’m so pleased to be able to share it with you. It looks impressive, but as you’ve seen, the steps are very manageable. Let me know how you get on in the comments below – I’d love to hear about it!
Happy cooking,
Adam Henderson


