
Strawberry Shortcake Cookies Recipe
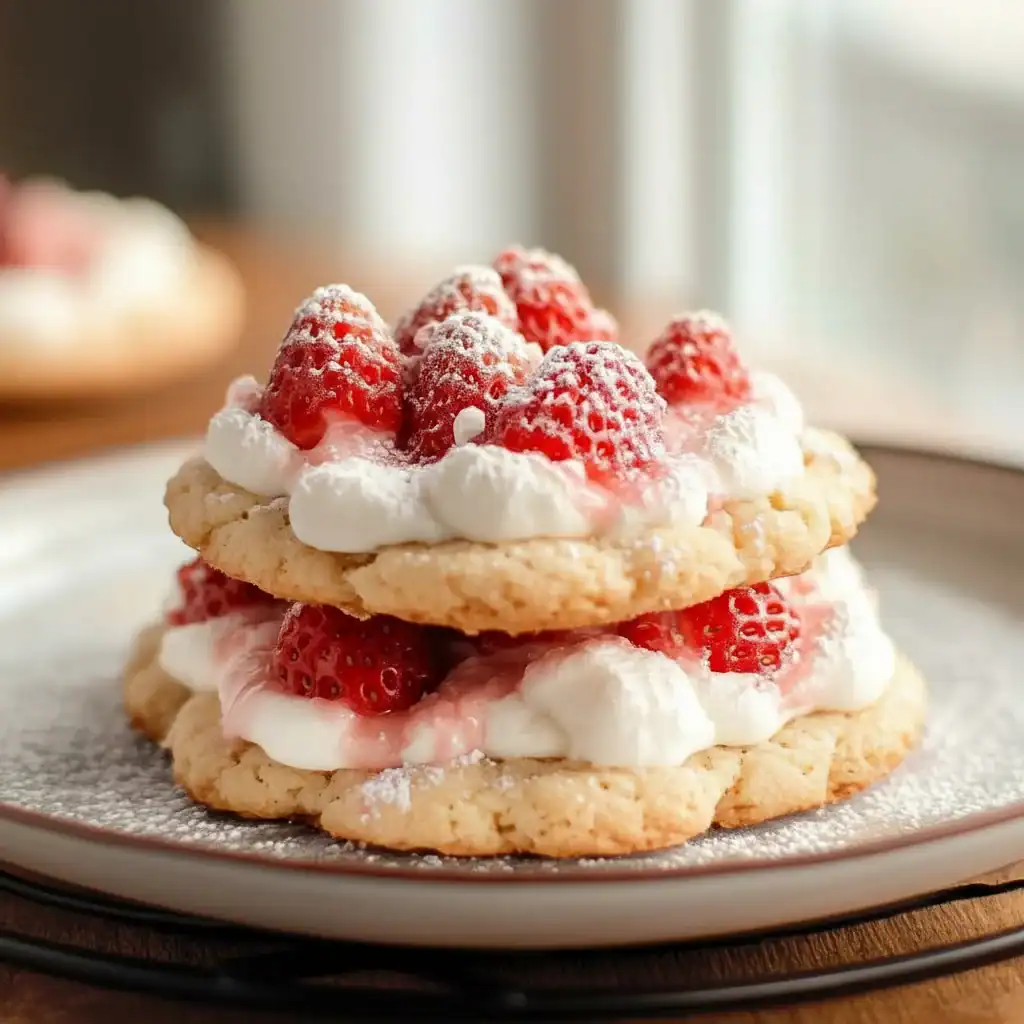
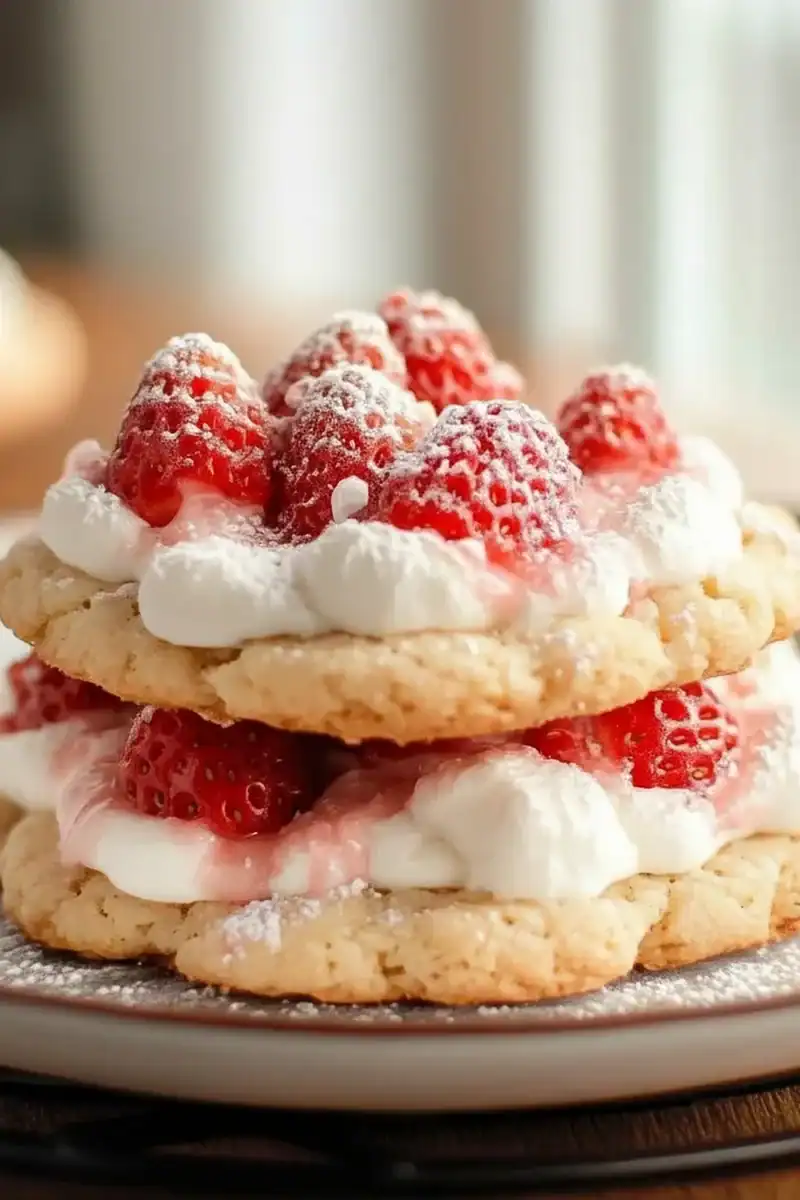
There’s a particular joy that comes with the first proper British summer’s day. The air feels different, the light is golden, and the scent of freshly cut grass hangs around. For me, that feeling is perfectly captured by the taste of fresh strawberries. And while a classic shortcake is a thing of beauty, I wanted to create something a bit more portable, a treat that encapsulates all that summery goodness in a single, delicious bite. The result is these Strawberry Shortcake Cookies – soft, buttery, and bursting with real fruit.
I’ve been making this recipe in some form for over 8 years, and it never disappoints. It bridges the gap between a classic shortcake and a soft-baked cookie. The dough itself is rich and tender, almost like a scone, with a lovely hint of vanilla. Then, we fold in chunks of fresh, sweet strawberries that soften and jam slightly as they bake, releasing their incredible flavour throughout. A simple vanilla glaze on top adds that final touch of sweetness and makes them look utterly delightful.
These cookies are wonderful for packing up for a picnic, sharing with friends over a cup of tea in the garden, or simply having a batch on hand for when you want a truly special treat. They are the essence of summer baking, and I’m thrilled to share my perfected version with you.
Recipe Overview
This recipe creates wonderfully soft, cake-like cookies that are a true taste of summer. We’re aiming for a texture that’s buttery and tender, not crisp, studded with pockets of sweet, juicy strawberries. The simple vanilla glaze provides a sweet finish that complements the fruit beautifully. After testing this recipe five times, I finally got the balance of moisture and structure just right, ensuring the cookies hold their shape without becoming dry.
- Prep Time: 20 minutes
- Chill Time: 30 minutes
- Cook Time: 12-15 minutes
- Total Time: 1 hour 5 minutes
- Servings: Makes approximately 24 cookies
- Difficulty: Easy
Why You’ll Love These Strawberry Shortcake Cookies
- Genuine Strawberry Flavour: We use fresh, diced strawberries, not artificial essences. This provides a genuine, bright fruit taste with a lovely tartness that cuts through the richness of the buttery cookie.
- Ready in About an Hour: The dough comes together in just 20 minutes. After a crucial 30-minute chill in the fridge, they bake to perfection in under 15 minutes.
- Flexible Recipe: Feel free to add 100g of white chocolate chips for extra creaminess or the zest of half a lemon to the dough to really make the strawberry flavour pop.
- Great for Summer Gatherings: These work beautifully for garden parties, school bake sales, or as a lovely addition to an afternoon tea spread. They always get compliments.
- Family Tested: My whole family adores these. My youngest says they’re like eating a tiny strawberry cake, which I think is the highest praise a cookie can get!
Ingredients You’ll Need
For these cookies, using good quality ingredients makes a noticeable difference, especially the butter and vanilla. I prefer using a creamy British unsalted butter as it forms the backbone of the flavour. Nielsen-Massey vanilla bean paste is my go-to for a really deep, authentic vanilla note that you just don’t get from essence.
- 250g plain flour
- 1 ½ teaspoons baking powder
- ¼ teaspoon bicarbonate of soda
- ¼ teaspoon fine sea salt
- 150g unsalted butter, at room temperature
- 175g caster sugar
- 1 large free-range egg, at room temperature
- 2 teaspoons vanilla extract or bean paste
- 150g fresh strawberries, hulled and diced into 1cm pieces
- For the Vanilla Glaze:
- 125g icing sugar, sifted
- 2-3 tablespoons whole milk
- ½ teaspoon vanilla extract
Adam’s Tip: After washing your strawberries, make sure to pat them completely dry with a paper towel before dicing. Any excess water on the fruit can make the cookie dough too sticky and cause the cookies to spread more than you’d like during baking.
How to Make Strawberry Shortcake Cookies
The process for these cookies is very straightforward. The key is to work gently once the flour is added and to give the dough a proper chill before baking. This ensures a soft texture and prevents them from becoming flat discs in the oven.
- Prepare Your Dry Ingredients: In a medium bowl, whisk together the plain flour, baking powder, bicarbonate of soda, and salt. Whisking helps to evenly distribute the leavening agents. Set this aside.
- Cream Butter and Sugar: In the bowl of a stand mixer fitted with the paddle attachment, or in a large bowl using a hand mixer, beat the room-temperature butter and caster sugar on medium speed for about 3-4 minutes. You’re looking for a light, pale, and fluffy texture. This step incorporates air, which is vital for a soft cookie. For more on this technique, BBC Good Food has a great guide.
- Add Wet Ingredients: Add the egg and vanilla extract to the creamed butter and sugar. Beat on medium speed until just combined, scraping down the sides of the bowl once to ensure everything is incorporated.
- Combine Wet and Dry: With the mixer on its lowest speed, gradually add the flour mixture to the wet ingredients. Mix only until the last streaks of flour have disappeared. Be careful not to overmix here, as that can develop the gluten and make the cookies tough.
- Fold in the Strawberries: Remove the bowl from the mixer. Gently fold the diced strawberries into the dough using a spatula until they are evenly distributed. The dough will be quite soft at this point.
- Chill the Dough: Cover the bowl with cling film and refrigerate for at least 30 minutes, or up to an hour. What works best for me is this minimum 30-minute chill, as it solidifies the butter and makes the dough much easier to handle. It’s the most important step for preventing excess spread.
- Scoop and Bake: Preheat your oven to 180°C (160°C Fan). Line two large baking trays with parchment paper. Use a medium cookie scoop or two spoons to drop rounded tablespoons of dough onto the prepared trays, leaving about 5cm of space between each one to allow for spreading.
- Bake to Perfection: Bake for 12-15 minutes, or until the edges are lightly golden brown and the centres look set. They might appear slightly underdone in the very middle, but they will continue to cook on the hot tray.
- Cool Completely: Let the cookies cool on the baking tray for 5 minutes before carefully transferring them to a wire rack to cool completely. They are delicate when warm.
- Glaze and Enjoy: While the cookies are cooling, whisk together the sifted icing sugar, 2 tablespoons of milk, and the vanilla extract in a small bowl. Add more milk, a teaspoon at a time, until you reach a thick but pourable consistency. Drizzle the glaze over the completely cooled cookies. Allow the glaze to set for about 20 minutes before serving.
Tips From My Kitchen
- Temperature Control: Your butter and egg really must be at room temperature. Cold ingredients won’t emulsify properly, leading to a dense, greasy cookie. Take them out of the fridge a good hour before you start.
- The Secret Step: I learned that gently pressing a few extra small pieces of diced strawberry onto the tops of the cookie dough balls before baking makes them look even more appealing once they come out of the oven.
- Make-Ahead: The cookie dough can be made and stored, well-wrapped in cling film, in the fridge for up to 2 days. You can also scoop the dough into balls, freeze them on a tray, and then transfer them to a freezer bag for up to 3 months. Bake from frozen, adding 2-3 minutes to the baking time.
- Storage: Once glazed and set, these cookies will keep in an airtight container at room temperature for up to 3 days. I find they are actually even softer and more flavourful on the second day as the moisture settles.
Equipment You’ll Need
You don’t need anything too specialised for this recipe, just some standard baking kit.
- Stand mixer or a hand mixer with a large bowl
- Two large baking trays
- Parchment paper
- Wire cooling rack
Common Mistakes to Avoid
- Overcrowding the tray: It’s tempting to fit as many cookies as possible onto one tray, but they need space. Overcrowding traps steam and prevents the edges from baking properly, causing them to merge together. Stick to 8-10 cookies per large tray.
- Using warm dough: Skipping the chilling step is the most common pitfall. The dough is soft, and warm butter will melt instantly in the oven, leading to thin, flat, and often burnt-edged cookies. Don’t skip the chill!
- Overbaking: These are soft cookies, not crunchy biscuits. Pull them from the oven when the edges are just turning golden, and the centres look puffy and set. They will firm up as they cool on the tray.
What to Serve With Strawberry Shortcake Cookies
While these are a delight on their own, they can also be part of a larger spread. They pair beautifully with simple, classic flavours that let the strawberries shine.
- A Pot of Tea: A classic English Breakfast or a fragrant Earl Grey tea is the ideal companion for these buttery cookies during an afternoon break.
- Vanilla Ice Cream: For a simple dessert, serve a warm cookie alongside a scoop of quality vanilla bean ice cream. The contrast in temperature is wonderful.
- Fresh Lemonade: A glass of sharp, homemade lemonade provides a refreshing citrus note that perfectly balances the sweetness of the cookies and complements the strawberries.
Frequently Asked Questions
Strawberry Shortcake Cookies
Ingredients
Method
- Prepare Your Dry Ingredients: In a medium bowl, whisk together the plain flour, baking powder, bicarbonate of soda, and salt. Whisking helps to evenly distribute the leavening agents. Set this aside.
- Cream Butter and Sugar: In the bowl of a stand mixer fitted with the paddle attachment, or in a large bowl using a hand mixer, beat the room-temperature butter and caster sugar on medium speed for about 3-4 minutes. You're looking for a light, pale, and fluffy texture. This step incorporates air, which is vital for a soft cookie. For more on this technique, BBC Good Food has a great guide.
- Add Wet Ingredients: Add the egg and vanilla extract to the creamed butter and sugar. Beat on medium speed until just combined, scraping down the sides of the bowl once to ensure everything is incorporated.
- Combine Wet and Dry: With the mixer on its lowest speed, gradually add the flour mixture to the wet ingredients. Mix only until the last streaks of flour have disappeared. Be careful not to overmix here, as that can develop the gluten and make the cookies tough.
- Fold in the Strawberries: Remove the bowl from the mixer. Gently fold the diced strawberries into the dough using a spatula until they are evenly distributed. The dough will be quite soft at this point.
- Chill the Dough: Cover the bowl with cling film and refrigerate for at least 30 minutes, or up to an hour. What works best for me is this minimum 30-minute chill, as it solidifies the butter and makes the dough much easier to handle. It's the most important step for preventing excess spread.
- Scoop and Bake: Preheat your oven to 180°C (160°C Fan). Line two large baking trays with parchment paper. Use a medium cookie scoop or two spoons to drop rounded tablespoons of dough onto the prepared trays, leaving about 5cm of space between each one to allow for spreading.
- Bake to Perfection: Bake for 12-15 minutes, or until the edges are lightly golden brown and the centres look set. They might appear slightly underdone in the very middle, but they will continue to cook on the hot tray.
- Cool Completely: Let the cookies cool on the baking tray for 5 minutes before carefully transferring them to a wire rack to cool completely. They are delicate when warm.
- Glaze and Enjoy: While the cookies are cooling, whisk together the sifted icing sugar, 2 tablespoons of milk, and the vanilla extract in a small bowl. Add more milk, a teaspoon at a time, until you reach a thick but pourable consistency. Drizzle the glaze over the completely cooled cookies. Allow the glaze to set for about 20 minutes before serving.
Notes
I hope you enjoy baking – and eating – these Strawberry Shortcake Cookies as much as my family and I do. They are a simple bake, but one that delivers so much summery flavour. If you love this kind of straightforward, satisfying recipe, you might also like my fail-safe Banana Bread Recipe. Let me know how you get on in the comments below; I always love to hear how my recipes turn out in your kitchens!
Happy baking,
Adam Henderson


