Try This Warm Cheesy Chicken Garlic Wraps Recipe
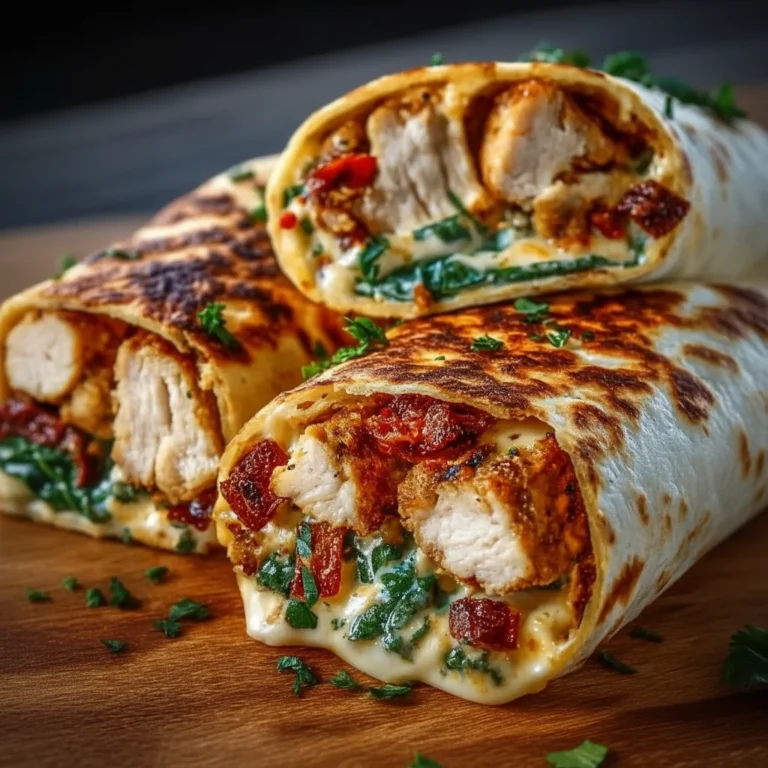
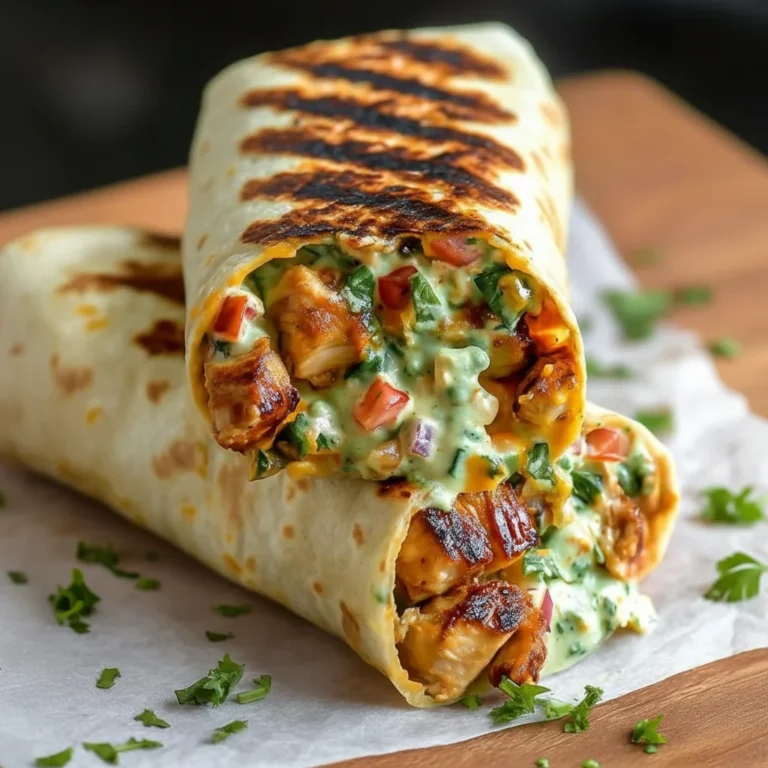
There are some meals that just hit the spot every single time, and for me, this Cheesy Chicken Garlic Wraps recipe is firmly at the top of that list. It’s the kind of dinner we turn to when the day has been long and we need something deeply satisfying without a lot of fuss. Imagine tender, juicy chunks of chicken, coated in a savoury garlic butter sauce, all bundled up with gloriously melty cheese inside a warm, toasted tortilla. It’s a simple concept, but the results are absolutely magnificent.
This isn’t just another chicken wrap recipe. What makes it special is the garlic butter that we not only mix with the chicken but also brush on the outside of the wrap before toasting. This little step transforms the tortilla from a simple vessel into a crispy, golden, flavour-packed part of the experience. Friends always ask me for this recipe after trying it at dinner parties, and they’re often surprised at how straightforward it is to put together. It’s become our go-to for a relaxed Friday night in or a substantial lunch that feels like a real treat.
Whether you’re cooking for yourself, your family, or a few friends, these Cheesy Chicken Garlic Wraps are guaranteed to be a hit. They are hearty, full of familiar, comforting flavours, and come together in about 30 minutes. It’s a recipe that proves you don’t need complicated ingredients or techniques to create something truly delicious. Let’s get cooking!
Recipe Overview
This Cheesy Chicken Garlic Wraps recipe delivers on flavour and satisfaction. The core of the dish is pan-seared chicken, which stays wonderfully moist, combined with a rich blend of melted cheddar and mozzarella. The real star, however, is the garlic butter, which infuses every component with its aromatic warmth. From my testing, I found that using both salted butter and fresh garlic cloves gives a much deeper flavour than using garlic powder or pre-made garlic spread.
- Prep Time: 15 minutes
- Cook Time: 15 minutes
- Total Time: 30 minutes
- Servings: 4 wraps
- Difficulty: Easy
Why You’ll Love This Cheesy Chicken Garlic Wraps Recipe
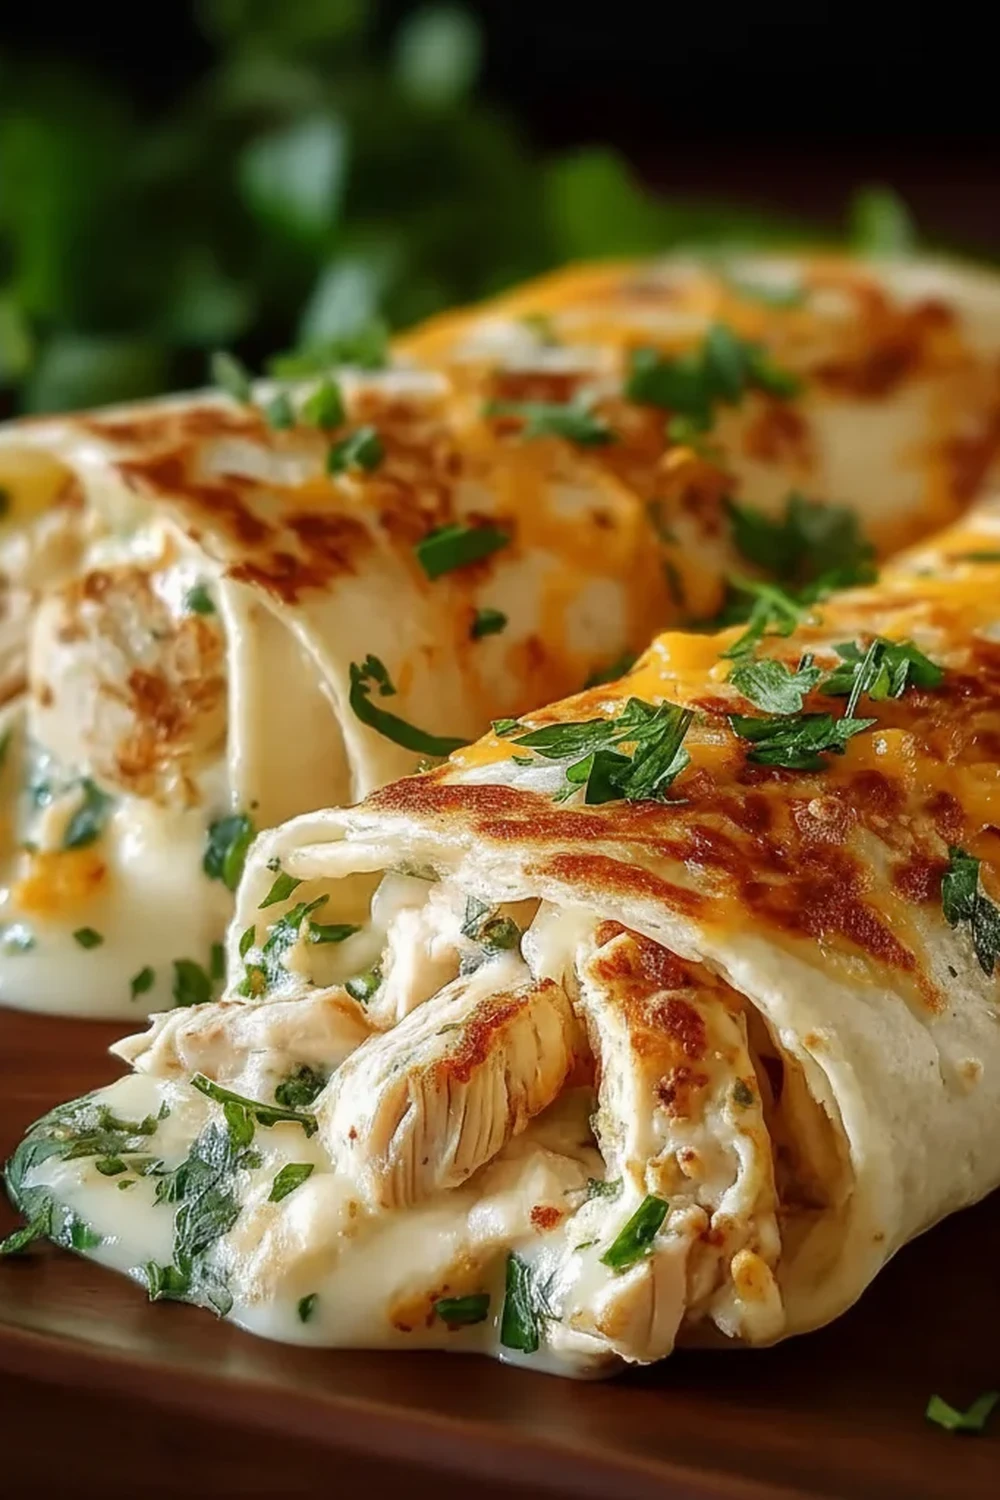
- Genuine Flavour: We’re not talking about subtle hints here. You get a robust garlic punch from the butter, savoury notes from the seasoned chicken, and a lovely, tangy creaminess from the melted cheese blend. The final toast in the pan brings it all together with a satisfyingly crisp texture.
- Ready in 30 Minutes: From chopping the chicken to serving the final wrap, this entire meal is on the table in about half an hour, which makes it ideal for those busy weeknights when you want proper food without the long wait.
- Flexible Recipe: This recipe is a fantastic base for customisation. Don’t have chicken breasts? Diced chicken thighs work beautifully. Feel free to add finely chopped red onion, sautéed bell peppers, or a handful of spinach to the filling for extra veg. You can also experiment with different cheeses like Red Leicester or Monterey Jack.
- Great for Casual Meals: It works beautifully for a quick family dinner, a filling lunch, or even sliced up as an appetiser for a casual get-together. They hold up well, so you can even pack them for a picnic.
- Family Tested: I make this at least once a week – it’s become a family favourite. My kids love the cheesy filling, and it’s a meal that always leaves the table with clean plates and happy faces. Everyone just seems to love this one.
Ingredients You’ll Need
For this recipe, we’re using simple, accessible ingredients that pack a lot of flavour. I find that using large, good-quality flour tortillas makes all the difference; they hold the filling well without tearing. My personal choice is Old El Paso’s Extra Large Super Soft Flour Tortillas as they are pliable and toast up perfectly.
- 500g skinless, boneless chicken breasts, diced into 2-3 cm pieces
- 1 tbsp olive oil
- 1 tsp smoked paprika
- 1 tsp dried oregano
- 1/2 tsp onion powder
- Salt and freshly ground black pepper, to taste
- 4 large flour tortillas
- For the Garlic Butter:
- 80g salted butter
- 4-5 cloves garlic, finely minced
- 1 tbsp fresh parsley, finely chopped
- For the Filling:
- 120g mature cheddar cheese, grated
- 120g mozzarella cheese, grated
Adam’s Tip: For the best results, grate your own cheese from a block. Pre-grated cheeses are often coated in anti-caking agents which can prevent them from melting as smoothly. It’s a small step that makes a noticeable difference to the texture.
How to Make Cheesy Chicken Garlic Wraps
The process for these chicken wraps is straightforward. We’ll cook the chicken, prepare the garlic butter, assemble the wraps, and then toast them until they are golden and the cheese is irresistibly gooey. Follow these steps for a perfect result every time.
- Season and Cook the Chicken: In a medium bowl, toss the diced chicken with olive oil, smoked paprika, dried oregano, onion powder, a generous pinch of salt, and a few grinds of black pepper until it’s evenly coated. Heat a large, non-stick frying pan over a medium-high heat. Add the chicken in a single layer and cook for 6-8 minutes, turning occasionally, until it’s cooked through and nicely browned on all sides. Avoid overcrowding the pan; cook in two batches if necessary. Once cooked, transfer the chicken to a clean bowl.
- Prepare the Garlic Butter: While the chicken is cooking, melt the butter in a small saucepan over a low heat. Add the minced garlic and cook gently for 1-2 minutes until fragrant—be careful not to let it brown or it will turn bitter. Stir in the chopped fresh parsley and remove from the heat.
- Combine Chicken and Butter: Pour about two-thirds of the garlic butter over the cooked chicken in the bowl. Toss well to ensure every piece is coated in that delicious buttery, garlicky sauce. Set the remaining garlic butter aside.
- Warm the Tortillas: Gently warm the tortillas in the microwave for 20-30 seconds. This makes them more pliable and easier to fold without cracking.
- Assemble the Wraps: Lay a warm tortilla flat on a clean surface. Sprinkle a quarter of the cheddar and mozzarella cheese mixture in a line down the centre. Top with a quarter of the garlic butter chicken.
- Fold the Wraps: To fold, tuck in the two shorter sides of the tortilla first. Then, tightly roll the wrap from the bottom up to create a sealed parcel. I find this method contains the filling much better than a simple roll. Repeat for the remaining three wraps.
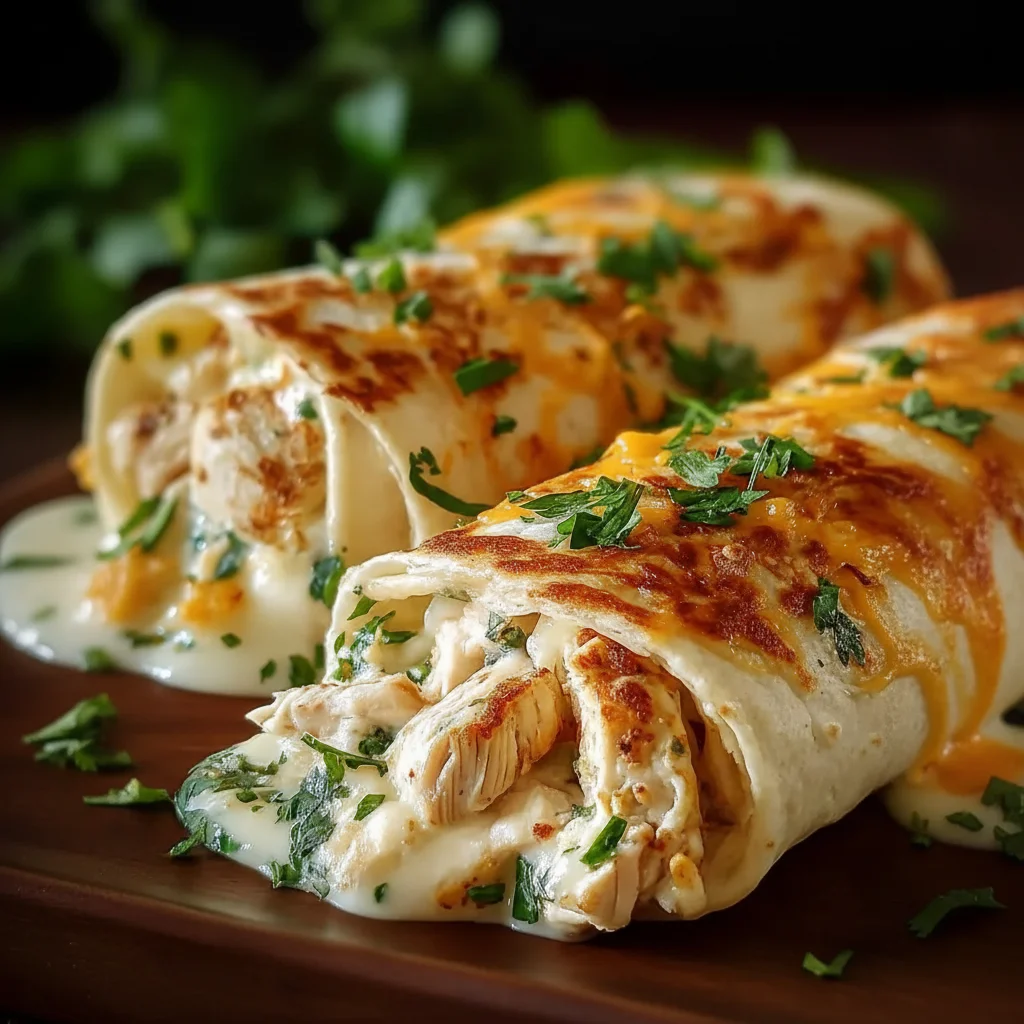
- Toast the Wraps: Wipe out the frying pan you used for the chicken and return it to a medium heat. Brush the top-facing side of each wrap with some of the reserved garlic butter. Carefully place the wraps in the pan, seam-side down. Cook for 2-3 minutes until the bottom is golden brown and crispy.
- Finish and Serve: While the first side is cooking, brush the tops of the wraps with the last of the garlic butter. Carefully flip them over and cook for another 2-3 minutes, until the other side is also golden brown and the cheese inside is completely melted and bubbling. Serve immediately while hot.
Tips From My Kitchen
- Temperature Control: When toasting the wraps, a consistent medium heat is key. If the pan is too hot, the tortilla will burn before the cheese has a chance to melt. Too low, and the wrap can become soggy. Keep a close eye on it.
- The Secret Step: I learned that brushing the *outside* of the wrap with garlic butter before toasting is what creates that incredible, crispy, golden-brown crust. Don’t skip this! It adds a final layer of flavour and texture that really elevates the dish.
- Make-Ahead: You can cook the chicken and prepare the garlic butter up to 2 days in advance. Store them in separate airtight containers in the fridge. When you’re ready to eat, simply assemble the wraps with the cheese and toast as directed.
- Storage: Leftover wraps can be stored in an airtight container in the fridge for up to 3 days. To reheat, I recommend using a dry frying pan over a medium heat or an air fryer to restore their crispiness. Microwaving will make them soft.
Common Mistakes to Avoid
- Overcrowding the pan: When cooking the chicken, ensure it’s in a single layer. If the pieces are too close together, they will steam instead of sear, and you won’t get those lovely browned edges. Cook in batches if your pan isn’t large enough.
- Wrong temperature: Using a screaming hot pan to toast the wraps is a common error. This leads to a burnt exterior and a cold, unmelted filling. A steady medium heat allows the heat to penetrate through to the cheese, melting it perfectly while the outside becomes golden.
- Skipping the rest time: While not essential for diced chicken, if you’re cooking whole chicken breasts to dice afterwards, letting them rest for 5 minutes is crucial. This allows the juices to redistribute, ensuring every piece is tender and moist. You can read more about the science of why resting meat is so important for juicy results.
What to Serve With Cheesy Chicken Garlic Wraps
These wraps are quite substantial on their own, but a few simple sides can round out the meal beautifully. The richness of the cheese and garlic calls for something fresh and light to balance it out.
- Simple Green Salad: A crisp green salad with a sharp vinaigrette cuts through the richness of the wraps. My Classic House Salad with Red Wine Vinaigrette is an excellent partner.
- Sweet Potato Fries: For a more indulgent meal, serve with a side of crispy baked sweet potato fries. The sweetness complements the savoury garlic chicken perfectly.
- Drink Pairing: A cold, crisp lager or a chilled glass of Sauvignon Blanc works wonderfully here. For a non-alcoholic option, a sparkling elderflower pressé is delightfully refreshing.
Frequently Asked Questions
Cheesy Chicken Garlic Wraps
Ingredients
Method
- Season and Cook the Chicken: In a medium bowl, toss the diced chicken with olive oil, smoked paprika, dried oregano, onion powder, a generous pinch of salt, and a few grinds of black pepper until it's evenly coated. Heat a large, non-stick frying pan over a medium-high heat. Add the chicken in a single layer and cook for 6-8 minutes, turning occasionally, until it's cooked through and nicely browned on all sides. Avoid overcrowding the pan; cook in two batches if necessary. Once cooked, transfer the chicken to a clean bowl.
- Prepare the Garlic Butter: While the chicken is cooking, melt the butter in a small saucepan over a low heat. Add the minced garlic and cook gently for 1-2 minutes until fragrant—be careful not to let it brown or it will turn bitter. Stir in the chopped fresh parsley and remove from the heat.
- Combine Chicken and Butter: Pour about two-thirds of the garlic butter over the cooked chicken in the bowl. Toss well to ensure every piece is coated in that delicious buttery, garlicky sauce. Set the remaining garlic butter aside.
- Warm the Tortillas: Gently warm the tortillas in the microwave for 20-30 seconds. This makes them more pliable and easier to fold without cracking.
- Assemble the Wraps: Lay a warm tortilla flat on a clean surface. Sprinkle a quarter of the cheddar and mozzarella cheese mixture in a line down the centre. Top with a quarter of the garlic butter chicken.
- Fold the Wraps: To fold, tuck in the two shorter sides of the tortilla first. Then, tightly roll the wrap from the bottom up to create a sealed parcel. I find this method contains the filling much better than a simple roll. Repeat for the remaining three wraps.
- Toast the Wraps: Wipe out the frying pan you used for the chicken and return it to a medium heat. Brush the top-facing side of each wrap with some of the reserved garlic butter. Carefully place the wraps in the pan, seam-side down. Cook for 2-3 minutes until the bottom is golden brown and crispy.
- Finish and Serve: While the first side is cooking, brush the tops of the wraps with the last of the garlic butter. Carefully flip them over and cook for another 2-3 minutes, until the other side is also golden brown and the cheese inside is completely melted and bubbling. Serve immediately while hot.
Notes
I really hope you enjoy making this Cheesy Chicken Garlic Wraps recipe. It’s a staple in my kitchen for a reason—it’s dependable, delicious, and always satisfying. If you give it a try, please let me know how it turned out in the comments below. I love hearing about your experiences! From my kitchen to yours, Adam Henderson.