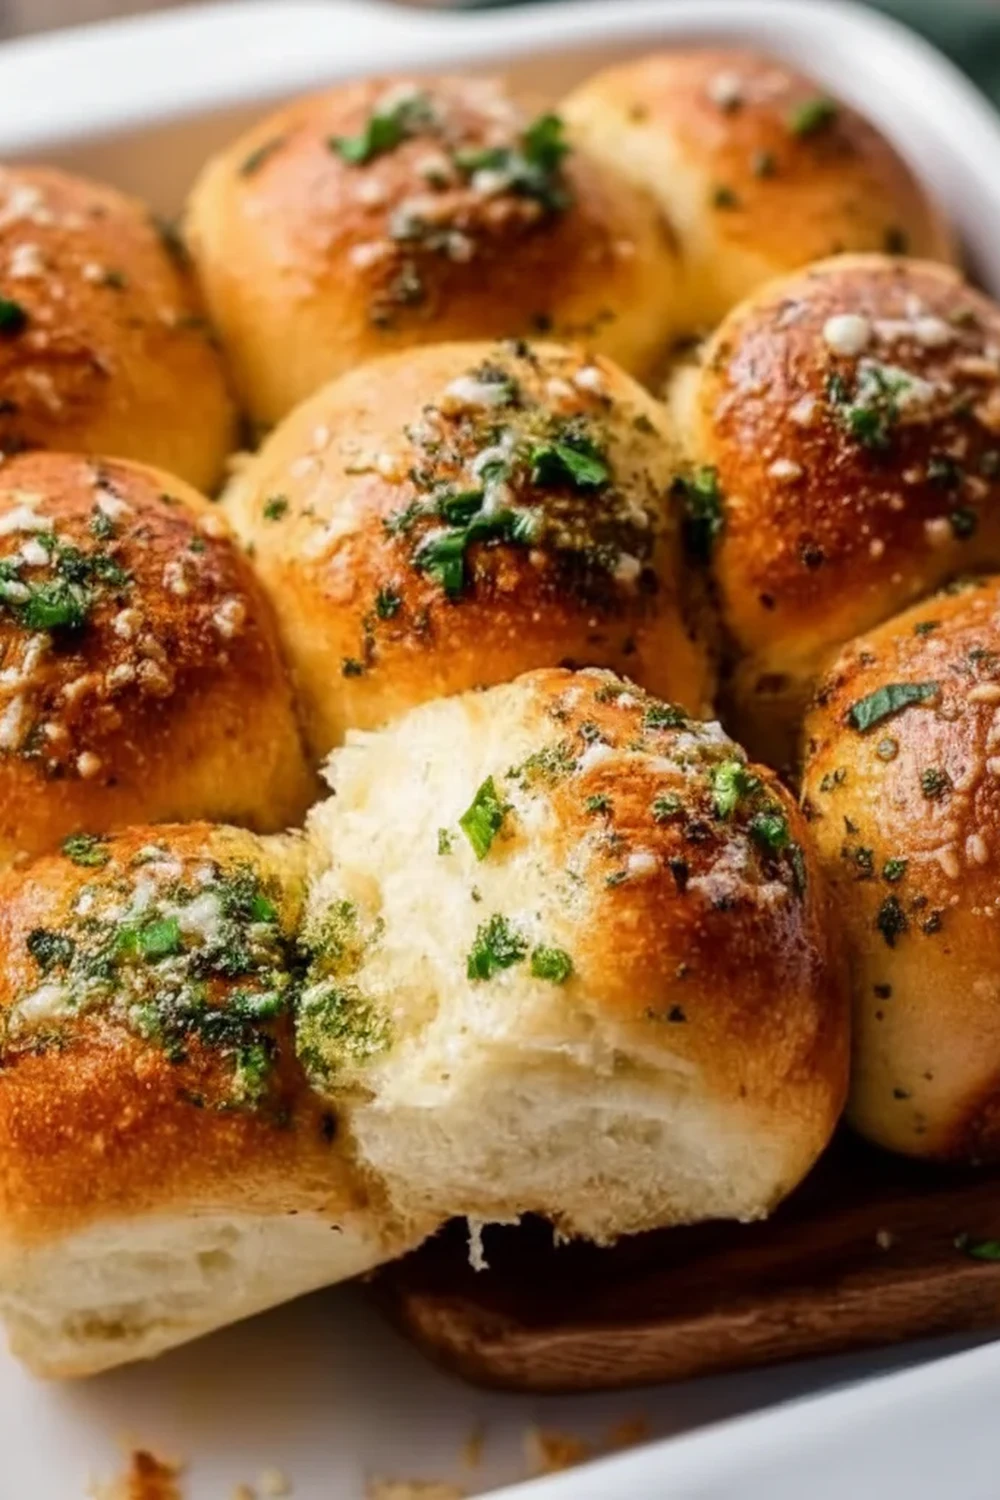
Soft and Buttery Garlic Bread Rolls Recipe
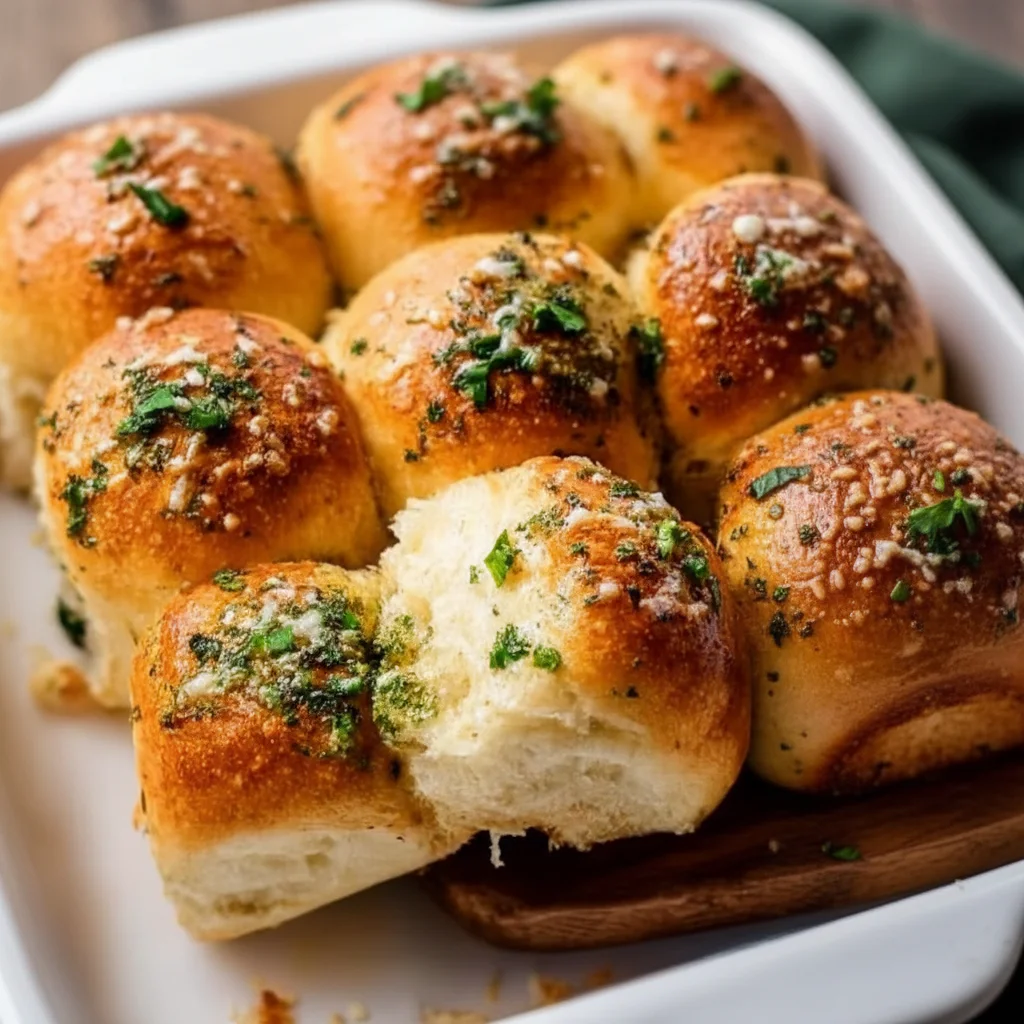
There’s a certain magic that happens when the aroma of baking bread and sizzling garlic fills the kitchen. It’s a scent that promises warmth, comfort, and something truly special. For me, that scent is embodied in this Garlic Bread Rolls Recipe. These aren’t just any rolls; they are pillowy-soft, drenched in a rich garlic butter, and flecked with fresh parsley. They have a wonderfully fluffy interior and a lightly golden crust that gives way with the slightest pressure.
This recipe has become a staple in our house for Sunday dinners and special occasions. After testing this recipe five times, I finally got the balance of softness in the dough and punchiness in the garlic butter just right. The secret, I found, is a double-brushing of the butter – once before baking to infuse the dough, and once after, to give them that irresistible glossy finish and a final hit of flavour. It’s a small step that makes a world of difference.
Whether you’re looking for the ideal companion to a hearty bowl of pasta, something to mop up the last of a delicious sauce, or a savoury treat to enjoy on its own, these garlic rolls deliver. They are straightforward to make, and the process of working the dough is wonderfully therapeutic. Everyone seems to love these, from the little ones who pull them apart with glee to the grown-ups who savour every buttery bite.
Recipe Overview
This Garlic Bread Rolls Recipe will guide you through creating twelve gloriously soft and flavourful rolls from scratch. Expect a tender, enriched dough that puffs up beautifully in the oven, and a potent garlic and herb butter that seeps into every crevice. The result is a batch of garlic rolls that are leagues ahead of anything you can buy. I discovered that letting the dough have its full second rise is non-negotiable for achieving that signature light texture.
- Prep Time: 25 minutes
- Proofing Time: 1 hour 30 minutes
- Cook Time: 20 minutes
- Total Time: 2 hours 15 minutes
- Servings: 12 rolls
- Difficulty: Medium
Why You’ll Love This Garlic Bread Rolls Recipe
- Genuine Flavour: We use fresh garlic cloves, real unsalted butter, and finely chopped parsley. This combination creates a vibrant, aromatic flavour that you simply don’t get from powders or artificial flavourings. The butter melts into the soft bread for a truly satisfying taste.
- Mostly Hands-Off Time: While the total time seems long, the active work is minimal. The majority of the time is for the dough to rise, a magical process that requires no effort from you. It’s an ideal weekend baking project.
- Flexible Recipe: This dough is a brilliant base for customisation. You can knead in some grated Parmesan for a cheesy twist, add a pinch of chilli flakes to the butter for a little heat, or swap the parsley for finely chopped rosemary.
- Works Wonderfully for Gatherings: These rolls are fantastic for serving alongside a big family meal. They complement so many dishes, from a Sunday roast to a big bowl of my Creamy Garlic Penne Pasta.
- Family Tested: My family can vouch for these! The moment they come out of the oven, little hands are always reaching for the first warm roll. They always get compliments when we take them to friends’ houses.
Ingredients You’ll Need
For the best results, we’re using simple, high-quality ingredients. I find that using a good quality block of unsalted butter, like Lurpak, makes a noticeable difference in the richness of the garlic topping. Don’t be tempted to skimp on the fresh garlic – it’s the star of the show.
- For the Dough:
- 500g strong white bread flour, plus extra for dusting
- 7g fast-action dried yeast (one sachet)
- 1 tbsp caster sugar
- 1 tsp fine sea salt
- 300ml lukewarm whole milk
- 50g unsalted butter, melted
- 1 large free-range egg, beaten
- For the Garlic Butter:
- 125g unsalted butter, softened
- 4-5 large garlic cloves, minced or very finely grated
- 25g fresh flat-leaf parsley, finely chopped
- ½ tsp fine sea salt
- ¼ tsp black pepper
Adam’s Tip: Make sure your milk is just lukewarm, not hot. If it’s too hot, it can kill the yeast, and your dough won’t rise. A good test is to dab a little on your wrist; it should feel comfortably warm.
How to Make Garlic Bread Rolls
The process involves making a soft, enriched dough, letting it rise, and then drenching it in a flavour-packed garlic butter before baking to golden perfection. Let’s get started.
- Prepare the Dough: In the bowl of a stand mixer fitted with a dough hook, or in a large mixing bowl, combine the strong bread flour, yeast, caster sugar, and salt. Give it a quick whisk to distribute everything evenly.
- Mix Wet Ingredients: In a separate jug, whisk together the lukewarm milk, melted butter, and the beaten egg. Pour the wet mixture into the dry ingredients.
- Knead the Dough: Mix on a low speed until a shaggy dough forms. Increase the speed to medium and knead for 8-10 minutes until the dough is smooth, elastic, and pulls away from the sides of the bowl. If kneading by hand, tip the dough onto a lightly floured surface and knead for about 10-12 minutes. For a helpful visual guide, BBC Good Food has an excellent article on how to knead dough.
- First Rise: Shape the dough into a ball and place it in a lightly oiled bowl. Cover with a clean, damp tea towel or cling film and leave it in a warm, draught-free place for about 1 hour, or until it has doubled in size.
- Shape the Rolls: Gently punch the air out of the risen dough and tip it onto a lightly floured surface. Divide the dough into 12 equal pieces (around 75g each). Roll each piece into a smooth ball and arrange them in a lightly greased 23x33cm (9×13 inch) baking tin, leaving a little space between each one.
- Second Rise: Cover the tin again and leave the rolls to rise for another 30-45 minutes, or until they have puffed up and are touching each other. While they rise, preheat your oven to 190°C (170°C fan).
- Make the Garlic Butter: In a small bowl, mix together the softened butter, minced garlic, chopped parsley, salt, and pepper until well combined. I find using a fork works best for this.
- First Buttering and Baking: Melt half of the garlic butter in the microwave or a small saucepan. Gently brush the melted butter over the tops of the risen rolls. Bake for 15-20 minutes, until the rolls are a beautiful golden brown and sound hollow when tapped on the bottom.
- Final Buttering: While the rolls are baking, gently melt the remaining garlic butter. As soon as the rolls come out of the oven, brush them generously with the rest of the melted garlic butter. Let them cool in the tin for a few minutes before serving warm.
Tips From My Kitchen
- Temperature Control is Key: Yeast is a living organism and is sensitive to temperature. Using lukewarm milk (around 38-43°C) is essential for activating it properly. This ensures you get a good, airy rise on your rolls.
- The Secret Double-Brush: I learned that brushing the rolls with garlic butter both before and after baking is the key to incredible flavour. The first brush bakes into the crust, while the second adds a fresh, glossy, and intensely garlicky finish.
- Make-Ahead Method: You can prepare the dough through to the end of step 3, then cover the bowl and place it in the fridge overnight for a slow, cold fermentation. The next day, let it come to room temperature for 30 minutes before shaping and proceeding with the recipe. This can develop an even deeper flavour.
- Storage: These rolls are best enjoyed on the day they are made. However, you can store any leftovers in an airtight container at room temperature for up to 2 days. Reheat them in a warm oven for 5 minutes to soften them up again.
Equipment You’ll Need
- Stand mixer with dough hook (optional, but helpful)
- Large mixing bowl
- 23x33cm (9×13 inch) baking tin or similar
- Small bowl for the butter
- Pastry brush
- Wire cooling rack
Delicious Variations to Try
Once you’ve mastered the basic garlic bread rolls recipe, it’s fun to start experimenting. Here are a few variations that work wonderfully:
- Cheesy Garlic Rolls: After the first rise, when you divide the dough into 12 pieces, flatten each piece and place a small cube of mozzarella or a teaspoon of grated mature cheddar in the centre. Pinch the dough to seal it tightly before rolling into a ball. Proceed with the recipe as normal for a gloriously melty cheese centre.
- Herb-Infused Rolls: Change up the herbs in the garlic butter. Finely chopped rosemary and thyme add a lovely woody, aromatic flavour that is great with roasted meats. A little fresh oregano works well if you’re serving them with Italian-inspired dishes like my Garlic Parmesan Chicken Pasta.
- Spicy Garlic Rolls: For those who like a bit of a kick, add ½ teaspoon of dried red chilli flakes to the garlic butter mixture. It provides a gentle warmth that contrasts beautifully with the rich butter and soft bread.
What to Serve With Garlic Bread Rolls
These versatile rolls are a welcome addition to so many meals. They are a form of Garlic Bread after all, so pasta is a natural fit!
- Hearty Pastas and Stews: They are brilliant for mopping up the sauce from a rich bolognese, a creamy carbonara, or a slow-cooked beef stew. They work particularly well with anything garlicky, like this Crockpot Garlic Parmesan Chicken Pasta.
- Soups and Salads: Serve them alongside a warming bowl of tomato soup or with a crisp, fresh salad for a lighter meal. Try them with a vibrant Classic House Salad with Red Wine Vinaigrette.
- Drink Pairings: A crisp, dry white wine like a Sauvignon Blanc cuts through the richness of the butter beautifully. For beer lovers, a light lager or a pilsner is an excellent choice.
Frequently Asked Questions
Garlic Bread Rolls
Ingredients
Method
- Prepare the Dough: In the bowl of a stand mixer fitted with a dough hook, or in a large mixing bowl, combine the strong bread flour, yeast, caster sugar, and salt. Give it a quick whisk to distribute everything evenly.
- Mix Wet Ingredients: In a separate jug, whisk together the lukewarm milk, melted butter, and the beaten egg. Pour the wet mixture into the dry ingredients.
- Knead the Dough: Mix on a low speed until a shaggy dough forms. Increase the speed to medium and knead for 8-10 minutes until the dough is smooth, elastic, and pulls away from the sides of the bowl. If kneading by hand, tip the dough onto a lightly floured surface and knead for about 10-12 minutes. For a helpful visual guide, BBC Good Food has an excellent article on how to knead dough.
- First Rise: Shape the dough into a ball and place it in a lightly oiled bowl. Cover with a clean, damp tea towel or cling film and leave it in a warm, draught-free place for about 1 hour, or until it has doubled in size.
- Shape the Rolls: Gently punch the air out of the risen dough and tip it onto a lightly floured surface. Divide the dough into 12 equal pieces (around 75g each). Roll each piece into a smooth ball and arrange them in a lightly greased 23x33cm (9x13 inch) baking tin, leaving a little space between each one.
- Second Rise: Cover the tin again and leave the rolls to rise for another 30-45 minutes, or until they have puffed up and are touching each other. While they rise, preheat your oven to 190°C (170°C fan).
- Make the Garlic Butter: In a small bowl, mix together the softened butter, minced garlic, chopped parsley, salt, and pepper until well combined. I find using a fork works best for this.
- First Buttering and Baking: Melt half of the garlic butter in the microwave or a small saucepan. Gently brush the melted butter over the tops of the risen rolls. Bake for 15-20 minutes, until the rolls are a beautiful golden brown and sound hollow when tapped on the bottom.
- Final Buttering: While the rolls are baking, gently melt the remaining garlic butter. As soon as the rolls come out of the oven, brush them generously with the rest of the melted garlic butter. Let them cool in the tin for a few minutes before serving warm.
Notes
There you have it – a recipe for garlic bread rolls that I truly hope becomes a favourite in your kitchen, just as it is in mine. The satisfaction of pulling apart a warm, buttery, homemade roll is one of life’s simple pleasures. I’d love to hear how you get on, so please feel free to leave a comment below and let me know if you tried any delicious variations! Happy baking.
– Adam Henderson