
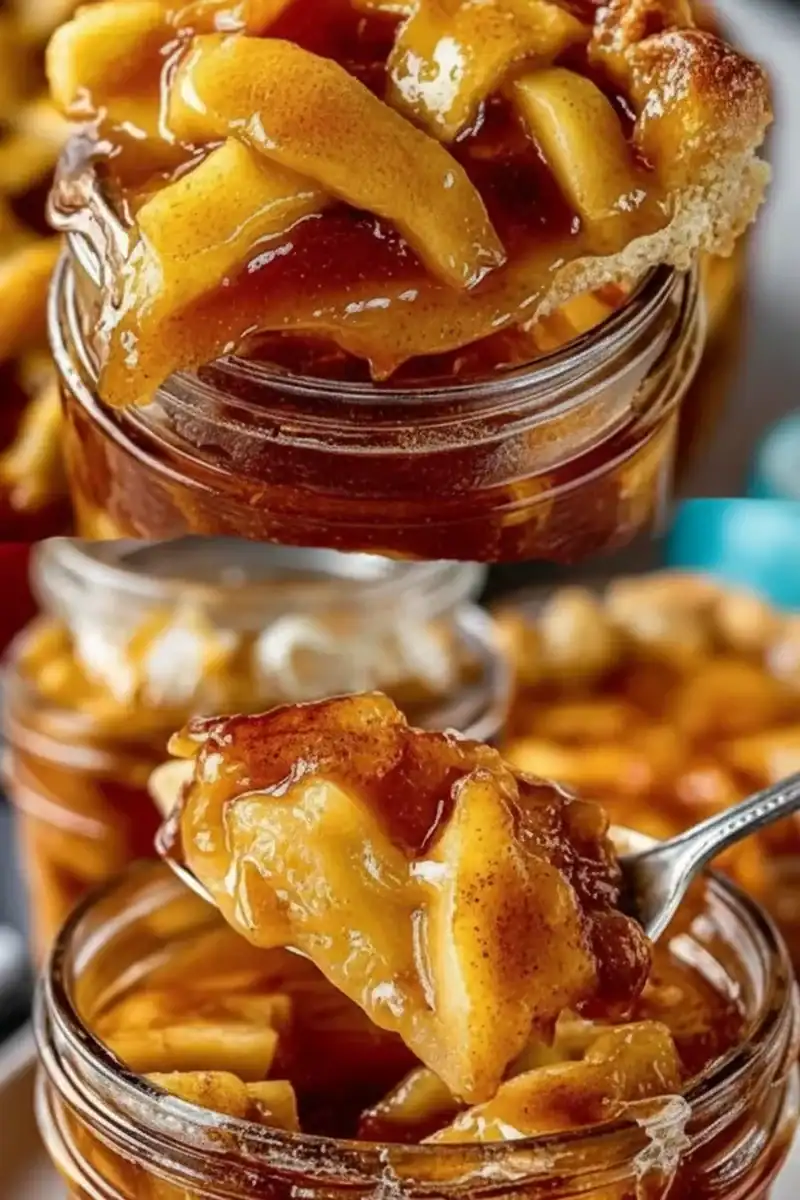
Canning Apple Pie Filling In Jars
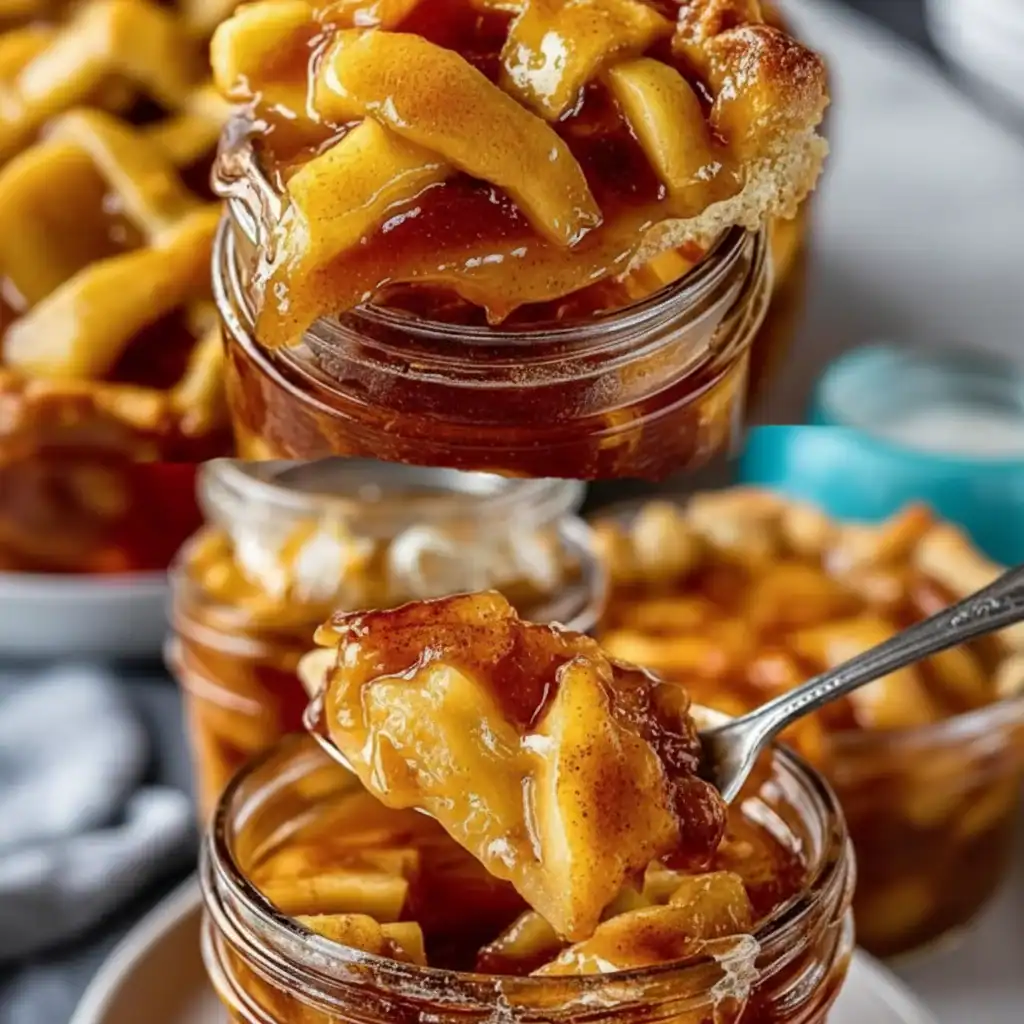
There’s something deeply satisfying about seeing a row of gleaming jars on the pantry shelf, filled with the promise of future desserts. Capturing the essence of autumn in a jar means that the glorious flavour of seasonal apples can be enjoyed months later, long after the last leaf has fallen. This jarred apple pie filling is my go-to recipe for preserving that taste. It transforms a glut of apples into a versatile, ready-to-use ingredient that makes baking a breeze. The apples stay tender yet hold their shape, suspended in a perfectly spiced, glossy syrup that tastes of pure comfort. My kids absolutely devour this every time I make it, whether it’s hidden inside a flaky pie crust or simply spooned over a bowl of warm porridge on a chilly morning.
This isn’t just about making pie filling; it’s about creating a foundation for so many wonderful bakes. We’re talking crumbles, turnovers, tarts, or even a decadent topping for pancakes. The process of canning apples is a timeless kitchen skill, and this recipe makes it approachable and rewarding. The scent that fills the house as the apples and cinnamon simmer on the hob is reason enough to make it. It’s a wonderful project for a lazy Sunday afternoon, resulting in beautiful jars of apple preserves that are as lovely to give as they are to keep.
Recipe Overview
This recipe will guide you through creating a beautifully balanced and perfectly textured jarred apple pie filling. The goal is to cook the apples until they are just tender, ensuring they don’t turn to mush, all while creating a thick, flavourful syrup infused with warm spices. I’ve found that a mix of sugars gives the best result – caster for sweetness and light brown for a hint of caramel. The final product is a pantry staple that will elevate your baking all year round.
- Prep Time: 25 minutes
- Cook Time: 20 minutes
- Total Time: 45 minutes (plus sterilising and processing time)
- Servings: Makes approx. 4 x 500ml jars
- Difficulty: Medium
Why You’ll Love This Jarred Apple Pie Filling
- Genuine Flavour: We use real apples, fresh lemon juice, and a careful blend of spices. The result is a filling that tastes authentically of apple and cinnamon, not just sugar, unlike many shop-bought alternatives. The tartness of the Bramley apples really shines through.
- Ready in Under an Hour: The hands-on cooking part comes together in about 45 minutes. It’s a very efficient way to process a large quantity of apples.
- Flexible Recipe: Feel free to adjust the spices to your liking. A pinch of allspice or a grating of fresh ginger can add a lovely new dimension. You can also mix different apple varieties for a more complex texture and taste.
- Great for Homemade Gifts: A jar of this apple pie filling, tied with a ribbon and a handwritten tag, makes a thoughtful and delicious gift for friends, family, or neighbours during the festive season.
- Family Tested: This recipe always gets compliments in my house. We use it for everything from a classic pie to a quick topping for vanilla ice cream after a Sunday roast. It’s a guaranteed winner.
Ingredients You’ll Need
The quality of your apples is key here. I always opt for Bramley apples when I can find them, as their sharp flavour and firm texture are ideal for cooking and canning. They break down just enough to become tender without dissolving completely. If you can’t find Bramleys, Granny Smith apples are a great substitute.
- 2 kg firm, tart apples (like Bramley or Granny Smith), peeled, cored, and sliced about 1cm thick
- 60 ml fresh lemon juice
- 200g caster sugar
- 150g light brown soft sugar
- 50g cornflour
- 2 tsp ground cinnamon
- ½ tsp ground nutmeg
- ¼ tsp salt
- 750 ml cold water
Sara’s Tip: For a more complex flavour profile, try using a mix of apples. I like to combine the tartness of Bramley apples with a firmer, sweeter variety like Braeburn or Gala. This gives you a wonderful contrast of textures in the final filling.
How to Make Jarred Apple Pie Filling
The process is straightforward. We’ll first prepare our jars and apples, then create a flavourful syrup, cook the apples gently within it, and finally, process the jars in a water bath to make them shelf-stable. Paying close attention during the apple cooking stage is crucial for the best texture.
- Prepare Your Jars: First, sterilise four 500ml canning jars and their lids. You can do this by running them through a hot cycle in the dishwasher or by washing them in hot, soapy water and then placing them on a baking tray in an oven preheated to 140°C (120°C fan) for at least 15 minutes. Keep them hot until you’re ready to fill.
- Prep the Apples: As you peel, core, and slice your apples, place them into a large bowl filled with cold water and the 60ml of lemon juice. This will stop them from browning while you prepare the rest of the ingredients.
- Create the Syrup Base: In a large, heavy-bottomed saucepan or Dutch oven, whisk together the caster sugar, light brown sugar, cornflour, cinnamon, nutmeg, and salt. Breaking up any lumps now is important for a smooth syrup.
- Cook the Syrup: Gradually whisk in the 750ml of cold water until the mixture is smooth. Place the pan over a medium heat and bring it to a boil, stirring constantly. Continue to cook for 2-3 minutes, until the syrup has thickened and turned glossy.
- Add the Apples: Drain the apple slices well and gently add them to the hot syrup in the pan. Stir carefully to coat all the slices without breaking them.
- Simmer Gently: Bring the mixture back to a gentle simmer. Cook for 5 to 8 minutes, stirring occasionally. The apples should be just tender when pierced with a knife, but still hold their shape well. What works best for me is to test a slice after 5 minutes; you want a little bit of bite left, as they will soften slightly more in the jar.
- Fill the Jars: Carefully ladle the hot apple pie filling into your hot, sterilised jars, using a canning funnel to avoid spills. Be sure to leave about 2cm of headspace at the top of each jar. Run a clean spatula or chopstick around the inside of the jar to remove any air bubbles.
- Seal and Process: Wipe the rims of the jars clean with a damp cloth, place the lids on top, and screw the bands on until they are “fingertip tight” – secure, but not forced. Process the jars in a boiling water bath for 20 minutes. For detailed, up-to-date safety instructions on water bath canning, please consult a trusted resource like the Food Standards Agency.
- Cool and Store: After processing, use a jar lifter to carefully remove the jars from the water bath and place them on a tea towel on your worktop. Leave them undisturbed for 12-24 hours. You should hear the lids “pop” as they seal. Check the seals before storing in a cool, dark place for up to one year.
Tips From My Kitchen
- Temperature Control: The rule of “hot pack” is vital in canning. This means putting hot food into hot jars. This prevents the glass from shattering due to thermal shock and helps ensure a safe and secure seal.
- The Secret Step: I learned that adding the apples to a fully thickened, hot syrup helps them retain their shape much better than cooking them from the start. The hot syrup quickly coats the outside of the apple slices, helping them to cook evenly without falling apart.
- Make-Ahead: This recipe is the ultimate make-ahead project. Prepare a large batch when apples are in season, and you’ll have instant dessert bases ready for the entire year.
- Storage: Properly sealed jars will last for up to 12 months in a cool, dark cupboard. Once a jar is opened, it must be kept in the refrigerator and used within 2 weeks.
Equipment You’ll Need
- Large stockpot or water bath canner
- 4-5 clean 500ml canning jars with new lids and bands
- Jar lifter
- Canning funnel
- Large saucepan or Dutch oven
- Whisk and wooden spoon
- Peeler and apple corer
What to Serve With Jarred Apple Pie Filling
While a classic apple pie is the most obvious use, this filling is incredibly versatile. It works beautifully in so many dishes, both sweet and savoury.
- Classic Apple Crumble: Spoon the filling into a baking dish and top with a simple oat crumble topping. Bake until golden and bubbling for a comforting dessert. It’s a fantastic partner to a warming main like our Crockpot Garlic Parmesan Chicken Pasta.
- Vanilla Bean Ice Cream: Simply warm the filling slightly and spoon it over a generous scoop of good-quality vanilla ice cream. The contrast between the warm, spiced apples and the cold, creamy ice cream is divine.
- Alongside Roast Pork: For a delicious twist on apple sauce, serve a spoonful of this filling alongside roasted pork loin or thick-cut pork chops. The sweet and tart notes cut through the richness of the meat perfectly.
Frequently Asked Questions
Jarred Apple Pie Filling
Ingredients
Method
- Prepare Your Jars: First, sterilise four 500ml canning jars and their lids. You can do this by running them through a hot cycle in the dishwasher or by washing them in hot, soapy water and then placing them on a baking tray in an oven preheated to 140°C (120°C fan) for at least 15 minutes. Keep them hot until you're ready to fill.
- Prep the Apples: As you peel, core, and slice your apples, place them into a large bowl filled with cold water and the 60ml of lemon juice. This will stop them from browning while you prepare the rest of the ingredients.
- Create the Syrup Base: In a large, heavy-bottomed saucepan or Dutch oven, whisk together the caster sugar, light brown sugar, cornflour, cinnamon, nutmeg, and salt. Breaking up any lumps now is important for a smooth syrup.
- Cook the Syrup: Gradually whisk in the 750ml of cold water until the mixture is smooth. Place the pan over a medium heat and bring it to a boil, stirring constantly. Continue to cook for 2-3 minutes, until the syrup has thickened and turned glossy.
- Add the Apples: Drain the apple slices well and gently add them to the hot syrup in the pan. Stir carefully to coat all the slices without breaking them.
- Simmer Gently: Bring the mixture back to a gentle simmer. Cook for 5 to 8 minutes, stirring occasionally. The apples should be just tender when pierced with a knife, but still hold their shape well. What works best for me is to test a slice after 5 minutes; you want a little bit of bite left, as they will soften slightly more in the jar.
- Fill the Jars: Carefully ladle the hot apple pie filling into your hot, sterilised jars, using a canning funnel to avoid spills. Be sure to leave about 2cm of headspace at the top of each jar. Run a clean spatula or chopstick around the inside of the jar to remove any air bubbles.
- Seal and Process: Wipe the rims of the jars clean with a damp cloth, place the lids on top, and screw the bands on until they are "fingertip tight" – secure, but not forced. Process the jars in a boiling water bath for 20 minutes. For detailed, up-to-date safety instructions on water bath canning, please consult a trusted resource like the Food Standards Agency.
- Cool and Store: After processing, use a jar lifter to carefully remove the jars from the water bath and place them on a tea towel on your worktop. Leave them undisturbed for 12-24 hours. You should hear the lids "pop" as they seal. Check the seals before storing in a cool, dark place for up to one year.
Notes
I hope you enjoy the process of making this jarred apple pie filling as much as you enjoy eating it. There’s a real sense of accomplishment in stocking your pantry with homemade goods that you can enjoy for months to come. Let me know how you get on in the comments below – I’d love to hear what delicious creations you use it for! Happy canning.
– Adam Henderson


