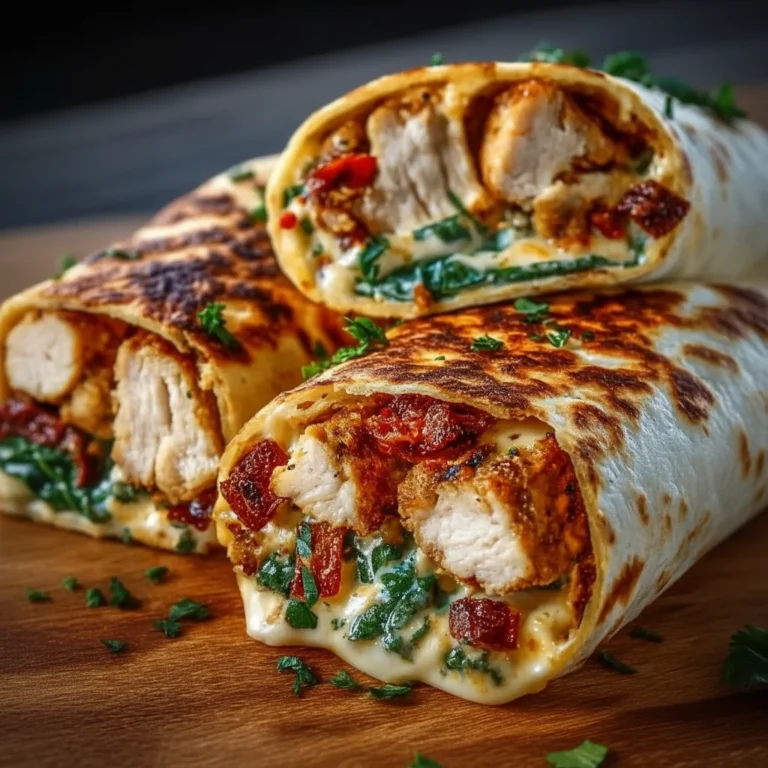
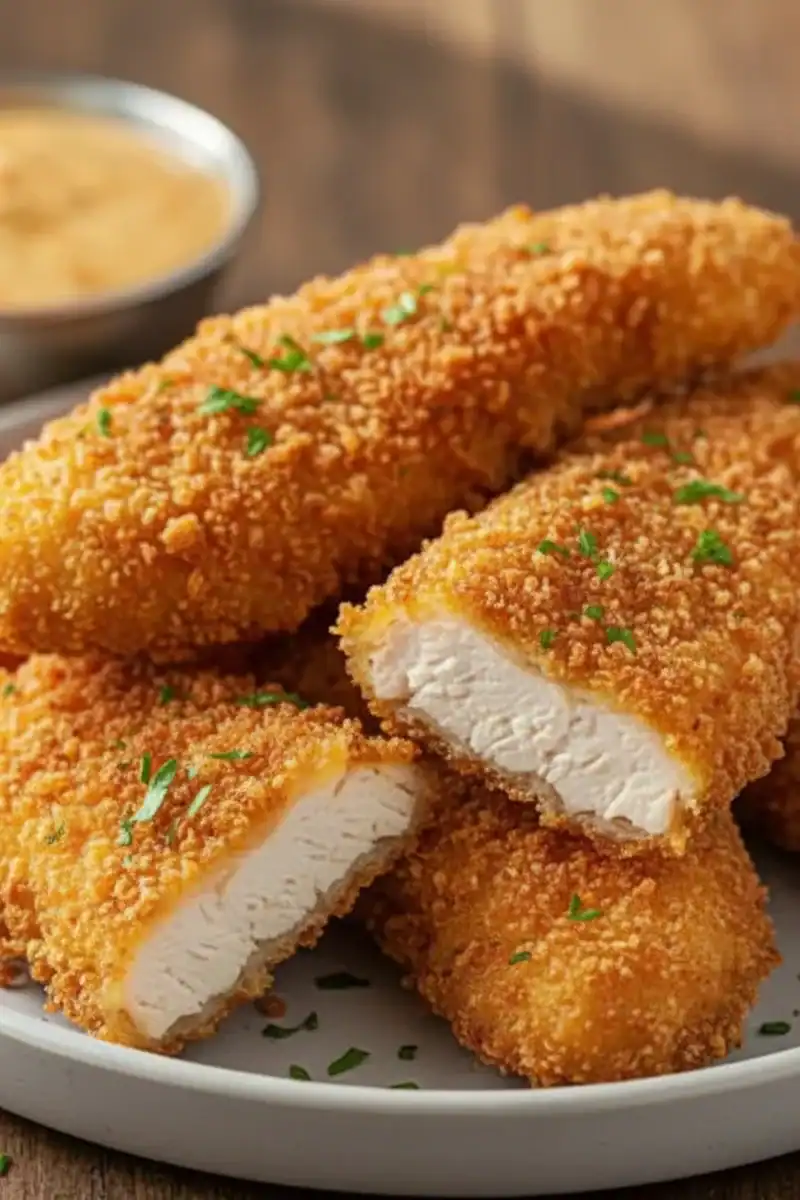
Crispy Chicken Tenders Side Dish
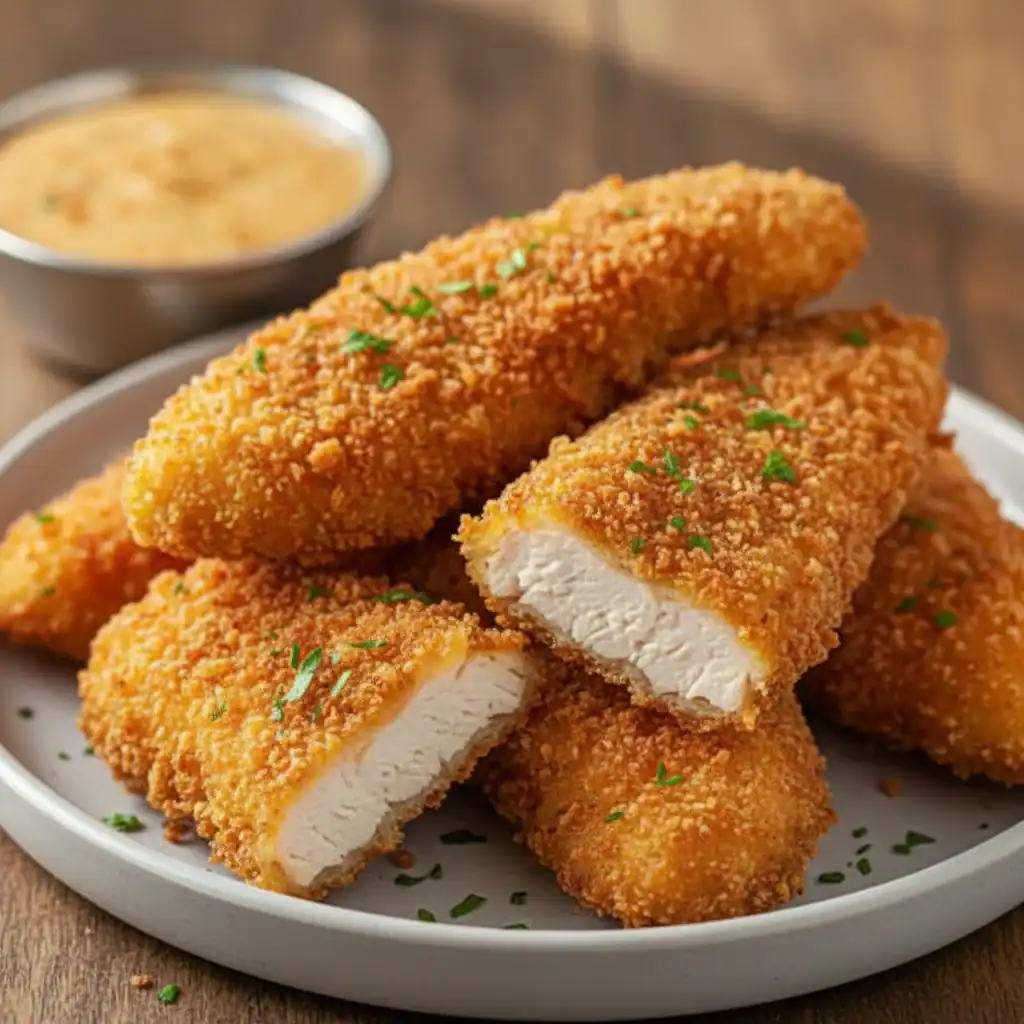
There’s something universally satisfying about a plate of perfectly cooked, crispy chicken tenders. Not the dry, uniform shapes from a frozen bag, but proper, homemade tenders with a craggy, flavourful crust that shatters when you bite into it, revealing tender, juicy chicken inside. This is that recipe. It’s the result of much testing in my own kitchen, tweaking the spice blend and perfecting the frying technique until I landed on something truly special. My kids absolutely devour this every time I make it, and their clean plates are the best review a cook can get.
What sets these chicken tenders apart is the coating. We use a double-dredging method with a seasoned flour and cornflour mix, which creates an incredibly textured, light, and crispy shell that stays that way. The secret weapon, though, is buttermilk. It not only tenderises the chicken but also helps the coating cling on for dear life during frying. This isn’t just fried chicken; it’s a brilliant bit of kitchen craft that comes together in about an hour.
This recipe is ideal when you want a satisfying, hands-on meal that always gets compliments. It works beautifully for a family dinner on a Friday night, as delicious finger food for a gathering, or simply when you need to answer the call for some seriously good crispy chicken. Serve them up with your favourite dips and a side of chips for a meal that never disappoints.
Recipe Overview
These chicken tenders are all about texture and flavour. The buttermilk marinade ensures the chicken is exceptionally moist and tender, while the double-dredge in a seasoned flour and cornflour mix creates a substantial, craggy crust that’s incredibly crispy. The flavour is savoury and slightly smoky from the paprika, with a gentle hum of garlic and onion. I stumbled upon the buttermilk-to-flour-to-buttermilk-to-flour technique by accident, and it’s been a hit ever since, creating a far better crust than a single dredge.
- Prep Time: 15 minutes (+ 30 minutes marinating)
- Cook Time: 15 minutes
- Total Time: 1 hour
- Servings: 4 people
- Difficulty: Medium
Why You’ll Love These Chicken Tenders
- Genuine Flavour and Texture: The coating isn’t just crunchy; it’s seasoned through and through with smoked paprika, garlic, and onion powder, complementing the juicy, tender chicken inside. The texture is light and craggy, not heavy or greasy.
- Ready in Under an Hour: Including marinating time, this entire dish is on the table in about 60 minutes, with an active cooking time of just 15-20 minutes.
- Flexible Recipe: You can easily adjust the seasoning. Add a teaspoon of cayenne for a spicy kick, or introduce dried herbs like thyme or oregano into the flour mixture for a different flavour profile.
- Great for Casual Meals: This is a fantastic recipe for a relaxed weekend lunch, a fun dinner for the family, or as a star component of a finger food buffet for a party.
- Family Tested: This is one of those reliable recipes that everyone in my house agrees on. It’s requested often and always vanishes from the serving plate in minutes.
Ingredients You’ll Need
For the best results, start with good quality ingredients. Using chicken breasts allows you to cut tenders to your preferred size. I always reach for a proper sweet smoked paprika, not just generic paprika powder, as it lends an authentic, deep, smoky flavour that makes all the difference.
- 700g skinless, boneless chicken breasts
- 300ml buttermilk
- 200g plain flour
- 50g cornflour
- 2 tsp salt
- 1 tsp freshly ground black pepper
- 2 tsp sweet smoked paprika
- 2 tsp garlic powder
- 1 tsp onion powder
- Approx. 750ml vegetable or sunflower oil, for frying
Adam’s Tip: Don’t be tempted to skip the cornflour. It’s a key player in achieving that light, shatteringly crisp texture. It works by inhibiting gluten development in the flour, which results in a more tender, crispier coating.
How to Make Chicken Tenders
The process is straightforward. We’ll prepare the chicken, set up a simple dredging station, and then pan-fry the tenders in batches until they are perfectly golden and cooked through. The key is organisation and not rushing the steps.
- Prepare the Chicken: Using a sharp knife, slice the chicken breasts lengthways into strips about 2-3 cm thick. Aim for uniform sizes so they cook evenly.
- Marinate in Buttermilk: Place the chicken strips in a medium bowl. Pour over the buttermilk, add 1 tsp of the salt and ½ tsp of the black pepper. Stir to coat every piece. Cover and place in the fridge to marinate for at least 30 minutes, or up to 4 hours for even more tender results.
- Mix the Dry Ingredients: In a wide, shallow bowl or dish, combine the plain flour, cornflour, the remaining 1 tsp salt, ½ tsp black pepper, smoked paprika, garlic powder, and onion powder. Whisk everything together until it’s evenly distributed.
- Set Up Your Dredging Station: Place the bowl of marinated chicken next to your dish of seasoned flour. Have a clean plate or wire rack ready for the coated chicken.
- Double-Dredge the Chicken: Take a piece of chicken from the buttermilk, letting any excess drip off. Coat it thoroughly in the flour mixture. Dip it *back* into the buttermilk for a second, then return it to the flour for a final, generous coating. Press the flour firmly onto the chicken to create a thick, shaggy coat. Place the coated tender on the wire rack. Repeat with all the chicken pieces.
- Rest the Coating: Let the coated chicken tenders rest on the wire rack for 10-15 minutes. What works best for me is not skipping this step; it allows the coating to hydrate and adhere properly, ensuring it doesn’t fall off during frying.
- Heat the Oil: Pour the oil into a large, heavy-bottomed frying pan or skillet to a depth of about 2 cm. Heat over a medium-high heat until it reaches 175°C (350°F). If you don’t have a thermometer, a small cube of bread should turn golden brown in about 30 seconds.
- Fry in Batches: Carefully place a few chicken tenders into the hot oil, ensuring not to overcrowd the pan. Fry for 3-4 minutes on each side, until the coating is a deep golden brown and the chicken is cooked through.
- Drain and Serve: Use tongs to remove the cooked tenders from the oil and place them on a clean wire rack to drain. Sprinkling with a tiny pinch of extra salt at this stage is a nice touch. Serve hot with your favourite dips.
Tips From My Kitchen
- Temperature Control is Crucial: The oil temperature makes or breaks fried chicken. Too hot, and the crust will burn before the inside is cooked. Too cool, and you’ll get greasy, soggy chicken. An instant-read thermometer is your best friend here. Aim for a steady 175°C.
- The Secret Step is the Rest: I learned that letting the coated chicken rest before frying is a game-changer. This short 10-minute pause allows the flour to bond with the buttermilk, creating a sort of ‘glue’ that ensures the crispy coating stays firmly attached to the chicken.
- Make-Ahead Method: You can get a head start by marinating the chicken in the buttermilk for up to 4 hours in the fridge. The seasoned flour mixture can also be combined and stored in an airtight container for weeks.
- Storage and Reheating: Leftover chicken tenders can be stored in an airtight container in the refrigerator for up to 3 days. To reheat and bring back the crispiness, place them on a baking tray in a preheated oven at 200°C (180°C fan) for 10-12 minutes. Avoid the microwave at all costs!
Equipment You’ll Need
- Large heavy-bottomed frying pan or cast-iron skillet
- Sharp knife and cutting board
- Two medium mixing bowls (one for marinating, one for flour)
- Tongs
- Wire rack for resting and draining
- Kitchen thermometer (highly recommended)
Common Mistakes to Avoid
- Overcrowding the Pan: It’s tempting to cook everything at once, but this will dramatically lower the oil temperature. The chicken will steam instead of fry, resulting in a pale, soft coating. Always cook in batches, leaving plenty of space around each tender.
- Frying at the Wrong Temperature: Frying is a specific cooking method that relies on precise temperatures. As explained in this excellent guide to frying from Serious Eats, maintaining the right heat is key to a crispy, non-greasy result. Use a thermometer to monitor and adjust your hob’s heat as needed.
- Skipping the Rest Time: Don’t rush from dredging straight to frying. That 10-15 minute rest allows the coating to set. If you skip it, you risk a lot of that beautiful, craggy crust falling off into the oil.
Delicious Variations to Try
Once you’ve mastered the basic recipe, it’s fun to play around with the flavours. This coating is a fantastic canvas for customisation.
- Spicy Chicken Tenders: For those who like a bit of a kick, add 1-2 teaspoons of cayenne pepper or hot smoked paprika to your flour mixture.
- Herby Tenders: Mix 1 tablespoon of finely chopped fresh parsley or 1 teaspoon of dried herbs like thyme or oregano into the seasoned flour for a more aromatic finish.
- Different Protein: This dredging and frying method works wonderfully for other proteins too. Try it with thin pork loin steaks cut into strips, or firm white fish fillets like cod or haddock (you’ll need to reduce the cooking time slightly for fish).
What to Serve With Chicken Tenders
These crispy chicken tenders are versatile and pair well with a wide range of sides. Here are a few of my go-to combinations:
- Classic Chips and Dips: You can’t go wrong with homemade chips and a selection of dips. A tangy BBQ sauce, a honey-mustard dip, or a creamy garlic aioli all work beautifully.
- A Fresh, Crisp Salad: To balance the richness of the fried chicken, a simple green salad is an excellent choice. Our Classic House Salad with Red Wine Vinaigrette provides a lovely, sharp contrast.
- Creamy Pasta: For a truly indulgent meal, you can slice the cooked tenders and serve them over a simple pasta dish like this Creamy Garlic Penne Pasta.
- Refreshing Drink: A cold, crisp lager or a sharp, fizzy lemonade cuts through the richness of the chicken perfectly.
Frequently Asked Questions
Chicken Tenders
Ingredients
Method
- Prepare the Chicken: Using a sharp knife, slice the chicken breasts lengthways into strips about 2-3 cm thick. Aim for uniform sizes so they cook evenly.
- Marinate in Buttermilk: Place the chicken strips in a medium bowl. Pour over the buttermilk, add 1 tsp of the salt and ½ tsp of the black pepper. Stir to coat every piece. Cover and place in the fridge to marinate for at least 30 minutes, or up to 4 hours for even more tender results.
- Mix the Dry Ingredients: In a wide, shallow bowl or dish, combine the plain flour, cornflour, the remaining 1 tsp salt, ½ tsp black pepper, smoked paprika, garlic powder, and onion powder. Whisk everything together until it's evenly distributed.
- Set Up Your Dredging Station: Place the bowl of marinated chicken next to your dish of seasoned flour. Have a clean plate or wire rack ready for the coated chicken.
- Double-Dredge the Chicken: Take a piece of chicken from the buttermilk, letting any excess drip off. Coat it thoroughly in the flour mixture. Dip it *back* into the buttermilk for a second, then return it to the flour for a final, generous coating. Press the flour firmly onto the chicken to create a thick, shaggy coat. Place the coated tender on the wire rack. Repeat with all the chicken pieces.
- Rest the Coating: Let the coated chicken tenders rest on the wire rack for 10-15 minutes. What works best for me is not skipping this step; it allows the coating to hydrate and adhere properly, ensuring it doesn't fall off during frying.
- Heat the Oil: Pour the oil into a large, heavy-bottomed frying pan or skillet to a depth of about 2 cm. Heat over a medium-high heat until it reaches 175°C (350°F). If you don't have a thermometer, a small cube of bread should turn golden brown in about 30 seconds.
- Fry in Batches: Carefully place a few chicken tenders into the hot oil, ensuring not to overcrowd the pan. Fry for 3-4 minutes on each side, until the coating is a deep golden brown and the chicken is cooked through.
- Drain and Serve: Use tongs to remove the cooked tenders from the oil and place them on a clean wire rack to drain. Sprinkling with a tiny pinch of extra salt at this stage is a nice touch. Serve hot with your favourite dips.
Notes
I genuinely hope you give this recipe a go. It’s a real treat and shows how a few simple techniques can transform a humble ingredient into something truly satisfying. I’m confident that these crispy chicken tenders will become a regular feature in your kitchen, just as they are in mine. If you do make them, please drop a comment below and let me know how they turned out! Happy cooking, Adam.