Crispy Hasselback Potatoes Side Dish
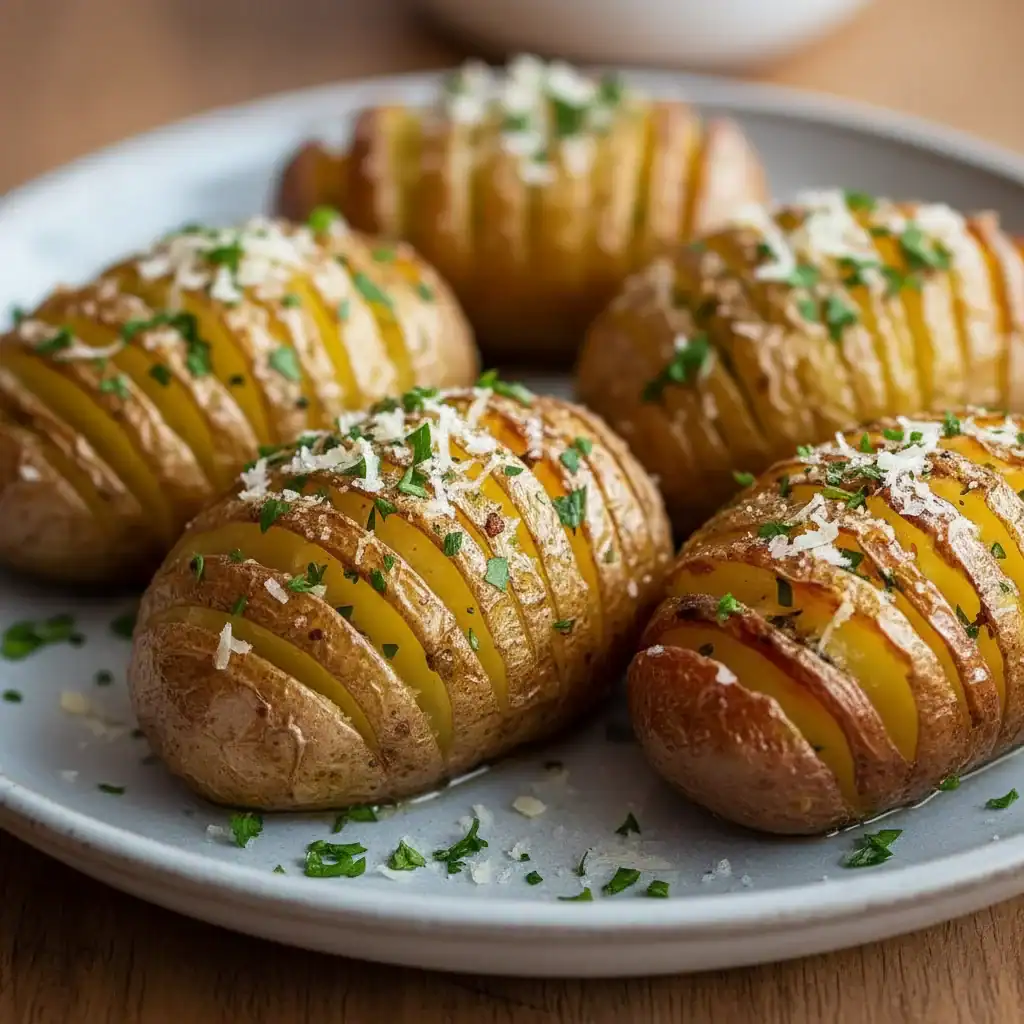
There are baked potatoes, and then there are Hasselback potatoes. One is a familiar, comforting staple; the other is a work of art that transforms a humble spud into the star of the table. With dozens of paper-thin slices that fan out during baking, you get an incredible combination of textures: deeply crispy, chip-like edges and a wonderfully soft, fluffy interior, all bathed in garlic and thyme-infused butter. It’s a potato side dish that looks impressive but is built on a straightforward technique.
This method of preparing sliced potatoes originated in Stockholm, Sweden, at the Hasselbacken restaurant, which is how they got their name. I’ve been making this for over 8 years, and it never disappoints. It bridges the gap between a classic roast potato and a jacket potato, delivering the best of both worlds. We’re not just baking a potato here; we’re creating layer upon layer of flavour and texture. It’s the kind of side dish that works beautifully for a special Sunday roast but is also simple enough to elevate a midweek meal.
What makes this particular recipe so special is the attention to detail. We double-baste the potatoes, ensuring the garlic butter seeps into every single crevice. This creates those irresistible crispy ridges that everyone will be fighting over. This crispy Hasselback potatoes side dish always gets compliments and makes any meal feel a little more memorable.
Recipe Overview
This recipe guides you through creating the ultimate crispy Hasselback potatoes. The flavour profile is rich and savoury, led by nutty melted butter, aromatic garlic, and earthy thyme. Expect potatoes with an accordion-like appearance, boasting fantastically crisp skin and edges while the inside remains tender and steamy. I’ve found that a second basting halfway through the cooking process is non-negotiable; it’s what takes the texture from good to absolutely magnificent.
- Prep Time: 15 minutes
- Cook Time: 60-70 minutes
- Total Time: 1 hour 25 minutes
- Servings: 4 people
- Difficulty: Medium
Why You’ll Love This Crispy Hasselback Potatoes Side Dish
- Incredible Texture: The contrast is everything. You get the crunch of the outer edges, the slightly chewy skin, and the pillowy-soft potato inside, all in one bite.
- Rich, Buttery Flavour: We use a generous amount of butter infused with fresh thyme and garlic. As it bakes, it browns slightly, adding a deep, nutty aroma that complements the potato perfectly.
- Visually Stunning: These sliced potatoes look far more complicated to make than they are. They bring a touch of restaurant-quality elegance to your home-cooked meals, making them ideal for impressing guests.
- Great for A Sunday Roast: This potato side dish is a fantastic alternative to traditional roasties. It works wonderfully alongside roast chicken, beef, or a nut roast.
- Family Tested: Friends always ask me for this recipe after trying it at dinner parties. It’s a guaranteed winner that feels both comforting and a bit special.

Ingredients You’ll Need
For the best results, start with the right kind of potato. I always reach for Maris Piper or King Edward potatoes. Their high starch content makes them fluffy on the inside, and they hold their shape well during baking, which is crucial for the Hasselback technique. You want evenly-sized, oval potatoes so they cook at the same rate.
- 4 large Maris Piper potatoes (about 250g each)
- 75g unsalted butter
- 2 tbsp olive oil
- 3 large cloves of garlic, finely minced
- 4-5 sprigs of fresh thyme
- 1 tsp sea salt flakes (like Maldon), plus extra for sprinkling
- ½ tsp freshly ground black pepper
Adam’s Tip: Use two wooden chopsticks or the handles of two wooden spoons placed on either side of the potato as a guide when you’re slicing. This clever trick stops the knife from cutting all the way through, ensuring your potato stays intact and you get perfect, uniform slices every time.
How to Make This Crispy Hasselback Potatoes Side Dish
The process is all about careful preparation and giving the potatoes enough time in the oven to transform. Don’t rush the baking; that slow, high-heat rendering of the butter is what creates the magic. Follow these steps for potato perfection.
- Preheat and Prepare: First things first, preheat your oven to 200°C (180°C fan). Line a sturdy baking tray with baking parchment.
- Wash and Dry the Potatoes: Give the potatoes a good scrub under cold water to remove any dirt. It’s very important to pat them completely dry with a tea towel or kitchen paper afterwards. A dry surface is key to getting crispy skin.
- Slice the Potatoes: Place a potato between your two chopsticks or wooden spoon handles. Using a sharp knife, make thin slices across the potato, about 3-4mm apart. The chopsticks will stop your knife from cutting all the way through. Repeat with all the potatoes.
- Make the Garlic-Thyme Butter: In a small saucepan, gently melt the butter with the olive oil over a low heat. Once melted, stir in the minced garlic and the leaves from the thyme sprigs. Let it infuse for a minute, but don’t let the garlic burn.
- First Baste: Place the sliced potatoes on your prepared baking tray. Brush about half of the garlic butter mixture all over the potatoes, trying to get a little between the slices. Sprinkle generously with sea salt flakes and black pepper. What works best for me is using a silicone pastry brush to gently nudge the slices apart.
- Initial Bake: Place the tray in the preheated oven and bake for 30 minutes. At this point, the slices will have started to separate and fan out.
- Second Baste: Carefully remove the tray from the oven. Now, brush the remaining garlic butter over the potatoes. This time, you can be more thorough, ensuring the butter drips down into all the gaps that have opened up. This step is crucial for flavour and crispiness.
- Final Bake: Return the potatoes to the oven and bake for another 30-40 minutes, or until they are deep golden brown, the edges are wonderfully crispy, and a skewer inserted into the centre goes through with no resistance.
- Serve Immediately: Let them rest for a minute before serving. Garnish with a few extra fresh thyme leaves and another sprinkle of sea salt flakes if you like.
Tips From My Kitchen
- Parboiling for a Head Start: If you’re short on time, you can parboil the whole potatoes for 10 minutes before slicing. This can reduce the final baking time slightly and guarantees a soft interior. Just make sure you let them cool and dry completely before you slice and baste them.
- The Secret Step: For ultimate crispiness, I learned that after slicing, you can give the potatoes a quick rinse under cold water to wash away some of the surface starch. This technique, also recommended by experts at Serious Eats for roast potatoes, works wonders here too. Just remember to dry them meticulously before adding the butter.
- Make-Ahead: You can slice the potatoes up to 4 hours in advance. To prevent them from browning, keep them fully submerged in a bowl of cold water. When you’re ready to cook, drain them and pat them extremely dry with kitchen paper.
- Storage: Leftover Hasselback potatoes can be stored in an airtight container in the refrigerator for up to 3 days. To reheat, place them on a baking tray in an oven preheated to 180°C (160°C fan) for 10-15 minutes, or until heated through and the edges have crisped up again. An air fryer also works brilliantly for this.
Delicious Variations to Try
While the garlic and thyme combination is classic, this recipe is a great canvas for other flavours. Here are a few ideas to get you started:
- Cheesy Bacon Hasselbacks: During the last 10 minutes of baking, sprinkle the potatoes with finely grated cheddar or Gruyère cheese and some crispy, crumbled bacon bits. Bake until the cheese is gloriously melty and golden.
- Spicy Paprika Potatoes: Add 1 teaspoon of smoked paprika and a generous pinch of chilli flakes to the butter mixture for a warming, smoky heat that pairs beautifully with the potatoes.
- Rosemary and Parmesan: Swap the thyme for finely chopped fresh rosemary. During the second basting, tuck some parmesan shavings between the slices for a salty, umami-rich flavour boost.
What to Serve With This Crispy Hasselback Potatoes Side Dish
These potatoes are versatile enough to accompany a wide range of main courses. Their rich flavour and satisfying texture make them a standout component of any meal.
- Roast Meats: They are the ultimate partner for a classic Sunday roast chicken, a leg of lamb, or a slow-cooked beef brisket.
- Steak Night: Serve them alongside a perfectly cooked sirloin or ribeye steak and a simple green vegetable like tenderstem broccoli.
- A Hearty Salad: For a lighter meal, pair them with a substantial salad, such as our Classic House Salad with Red Wine Vinaigrette to balance the richness.
- A Creamy Pasta Dish: The crispy texture of the potatoes is a wonderful contrast to a softer main, like this Creamy Garlic Penne Pasta.
- Drink Pairing: A full-bodied red wine like a Cabernet Sauvignon or a crisp, hoppy pale ale cuts through the butteriness wonderfully.
Frequently Asked Questions
Crispy Hasselback Potatoes Side Dish
Ingredients
Method
- Preheat and Prepare: First things first, preheat your oven to 200°C (180°C fan). Line a sturdy baking tray with baking parchment.
- Wash and Dry the Potatoes: Give the potatoes a good scrub under cold water to remove any dirt. It's very important to pat them completely dry with a tea towel or kitchen paper afterwards. A dry surface is key to getting crispy skin.
- Slice the Potatoes: Place a potato between your two chopsticks or wooden spoon handles. Using a sharp knife, make thin slices across the potato, about 3-4mm apart. The chopsticks will stop your knife from cutting all the way through. Repeat with all the potatoes.
- Make the Garlic-Thyme Butter: In a small saucepan, gently melt the butter with the olive oil over a low heat. Once melted, stir in the minced garlic and the leaves from the thyme sprigs. Let it infuse for a minute, but don't let the garlic burn.
- First Baste: Place the sliced potatoes on your prepared baking tray. Brush about half of the garlic butter mixture all over the potatoes, trying to get a little between the slices. Sprinkle generously with sea salt flakes and black pepper. What works best for me is using a silicone pastry brush to gently nudge the slices apart.
- Initial Bake: Place the tray in the preheated oven and bake for 30 minutes. At this point, the slices will have started to separate and fan out.
- Second Baste: Carefully remove the tray from the oven. Now, brush the remaining garlic butter over the potatoes. This time, you can be more thorough, ensuring the butter drips down into all the gaps that have opened up. This step is crucial for flavour and crispiness.
- Final Bake: Return the potatoes to the oven and bake for another 30-40 minutes, or until they are deep golden brown, the edges are wonderfully crispy, and a skewer inserted into the centre goes through with no resistance.
- Serve Immediately: Let them rest for a minute before serving. Garnish with a few extra fresh thyme leaves and another sprinkle of sea salt flakes if you like.
Notes
There you have it – a truly fantastic way to prepare potatoes that will bring a little bit of flair to your dinner table. The aroma of garlic butter and thyme filling your kitchen is almost as good as the first crispy bite. I really hope you give this Crispy Hasselback Potatoes Side Dish a go. If you do, please let me know how they turned out in the comments below. I love hearing about your experiences in the kitchen!
All the best,
Adam Henderson