
Decadent Gooey Brownie Pie Recipe
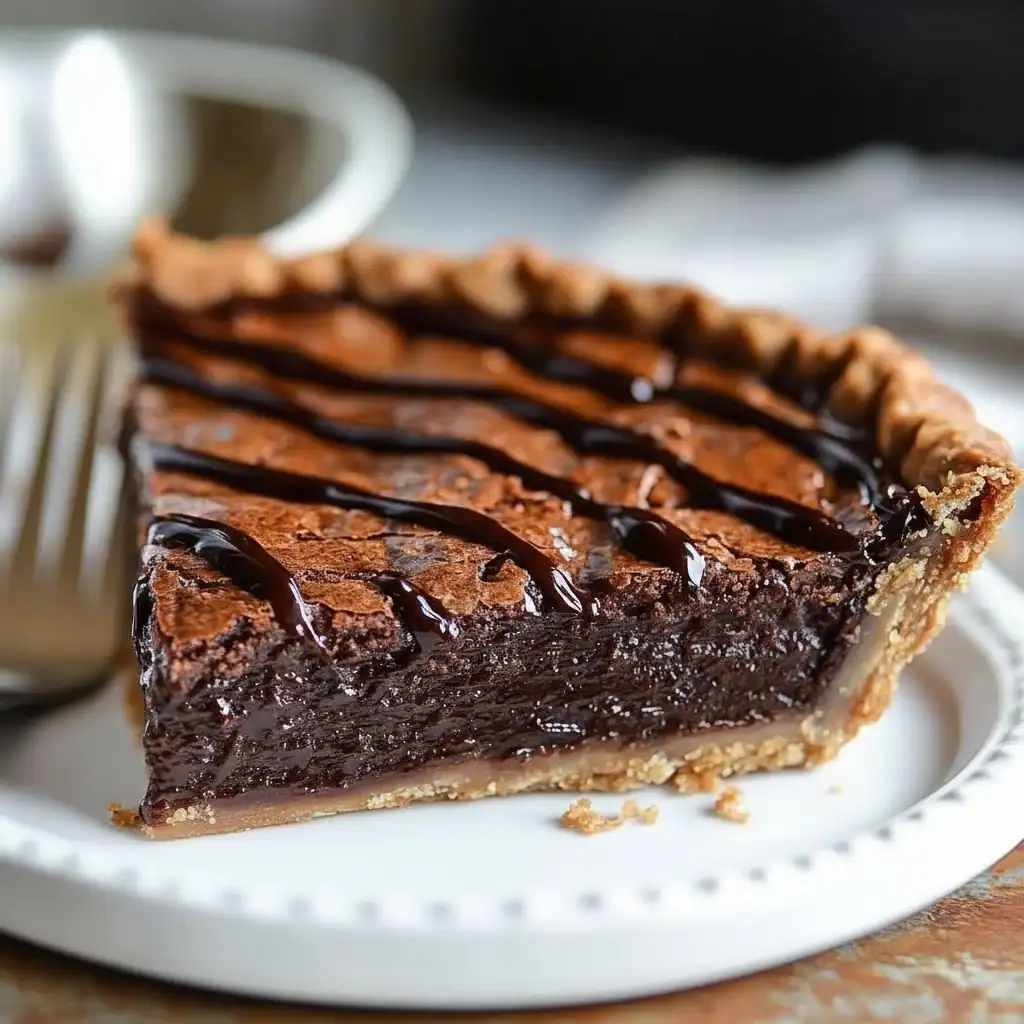
There are moments that call for a simple tray of brownies, and then there are moments that demand something more. This Gooey Brownie Pie recipe is for those latter occasions. It takes everything we adore about a rich, fudgy brownie—the crackly, paper-thin top, the molten chocolate centre, the intense cocoa flavour—and elevates it by nestling it inside a buttery, flaky, all-butter pie crust. The result is a dessert that feels both rustic and incredibly decadent, a true showstopper that is surprisingly straightforward to assemble.
This is my go-to recipe when I need something that feels a bit special but doesn’t require hours of complex pastry work. It’s the perfect hybrid dessert, satisfying cravings for both pie and brownies in one glorious slice. We love serving it warm from the oven, when the centre is still gloriously gooey, with a scoop of vanilla ice cream melting slowly over the top. It’s an ideal dessert for a weekend family dinner, a casual get-together with friends, or simply for a night when only a serious chocolate treat will do. If you’re a fan of deep chocolate flavours, this brownie pie will not disappoint.
Recipe Overview
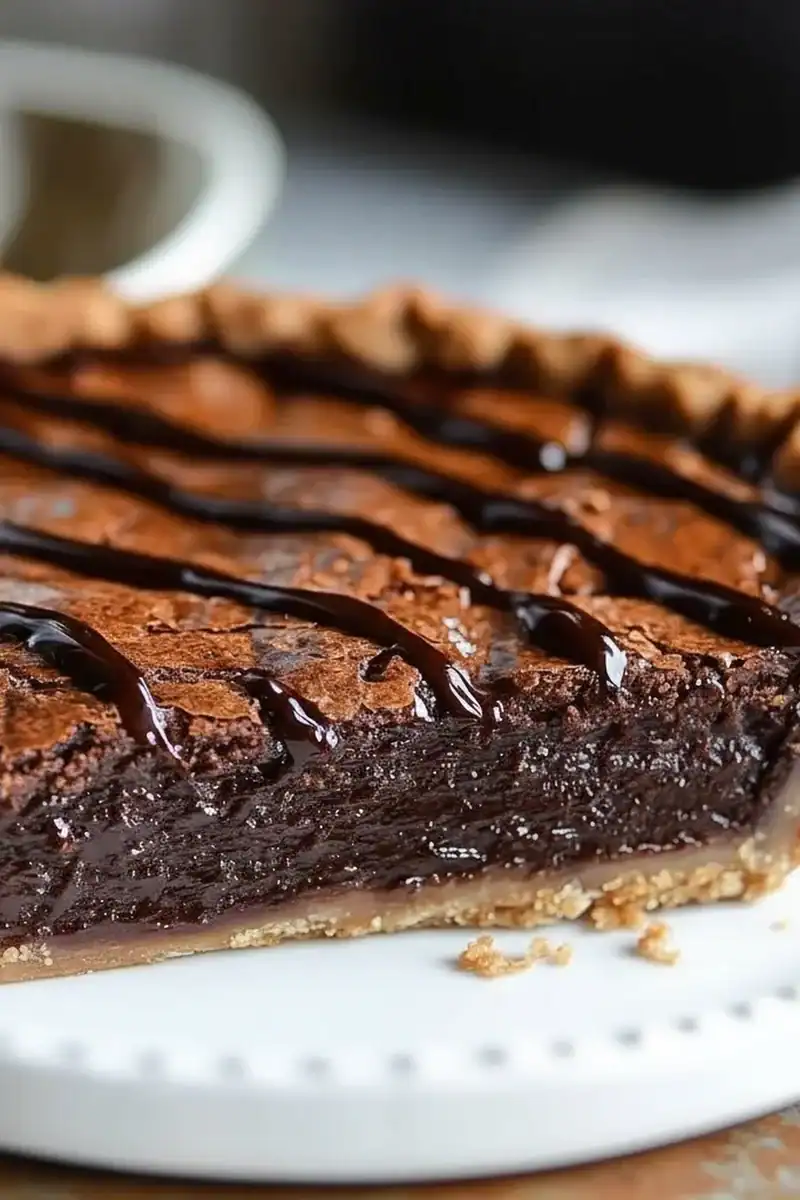
This Gooey Brownie Pie features a deeply chocolatey, fudgy brownie filling baked inside a crisp, homemade shortcrust pastry. The contrast in textures between the tender, buttery crust and the rich, dense filling is what makes this dessert so memorable. I’ve tested this with various types of chocolate, and a good quality 70% dark chocolate gives the most balanced and intense flavour. The key is to slightly underbake it to achieve that perfect molten centre that gently oozes when you cut into it.
- Prep Time: 25 minutes (plus 30 minutes chilling time for pastry)
- Cook Time: 35-40 minutes
- Total Time: 1 hour 40 minutes
- Servings: 8-10 people
- Difficulty: Medium
Why You’ll Love This Gooey Brownie Pie Recipe
- Incredible Texture and Flavour: The combination of the flaky, buttery pie crust and the dense, fudgy brownie filling is simply sublime. The flavour is intensely chocolatey, thanks to both dark chocolate and cocoa powder, with a hint of vanilla and salt to round it all out.
- Ready in Under an Hour of Active Time: While the pastry needs to chill, the active preparation and baking time is about an hour, making it a manageable bake for a weekend treat.
- A Versatile Showstopper: You can add your own touches by stirring in chopped nuts, chocolate chips, or even a swirl of caramel. It’s a base recipe that welcomes creativity. For other creative bakes, you might also like my Chocolate Peanut Butter Banana Bread.
- Great for Gatherings: Works beautifully as the finale to a special meal. I often make it after serving a hearty main like my Garlic Parmesan Chicken Pasta because it feels celebratory.
- Family Tested and Approved: My family absolutely adores this pie. The first time I made it, my youngest declared it “better than a birthday cake,” which I think is the highest praise a dessert can receive!
Ingredients You’ll Need
For the best results, using good quality ingredients makes all the difference, especially the chocolate. I always reach for a bar of Green & Black’s or Lindt 70% cocoa dark chocolate; its flavour is robust and not overly sweet, which is exactly what we need here.
- For the All-Butter Pie Crust:
- 225g plain flour, plus extra for dusting
- 1/4 tsp fine sea salt
- 140g unsalted butter, cold and cubed
- 1 tbsp caster sugar
- 1 large egg yolk
- 2-3 tbsp ice-cold water
- For the Gooey Brownie Filling:
- 150g unsalted butter, cubed
- 150g good quality dark chocolate (70% cocoa), roughly chopped
- 2 large free-range eggs
- 100g caster sugar
- 100g light brown soft sugar
- 1 tsp vanilla extract
- 75g plain flour
- 25g unsweetened cocoa powder
- 1/2 tsp fine sea salt
- 1 tsp instant espresso powder (optional, but recommended)
Adam’s Tip: Make sure your butter for the pastry is truly fridge-cold. Cutting it into small cubes and even popping it in the freezer for 10 minutes beforehand is my secret to an exceptionally flaky, tender crust.
How to Make This Gooey Brownie Pie
The process is broken down into two main parts: making the pastry and then creating the brownie filling. Don’t be intimidated by the pastry; it’s a very forgiving recipe and comes together beautifully.
- Make the Pastry: In a large bowl, mix the 225g plain flour, 1/4 tsp salt, and 1 tbsp caster sugar. Add the 140g of cold, cubed butter. Using your fingertips, rub the butter into the flour until the mixture resembles coarse breadcrumbs. Mix the egg yolk with 2 tbsp of ice-cold water and add it to the flour mixture. Bring it together with your hands or a knife until it just forms a dough. If it’s too dry, add the final tbsp of water. Do not overwork it.
- Chill the Dough: Form the dough into a flat disc, wrap it tightly in cling film, and chill in the fridge for at least 30 minutes.
- Prepare the Pie Dish: Preheat your oven to 200°C (180°C fan). On a lightly floured surface, roll out the chilled dough to about the thickness of a £1 coin. Carefully line a 23cm loose-bottomed tart tin or pie dish with the pastry, trimming any excess. Prick the base with a fork.
- Blind Bake the Crust: Line the pastry case with baking parchment and fill with baking beans or uncooked rice. Bake for 15 minutes. Carefully remove the paper and beans and bake for another 5 minutes until the pastry is pale golden. Reduce the oven temperature to 180°C (160°C fan).
- Start the Brownie Filling: While the crust bakes, place the 150g butter and 150g chopped dark chocolate in a heatproof bowl set over a saucepan of gently simmering water (a bain-marie). Stir occasionally until melted and smooth. Remove from the heat and set aside to cool slightly for 5-10 minutes.
- Mix Wet Ingredients: In a separate large bowl, using an electric mixer or a whisk, beat the 2 large eggs, 100g caster sugar, and 100g light brown sugar for 3-4 minutes until pale, thick, and voluminous. This step is key for the crackly top. Stir in the 1 tsp vanilla extract.
- Combine and Finish the Batter: Pour the slightly cooled chocolate-butter mixture into the egg mixture and gently fold to combine. In another bowl, sift the 75g plain flour, 25g cocoa powder, 1/2 tsp salt, and 1 tsp espresso powder. Add the dry ingredients to the wet ingredients and fold until just combined. I find that it’s important not to overmix here; stop as soon as you no longer see streaks of flour.
- Bake the Pie: Pour the brownie batter into the partially baked pie crust and spread it evenly. Bake for 30-35 minutes. The edges should be set and slightly puffed, but the centre should still have a definite wobble.
- Cool and Serve: Let the brownie pie cool in the tin on a wire rack for at least 30 minutes before slicing. This allows the centre to set to a perfectly fudgy consistency. Serve warm, perhaps with a dusting of icing sugar or a dollop of cream.
Tips From My Kitchen
- Temperature is Key: Ensure your melted chocolate mixture has cooled down before adding it to the whipped eggs. If it’s too hot, it can deflate the eggs or, worse, scramble them slightly, ruining the texture.
- The Espresso Secret: I learned that adding a small amount of instant espresso powder is a game-changer in chocolate recipes. It doesn’t make the final bake taste like coffee; instead, it acts as a flavour enhancer, making the chocolate taste richer and more complex.
- Make-Ahead Magic: You can prepare the pie crust a day or two in advance. Keep the raw dough wrapped in the fridge, or even line your pie dish, cover it well, and refrigerate until you’re ready to bake. The brownie batter is best made fresh.
- Storing Leftovers: If you have any pie left, store it in an airtight container at room temperature for up to 3 days. I find it becomes even fudgier and more delicious on the second day. You can gently warm slices in the microwave for 15-20 seconds before serving.
Equipment You’ll Need
- 23cm (9-inch) loose-bottomed tart tin or pie dish
- Large mixing bowls
- Saucepan and a heatproof bowl for melting chocolate
- Electric hand mixer or stand mixer (or a good balloon whisk and some elbow grease)
- Spatula
- Baking parchment and baking beans (or uncooked rice/lentils)
- Wire cooling rack
Common Mistakes to Avoid
- Overbaking the Brownie: The number one rule of a gooey brownie is not to overbake it. Look for set edges and a wobbly centre. A skewer inserted into the middle should come out with moist, fudgy crumbs attached, not clean. It will firm up as it cools.
- Rushing the Chill Time: Don’t skip chilling the pastry dough. This step is vital for relaxing the gluten, which prevents the crust from shrinking during baking and ensures a tender, flaky result.
- Slicing Too Soon: It’s incredibly tempting to cut into the pie straight from the oven, but patience is a virtue here. Allowing it to rest for at least 30 minutes gives the molten centre a chance to set properly, so you get clean slices with a perfectly fudgy interior.
Delicious Variations to Try
While this recipe is wonderful as it is, it also serves as a fantastic base for a little experimentation. Here are a few ideas we’ve tried and loved:
- Nutty Crunch: Fold 100g of toasted and roughly chopped pecans, walnuts, or hazelnuts into the brownie batter just before pouring it into the crust for a delightful textural contrast.
- Salted Caramel Swirl: After pouring the batter into the crust, dollop 3-4 tablespoons of thick salted caramel sauce over the top and use a skewer to gently swirl it through for a beautiful marbled effect and pockets of caramel.
- Orange or Mint Chocolate: Add the finely grated zest of one large orange or 1/2 teaspoon of peppermint extract to the brownie batter for a classic flavour pairing. For another treat, our classic Banana Bread Recipe is always a hit.
What to Serve With This Gooey Brownie Pie
This chocolate pie is rich and decadent, so it pairs best with accompaniments that offer a creamy or sharp contrast.
- Vanilla Bean Ice Cream: A classic for a reason. The cold, creamy vanilla against the warm, intensely chocolatey pie is a match made in heaven.
- Fresh Berries and Crème Fraîche: A handful of fresh raspberries or sliced strawberries adds a burst of freshness, while the tangy crème fraîche cuts through the richness of the chocolate beautifully.
- A Good Coffee: For an after-dinner treat, a strong espresso or a freshly brewed black coffee is the perfect partner to this rich dessert.
Frequently Asked Questions
Gooey Brownie Pie
Ingredients
Method
- Make the Pastry: In a large bowl, mix the 225g plain flour, 1/4 tsp salt, and 1 tbsp caster sugar. Add the 140g of cold, cubed butter. Using your fingertips, rub the butter into the flour until the mixture resembles coarse breadcrumbs. Mix the egg yolk with 2 tbsp of ice-cold water and add it to the flour mixture. Bring it together with your hands or a knife until it just forms a dough. If it's too dry, add the final tbsp of water. Do not overwork it.
- Chill the Dough: Form the dough into a flat disc, wrap it tightly in cling film, and chill in the fridge for at least 30 minutes.
- Prepare the Pie Dish: Preheat your oven to 200°C (180°C fan). On a lightly floured surface, roll out the chilled dough to about the thickness of a £1 coin. Carefully line a 23cm loose-bottomed tart tin or pie dish with the pastry, trimming any excess. Prick the base with a fork.
- Blind Bake the Crust: Line the pastry case with baking parchment and fill with baking beans or uncooked rice. Bake for 15 minutes. Carefully remove the paper and beans and bake for another 5 minutes until the pastry is pale golden. Reduce the oven temperature to 180°C (160°C fan).
- Start the Brownie Filling: While the crust bakes, place the 150g butter and 150g chopped dark chocolate in a heatproof bowl set over a saucepan of gently simmering water (a bain-marie). Stir occasionally until melted and smooth. Remove from the heat and set aside to cool slightly for 5-10 minutes.
- Mix Wet Ingredients: In a separate large bowl, using an electric mixer or a whisk, beat the 2 large eggs, 100g caster sugar, and 100g light brown sugar for 3-4 minutes until pale, thick, and voluminous. This step is key for the crackly top. Stir in the 1 tsp vanilla extract.
- Combine and Finish the Batter: Pour the slightly cooled chocolate-butter mixture into the egg mixture and gently fold to combine. In another bowl, sift the 75g plain flour, 25g cocoa powder, 1/2 tsp salt, and 1 tsp espresso powder. Add the dry ingredients to the wet ingredients and fold until just combined. I find that it's important not to overmix here; stop as soon as you no longer see streaks of flour.
- Bake the Pie: Pour the brownie batter into the partially baked pie crust and spread it evenly. Bake for 30-35 minutes. The edges should be set and slightly puffed, but the centre should still have a definite wobble.
- Cool and Serve: Let the brownie pie cool in the tin on a wire rack for at least 30 minutes before slicing. This allows the centre to set to a perfectly fudgy consistency. Serve warm, perhaps with a dusting of icing sugar or a dollop of cream.
Notes
This Gooey Brownie Pie is more than just a recipe; it’s a guaranteed moment of pure indulgence that always gets compliments. The rich chocolate and buttery pastry make for such a satisfying combination, and I truly hope you enjoy making it as much as we enjoy eating it. Let me know in the comments how yours turns out, I’d love to hear from you!
All the best,
Adam Henderson


