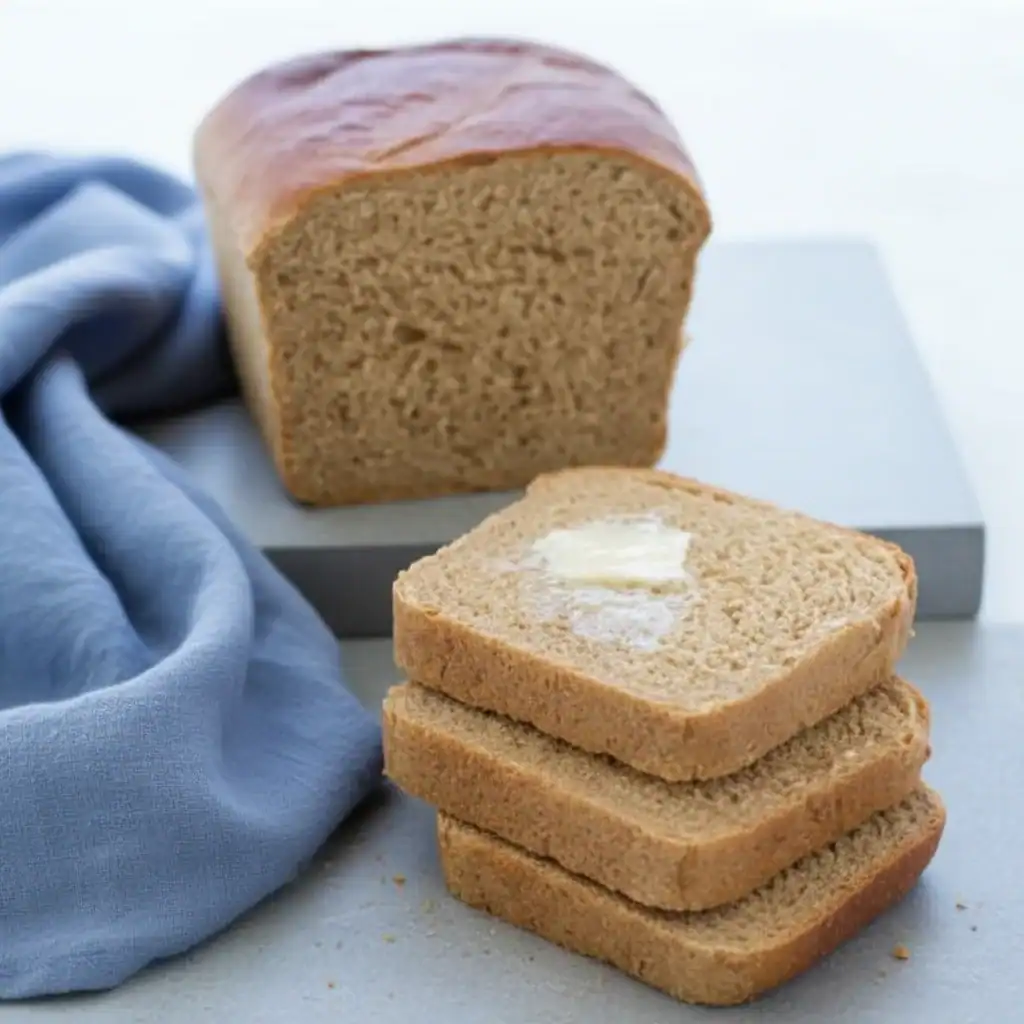
Easy Homemade Whole Wheat Bread
There’s a unique kind of magic in the aroma of a freshly baked loaf of bread wafting through the house. It’s a scent that promises warmth, comfort, and simple satisfaction. For years, I chased the perfect homemade whole wheat bread loaf – one that wasn’t dense or dry, but light, soft, and full of that wonderful nutty flavour. After testing this recipe more than five times, tweaking the flour ratios and proofing times, I finally got it just right. This isn’t just a recipe; it’s the result of a genuine passion for creating wholesome, delicious bread from scratch.
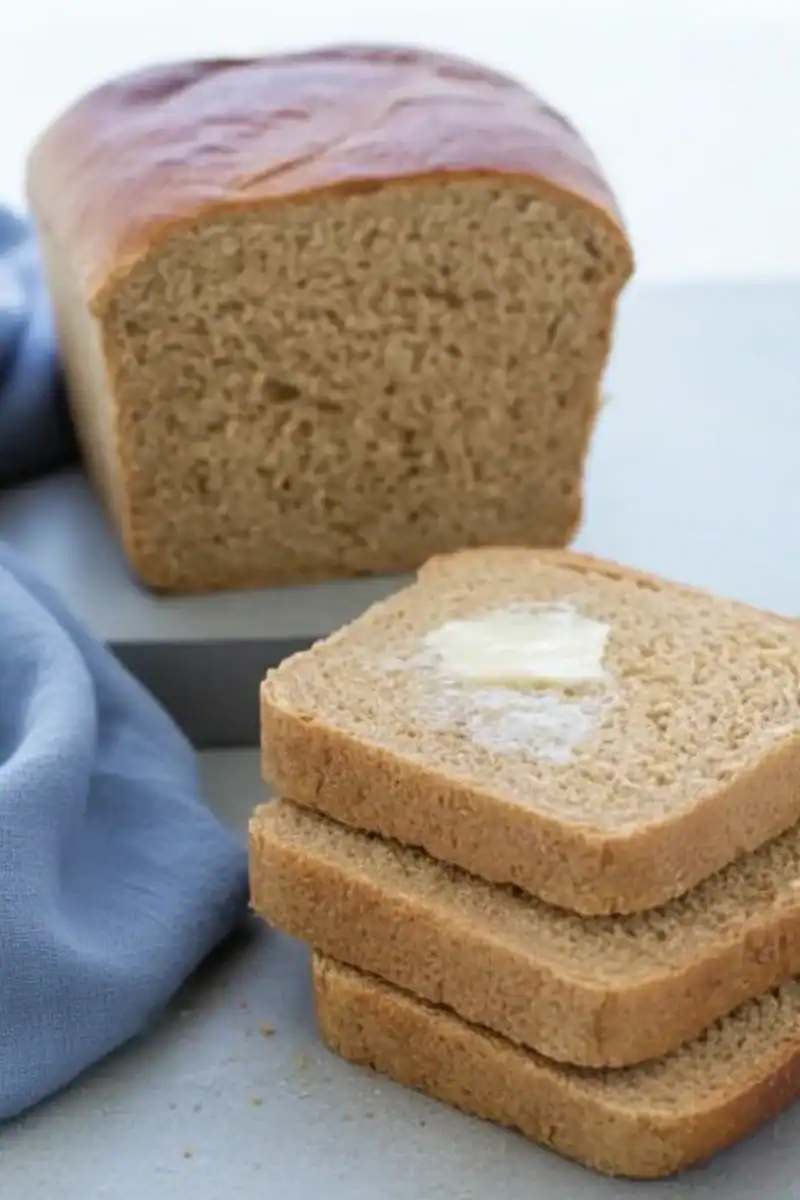
What makes this particular whole wheat bread so special is its balance. We use a blend of whole wheat and strong white bread flour to achieve a loaf that has a beautifully soft, springy crumb while still delivering that deep, earthy flavour you expect from whole wheat. The crust bakes to a gorgeous deep brown, offering a satisfying chew without being tough. It’s the kind of bread that transforms a simple sandwich into a memorable meal and makes morning toast feel like a small luxury.
This homemade bread is for anyone who appreciates the craft of baking and wants to fill their kitchen with the wholesome goodness of a from-scratch loaf. It works beautifully for school lunchboxes, a hearty sandwich alongside a bowl of soup, or simply sliced thick and slathered with good butter. It’s a foundational recipe that everyone seems to love, and I’m thrilled to share my method with you.
Recipe Overview
This recipe produces a classic, rustic whole wheat bread loaf with a wonderfully soft interior and a chewy, golden-brown crust. The flavour is rich and nutty with a subtle sweetness from the honey, making it an incredibly versatile bread for any occasion. I found that letting the dough have a full, uninterrupted first rise is the key to its light texture.
- Prep Time: 20 minutes (plus 1.5 – 2 hours rising time)
- Cook Time: 30-35 minutes
- Total Time: Approximately 2 hours 30 minutes
- Servings: 1 loaf (about 12 slices)
- Difficulty: Medium
Why You’ll Love This Whole Wheat Bread Loaf
- Genuine Flavour: Unlike many shop-bought loaves, this bread has a deep, nutty flavour profile from the whole wheat flour, perfectly balanced by a hint of golden honey. The crust has a satisfying chew that gives way to a tender, moist crumb.
- Satisfyingly Straightforward: While bread making takes time, the active, hands-on part of this recipe is just around 20 minutes. The rest is simply letting the yeast work its magic.
- Flexible Recipe: You can easily customise this loaf. Try adding a handful of sunflower or pumpkin seeds to the dough for extra texture, or brush the top with milk and sprinkle with oats before baking for a classic finish.
- Great for Daily Meals: This loaf is a true workhorse. It makes fantastic, sturdy sandwiches that don’t fall apart and is brilliant for toasting. We often have it alongside hearty pasta dishes like this Parmesan Garlic Beef Bowtie Pasta to mop up the sauce.
- Family Tested: My kids, who can be fussy about “brown bread,” absolutely adore this loaf, especially when it’s still slightly warm from the oven with a bit of butter. It always gets compliments.
Ingredients You’ll Need
For the best results, use good quality strong bread flours. The higher protein content is essential for developing the gluten that gives the bread its structure. I often use Allinson’s or a similar UK brand, but any high-protein flour will work well. Using digital scales for weighing ingredients is highly recommended for accuracy in baking.
- 300g strong whole wheat bread flour
- 200g strong white bread flour, plus extra for dusting
- 7g sachet of fast-action (instant) dried yeast
- 10g fine sea salt
- 2 tbsp clear honey (or maple syrup for a vegan option)
- 300ml lukewarm water
- 2 tbsp olive oil, plus extra for greasing
Adam’s Tip: Make sure your water is lukewarm, not hot. A good test is to dab a little on your wrist; it should feel comfortably warm. Water that is too hot can kill the yeast, and your loaf won’t rise.
How to Make This Whole Wheat Bread Loaf
The process is broken down into clear stages: mixing, kneading, rising, shaping, and baking. Don’t rush the rising times – they are crucial for developing flavour and texture. Let’s get our hands doughy!
- Combine Dry Ingredients: In the large bowl of a stand mixer or a large mixing bowl, combine the whole wheat flour, white bread flour, and salt. Add the fast-action yeast to one side of the bowl and the salt to the other. Give it a quick mix with your fingers to distribute everything.
- Mix the Wet Ingredients: In a separate jug, mix the lukewarm water, honey, and olive oil until the honey has dissolved.
- Form the Dough: Pour the wet mixture into the dry ingredients. If using a stand mixer, use the dough hook attachment and mix on a low speed for 2-3 minutes until a shaggy dough forms. If mixing by hand, use a wooden spoon or spatula to bring everything together into a rough ball.
- Knead the Dough: Tip the dough onto a lightly floured work surface. Knead for a solid 10 minutes (or for 7-8 minutes on a medium speed in your stand mixer). The dough should transform from sticky and rough to smooth, elastic, and pliable. I find that using the heel of my hand to push the dough away and then folding it back on itself is the most effective technique. You’re looking for it to pass the windowpane test.
- First Rise (Bulk Fermentation): Lightly oil a clean, large bowl. Place the kneaded dough inside and turn it over once to coat it lightly in oil. Cover the bowl with a clean tea towel or cling film. Leave it to rise in a warm, draught-free place for 1 to 1.5 hours, or until it has doubled in size.
- Shape the Loaf: Once risen, gently tip the dough out onto a lightly floured surface. Knock it back by gently pressing the air out. Shape the dough into a rough oblong and place it into a greased and floured 900g (2lb) loaf tin.
- Second Rise (Proofing): Cover the loaf tin loosely with oiled cling film or a tea towel. Leave it in a warm place to rise again for 30-45 minutes, or until the dough has risen about 2-3cm above the rim of the tin. While it’s rising, preheat your oven to 220°C (200°C fan).
- Bake the Bread: Place the loaf tin on the middle shelf of the preheated oven. Bake for 15 minutes, then reduce the oven temperature to 190°C (170°C fan) and bake for a further 15-20 minutes. The loaf should be a deep golden brown and sound hollow when you tap it on the bottom.
- Cool Down: Immediately turn the loaf out of the tin and place it on a wire rack to cool completely. It’s tempting to slice into it right away, but letting it cool allows the crumb to set properly.
Tips From My Kitchen
- Temperature Control: The temperature of your kitchen dramatically affects rising times. On a cold day, your dough might take longer. A great spot for rising is an oven that’s turned off, with just the light on for a little warmth.
- The Secret Step: For an even softer crumb, try an ‘autolyse’. Before adding the salt and yeast, just mix the flours and water together and let them sit for 20 minutes. This allows the whole wheat flour to fully hydrate, making the dough easier to work with.
- Make-Ahead: You can perform the first rise in the refrigerator. After kneading, place the dough in the oiled bowl, cover, and chill for up to 24 hours. This slow fermentation develops a deeper flavour. Just let it come to room temperature for about an hour before shaping.
- Storage: Store the cooled loaf in a bread bin or a paper bag at room temperature for up to 3 days. Avoid the refrigerator, as it can make the bread go stale faster. It also freezes brilliantly – I slice it first for convenience.
Equipment You’ll Need
- Stand mixer with dough hook (optional, but helpful)
- Large mixing bowl
- 900g (2lb) loaf tin
- Digital kitchen scales
- Wire cooling rack
Common Mistakes to Avoid
- Using Water That’s Too Hot: Yeast is a living organism. Water above 45°C (115°F) will kill it, and your bread won’t rise at all. Always test it on your wrist first – it should feel pleasantly warm, not hot.
- Under-Kneading: It’s tempting to stop kneading when the dough looks combined, but those 10 minutes are vital. Proper kneading develops the gluten network that traps air and gives the bread its structure and chew. Without it, you’ll get a dense, crumbly loaf.
- Slicing Too Soon: The bread is still technically cooking as it cools on the wire rack. Slicing into a hot loaf releases steam, which can result in a gummy, doughy texture inside. Patience is a virtue here!
Delicious Variations to Try
This whole wheat bread loaf is a fantastic canvas for customisation. Once you’ve mastered the basic recipe, feel free to experiment.
- Seeded Whole Wheat Loaf: Add 75g of mixed seeds (like pumpkin, sunflower, and linseed) to the dry ingredients at the beginning. You can also press some extra seeds onto the top of the loaf before its second rise.
- Oat & Treacle Loaf: Swap the honey for two tablespoons of black treacle for a darker, richer flavour. Brush the top of the unbaked loaf with a little milk and sprinkle generously with rolled oats before baking.
- Vegan Whole Wheat Loaf: This recipe is easily made vegan. Simply substitute the honey with an equal amount of maple syrup or agave nectar. The olive oil is already plant-based, so you’re good to go.
What to Serve With This Whole Wheat Bread Loaf
This versatile loaf works for almost any meal. Its robust structure makes it ideal for building substantial sandwiches or serving alongside other dishes.
- Hearty Sandwiches: It’s a brilliant sandwich bread. Try it with sharp cheddar and chutney, or use it to make a satisfying chicken sandwich to serve alongside a fresh Classic House Salad with Red Wine Vinaigrette.
- With Soup or Stew: A thick slice is just the thing for mopping up the last bits of a comforting bowl of soup or a rich stew.
- Breakfast Toast: Simply toasted and spread with butter and marmalade, it’s a fantastic start to the day. The nutty flavour pairs beautifully with sweet or savoury toppings.
Frequently Asked Questions
Whole Wheat Bread Loaf
Ingredients
Method
- Combine Dry Ingredients: In the large bowl of a stand mixer or a large mixing bowl, combine the whole wheat flour, white bread flour, and salt. Add the fast-action yeast to one side of the bowl and the salt to the other. Give it a quick mix with your fingers to distribute everything.
- Mix the Wet Ingredients: In a separate jug, mix the lukewarm water, honey, and olive oil until the honey has dissolved.
- Form the Dough: Pour the wet mixture into the dry ingredients. If using a stand mixer, use the dough hook attachment and mix on a low speed for 2-3 minutes until a shaggy dough forms. If mixing by hand, use a wooden spoon or spatula to bring everything together into a rough ball.
- Knead the Dough: Tip the dough onto a lightly floured work surface. Knead for a solid 10 minutes (or for 7-8 minutes on a medium speed in your stand mixer). The dough should transform from sticky and rough to smooth, elastic, and pliable. I find that using the heel of my hand to push the dough away and then folding it back on itself is the most effective technique. You're looking for it to pass the windowpane test.
- First Rise (Bulk Fermentation): Lightly oil a clean, large bowl. Place the kneaded dough inside and turn it over once to coat it lightly in oil. Cover the bowl with a clean tea towel or cling film. Leave it to rise in a warm, draught-free place for 1 to 1.5 hours, or until it has doubled in size.
- Shape the Loaf: Once risen, gently tip the dough out onto a lightly floured surface. Knock it back by gently pressing the air out. Shape the dough into a rough oblong and place it into a greased and floured 900g (2lb) loaf tin.
- Second Rise (Proofing): Cover the loaf tin loosely with oiled cling film or a tea towel. Leave it in a warm place to rise again for 30-45 minutes, or until the dough has risen about 2-3cm above the rim of the tin. While it's rising, preheat your oven to 220°C (200°C fan).
- Bake the Bread: Place the loaf tin on the middle shelf of the preheated oven. Bake for 15 minutes, then reduce the oven temperature to 190°C (170°C fan) and bake for a further 15-20 minutes. The loaf should be a deep golden brown and sound hollow when you tap it on the bottom.
- Cool Down: Immediately turn the loaf out of the tin and place it on a wire rack to cool completely. It's tempting to slice into it right away, but letting it cool allows the crumb to set properly.
Notes
There is nothing quite as rewarding as slicing into a loaf of bread you’ve baked yourself. The effort is always worth it. I hope you and your family enjoy this wholesome whole wheat bread loaf as much as we do in my home. Please let me know how you get on in the comments below – I’d love to hear about your baking adventures! Happy baking, Adam.