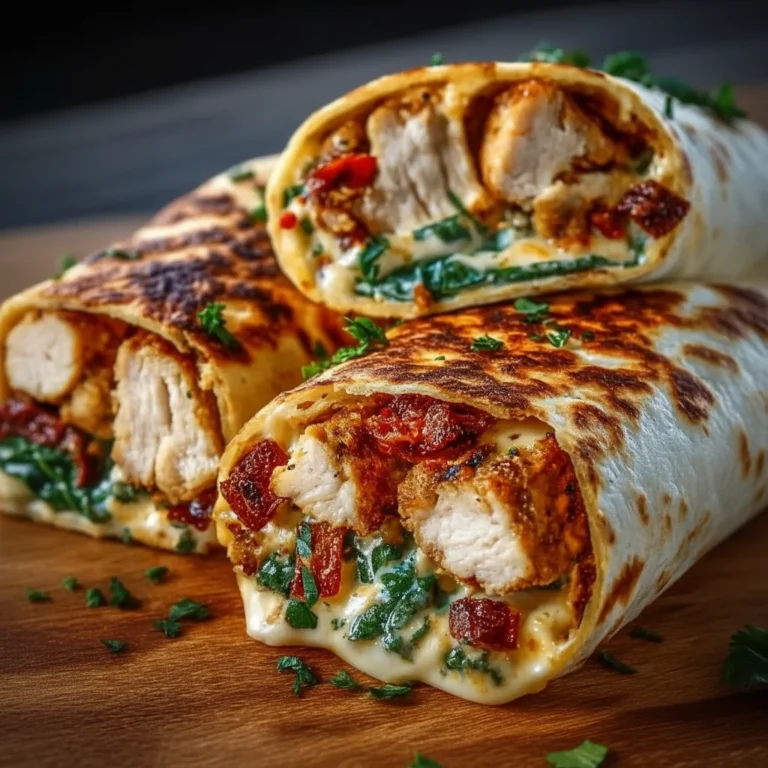
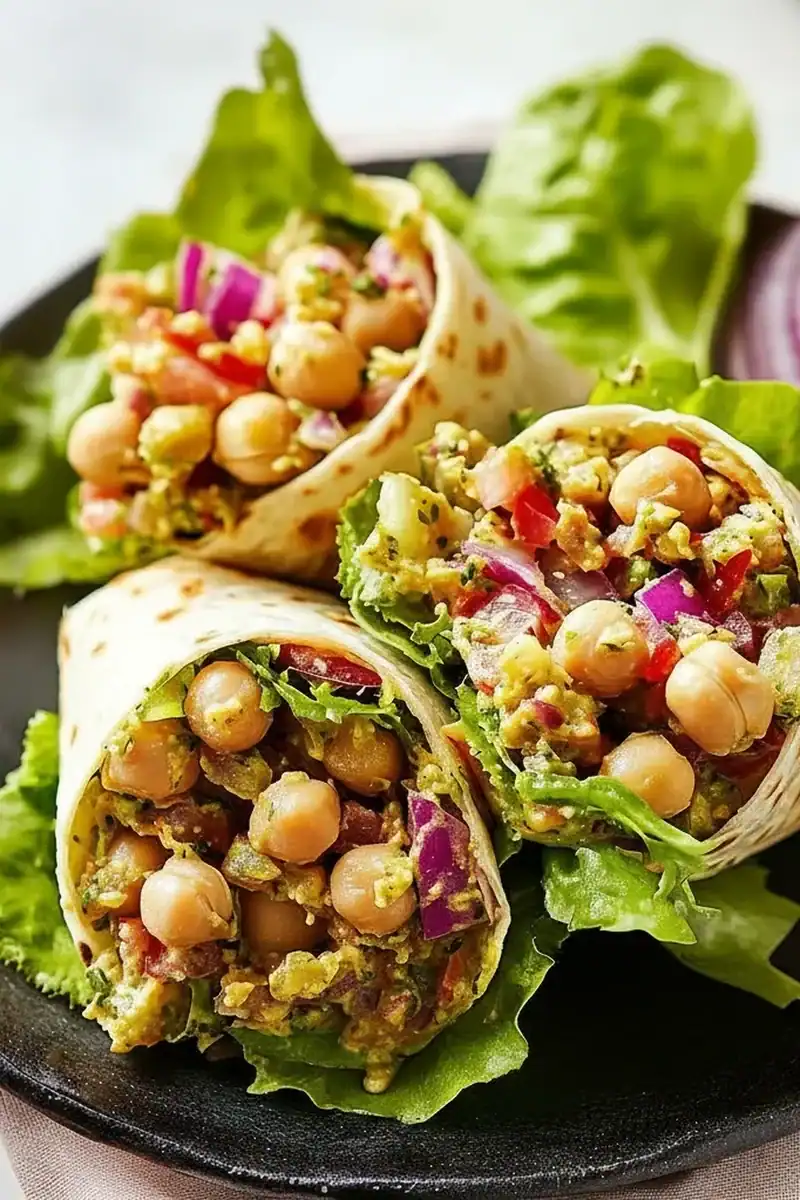
Flavorful Chickpea Salad Wraps
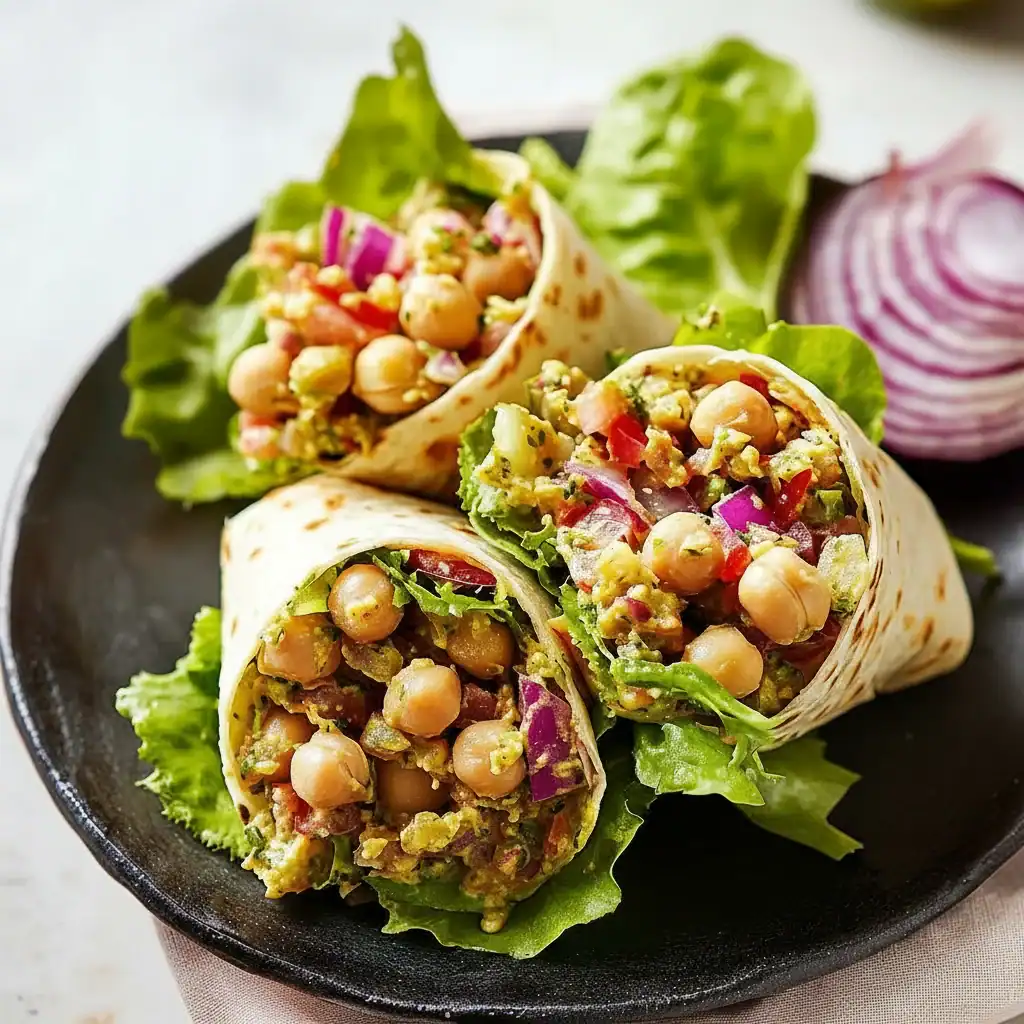
There are some recipes we turn to time and time again, the reliable staples that make a weekday lunch feel like a small, deliberate treat. For me, these Chickpea Salad Wraps are exactly that. It’s a recipe born from a need for something substantial, flavourful, and packed with goodness that could be put together without much fuss. The beauty of this dish is its texture; we create a base that’s both creamy and chunky, with pops of freshness and crunch in every single bite. It’s the kind of healthy lunch that genuinely satisfies.
I’ve been making variations of this chickpea salad for years, but this particular version is the one that always gets compliments when I bring it along to picnics or share it with colleagues for lunch. It’s all about balancing the creaminess of the mashed chickpeas and mayonnaise with the nutty depth of tahini and a bright, zesty lift from fresh lemon. We pack it into soft tortillas with some crisp greens, creating a self-contained meal that’s brilliant for eating on the go or enjoying at your desk. It’s a veggie wrap that even the most devoted meat-eaters in my life have come to love.
This is the kind of recipe that works beautifully for meal prep. You can make a big batch of the chickpea salad filling on a Sunday and have delicious, healthy lunches ready for the next few days. It’s endlessly adaptable, satisfying, and a wonderful way to enjoy a plant-based meal that is anything but boring. Let’s get into how we make it.
Recipe Overview
This recipe brings together the humble, nutritious chickpea with a creamy, tangy dressing made from mayonnaise, tahini, and lemon. By mashing about half of the chickpeas, we create a wonderful base that holds everything together, while the whole chickpeas provide a satisfying bite. Finely diced celery and red onion add a necessary crunch and a little sharpness. I’ve tested this recipe many times, and I find that letting the prepared salad rest for just 15 minutes before assembling the wraps really allows the flavours to meld together perfectly.
- Prep Time: 15 minutes
- Cook Time: 0 minutes
- Total Time: 15 minutes
- Servings: 4 wraps
- Difficulty: Easy
Why You’ll Love This Chickpea Salad Wraps Recipe
- Genuine Flavour: The flavour here is layered and satisfying. You get the earthy notes from the chickpeas, a creamy richness from the mayonnaise, a nutty depth from the tahini, and a sharp, zesty finish from the lemon juice and Dijon mustard. The fresh dill brings it all together with a lovely herbaceous lift.
- Ready in 15 Minutes: From opening the tin of chickpeas to rolling the final wrap, this entire meal comes together in about 15 minutes, making it a brilliant option for a speedy and healthy lunch or light dinner.
- Flexible Recipe: This recipe is a fantastic starting point. You can add extra vegetables like grated carrot or finely chopped bell pepper, swap the dill for fresh parsley or chives, or add a handful of toasted sunflower seeds for extra crunch.
- Great for Meal Prep: The chickpea salad filling is ideal for making ahead of time. It keeps brilliantly in the fridge, so you can prepare a batch and have effortless lunches ready to go for several days.
- Family Tested: This is one of those veggie recipes that my whole family enjoys. The texture is interesting enough to keep it from feeling monotonous, and it’s a great way to serve up a nutritious, plant-forward meal without any complaints.
Ingredients You’ll Need
For this recipe, using good quality tinned chickpeas makes a noticeable difference. I always look for ones that are plump and hold their shape well. The same goes for the mayonnaise; a good, full-fat variety will give you the creamiest, most satisfying result. Everything else is about freshness—crisp celery, sharp onion, and fragrant dill are key.
- 2 x 400g tins of chickpeas, rinsed and well-drained
- 100g full-fat mayonnaise
- 2 tbsp tahini
- 1 tbsp Dijon mustard
- Juice and zest of 1 medium lemon
- 2 celery stalks, very finely diced
- 1 small red onion, very finely diced
- 3 tbsp fresh dill, finely chopped
- ½ tsp salt, or to taste
- ¼ tsp freshly ground black pepper
- 4 large tortilla wraps
- A large handful of rocket or baby spinach leaves
Sara’s Tip: For the best flavour, make sure your tahini is well-stirred before you measure it. The oil can separate, and you want a smooth, consistent paste for the dressing.
How to Make Chickpea Salad Wraps
The process for this chickpea recipe is wonderfully straightforward. It’s all about preparation and assembly—no cooking required. The key is to get the texture of the chickpea base just right and to dice your vegetables finely so they incorporate evenly throughout the salad.
- Prepare the Chickpeas: After rinsing and draining your chickpeas, place them in a large mixing bowl. Take a potato masher or a fork and mash about half of them, leaving the other half whole. This creates that perfect creamy-yet-chunky texture. I find a potato masher works best for this job.
- Prepare the Fresh Ingredients: Finely dice the celery and red onion. You want the pieces to be quite small so that you get a little bit of crunch in every bite without being overwhelmed by a large chunk of onion. Finely chop your fresh dill.
- Make the Dressing: In a separate, smaller bowl, whisk together the mayonnaise, tahini, Dijon mustard, lemon zest, and lemon juice. Keep whisking until the dressing is smooth and creamy.
- Combine Everything: Pour the dressing over the mashed and whole chickpeas in the large bowl. Add the diced celery, red onion, and chopped dill.
- Mix and Season: Using a spatula or large spoon, gently fold everything together until all the chickpeas are coated in the dressing and the vegetables are evenly distributed. Add the salt and black pepper, taste, and adjust the seasoning if necessary. You might want a little more salt or an extra squeeze of lemon.
- Rest the Salad (Optional but Recommended): If you have time, cover the bowl and let the chickpea salad sit in the fridge for about 15-20 minutes. This allows all the flavours to meld together beautifully.
- Warm the Wraps: To make the tortillas more pliable and pleasant to eat, you can warm them for about 20-30 seconds per side in a dry, non-stick frying pan over medium heat.
- Assemble the Wraps: Lay a warmed tortilla on a flat surface. Place a handful of rocket or spinach leaves down the centre, leaving a border at the edges. Spoon a generous quarter of the chickpea salad mixture on top of the greens.
- Roll and Serve: Fold in the bottom edge of the tortilla, then fold in the sides tightly, and finally roll it up to form a secure wrap. You can slice it in half on a diagonal or serve it whole. Repeat with the remaining tortillas and filling.
Tips From My Kitchen
- Dressing Consistency: Different brands of tahini have varying thicknesses. If your dressing seems too stiff, you can thin it with an extra teaspoon of lemon juice or even a splash of cold water until it reaches a creamy, easily spreadable consistency.
- The Secret Step: I learned that adding a pinch of smoked paprika to the dressing introduces a subtle, smoky depth that works wonderfully with the chickpeas. It’s not traditional, but it adds a lovely layer of flavour.
- Make-Ahead: This is a fantastic recipe for getting ahead. The chickpea salad filling can be made and stored in an airtight container in the refrigerator for up to 3 days. Simply assemble the wraps just before you plan to eat them to prevent them from becoming soggy.
- Storage: Leftover filling should be kept in the fridge. Assembled wraps are best eaten the same day, but if you need to pack one for the next day, try creating a barrier between the filling and the tortilla with a large lettuce leaf, as explained in the FAQ.
Equipment You’ll Need
You don’t need any special gadgets for these veggie wraps, just a few kitchen basics.
- Large salad bowl
- Sharp knife and cutting board
- Potato masher or a fork
- Small bowl for the dressing
Delicious Variations to Try
Once you have the basic recipe down, it’s fun to experiment. Here are a few ideas we’ve tried and loved:
- Spicy Version: For a bit of heat, add a finely chopped red chilli, a quarter teaspoon of cayenne pepper, or a generous dash of your favourite hot sauce to the dressing.
- Vegan Option: The recipe is easily made vegan. Simply substitute the mayonnaise with a high-quality vegan mayonnaise. The rest of the ingredients are already plant-based.
- Added Crunch and Protein: For a different kind of texture, try adding 50g of toasted sunflower seeds or chopped walnuts to the salad mixture. It adds a lovely nutty flavour and an extra protein boost.
What to Serve With Chickpea Salad Wraps
While these wraps are a complete meal on their own, they also pair nicely with a few simple sides, especially if you’re serving them for a more substantial dinner.
- Simple Green Salad: A light, crisp salad complements the creamy wrap perfectly. A Classic House Salad with Red Wine Vinaigrette works wonderfully.
- Crisps or Vegetable Sticks: For a classic lunch combination, serve the wraps with a side of good quality sea salt crisps or some crunchy vegetable sticks like carrots, cucumbers, and bell peppers with hummus.
- Drink Pairing: A chilled glass of Sauvignon Blanc or a crisp lager is a great match. For a non-alcoholic option, a sparkling elderflower pressé is delightfully refreshing.
Frequently Asked Questions
Chickpea Salad Wraps
Ingredients
Method
- Prepare the Chickpeas: After rinsing and draining your chickpeas, place them in a large mixing bowl. Take a potato masher or a fork and mash about half of them, leaving the other half whole. This creates that perfect creamy-yet-chunky texture. I find a potato masher works best for this job.
- Prepare the Fresh Ingredients: Finely dice the celery and red onion. You want the pieces to be quite small so that you get a little bit of crunch in every bite without being overwhelmed by a large chunk of onion. Finely chop your fresh dill.
- Make the Dressing: In a separate, smaller bowl, whisk together the mayonnaise, tahini, Dijon mustard, lemon zest, and lemon juice. Keep whisking until the dressing is smooth and creamy.
- Combine Everything: Pour the dressing over the mashed and whole chickpeas in the large bowl. Add the diced celery, red onion, and chopped dill.
- Mix and Season: Using a spatula or large spoon, gently fold everything together until all the chickpeas are coated in the dressing and the vegetables are evenly distributed. Add the salt and black pepper, taste, and adjust the seasoning if necessary. You might want a little more salt or an extra squeeze of lemon.
- Rest the Salad (Optional but Recommended): If you have time, cover the bowl and let the chickpea salad sit in the fridge for about 15-20 minutes. This allows all the flavours to meld together beautifully.
- Warm the Wraps: To make the tortillas more pliable and pleasant to eat, you can warm them for about 20-30 seconds per side in a dry, non-stick frying pan over medium heat.
- Assemble the Wraps: Lay a warmed tortilla on a flat surface. Place a handful of rocket or spinach leaves down the centre, leaving a border at the edges. Spoon a generous quarter of the chickpea salad mixture on top of the greens.
- Roll and Serve: Fold in the bottom edge of the tortilla, then fold in the sides tightly, and finally roll it up to form a secure wrap. You can slice it in half on a diagonal or serve it whole. Repeat with the remaining tortillas and filling.
Notes
I really hope you give these Chickpea Salad Wraps a go. They’ve become such a go-to in my kitchen for a reason, and they’re a fantastic way to make lunchtime something to look forward to. If you enjoy this, you might also like some of my other straightforward meal ideas, like this Crunchy Asian Chicken Salad with Peanut Dressing. I’d love to hear how you get on, so please feel free to leave a comment below and let me know if you make any delicious variations of your own!