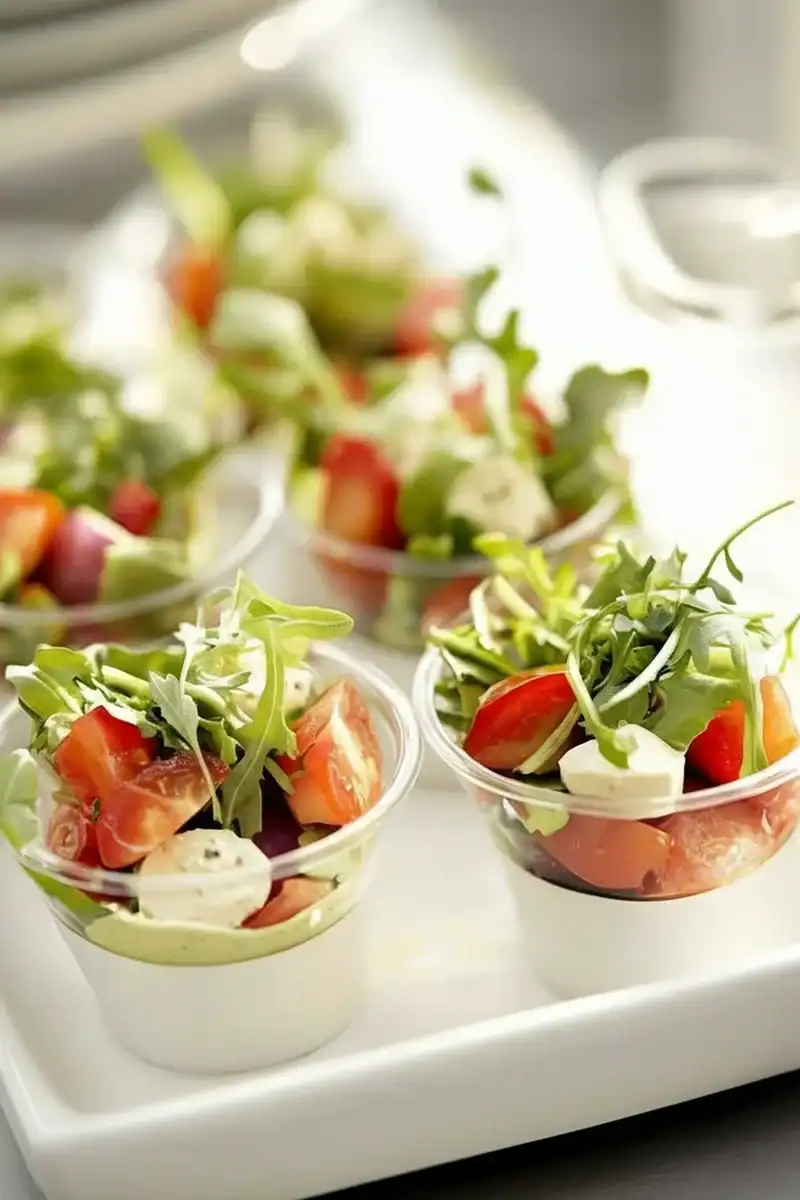
Fresh Individual Salad Cups Recipe

There’s a certain magic to hosting a gathering, laying out a spread of food, and watching your friends and family enjoy it. But let’s be honest, a big bowl of communal salad can often look a bit sad after the first few people have served themselves. It gets messy, the dressing pools at the bottom, and the delicate leaves get crushed. That’s where these glorious Individual Salad Cups come in. They are my secret weapon for entertaining. Each little cup is a perfectly portioned, beautifully layered, and mess-free serving of fresh, crunchy goodness.
I developed this recipe for a family barbecue last summer, and now it’s my go-to for any get-together. What makes these veggie cups so special is the clever layering. We put the tangy, creamy dill dressing at the very bottom, which keeps the crisp lettuce and other vegetables from going soggy. Every bite has that ideal combination of fresh crunch from the cucumber, a burst of sweetness from the cherry tomatoes and corn, and the rich, herby dressing that ties it all together. They look fantastic on a buffet table and are so easy for guests to grab and eat while mingling.
This is the kind of healthy appetizer that works for almost any occasion, from a casual picnic in the park to a more formal birthday buffet. They’re a brilliant way to get everyone, including the kids, to eat their greens. The individual portions make people feel catered for, and they solve the problem of leftover, wilted salad at the end of the party. If you’re looking for a party salad solution that is both practical and impressive, you’ve found it.
Recipe Overview
These Individual Salad Cups are a masterclass in texture and fresh flavour. Each layer is distinct, from the creamy and tangy dill dressing at the base to the crisp, shredded lettuce on top. They are designed to be prepared ahead, making hosting feel much more manageable. After testing this recipe five times, I finally got the layering just right to keep the lettuce crisp for hours, even on a warm day.
- Prep Time: 25 minutes
- Cook Time: 0 minutes
- Total Time: 25 minutes
- Servings: 12 cups
- Difficulty: Easy
Why You’ll Love These Individual Salad Cups
- Genuine Flavour: The zesty, creamy dill dressing, made with thick Greek yogurt and fresh herbs, cuts through the natural sweetness of the sweetcorn and juicy cherry tomatoes. The cucumber provides a clean, cooling crunch in every single bite.
- Ready in Under 30 Minutes: From chopping the veg to layering the cups, the entire process is straightforward and comes together in about 25 minutes. It’s the ideal appetizer when you’re short on time but want something that looks elegant.
- Flexible Recipe: This recipe is a fantastic starting point. You can easily add a layer of chickpeas for extra protein, swap the cucumber for finely diced red bell pepper for a different crunch, or use fresh chives instead of dill in the dressing.
- Great for Gatherings: These work beautifully for summer barbecues, birthday party buffets, and even elegant canapé evenings. Because they’re self-contained, they are also a brilliant addition to a packed lunch.
- Family Tested: My kids, who can be a bit selective about salads, absolutely love having their own little pot. They see it as a special treat, and their cups are always the first things to disappear from the table!
Ingredients You’ll Need
For the best result, use the freshest, crispest vegetables you can find. The quality of the produce really shines through here. For the dressing, I find that a thick, full-fat Greek-style yogurt like Fage gives the best consistency—it’s creamy enough to hold its own at the bottom of the cup without being watery. I also recommend using a good quality English cucumber for its minimal seeds and crisp texture.
- For the Creamy Dill Dressing:
- 200g full-fat Greek yogurt
- 1 tbsp fresh dill, finely chopped
- 1 clove garlic, crushed or very finely minced
- 1 tbsp lemon juice, freshly squeezed
- 1/2 tsp sea salt
- 1/4 tsp black pepper, freshly ground
- 1 tsp water (to adjust consistency, if needed)
- For the Salad Layers:
- 1 large English cucumber (about 300g)
- 200g tinned sweetcorn, drained well
- 250g cherry tomatoes
- 1/2 small red onion
- 1 large head of romaine or iceberg lettuce
- Optional Garnish: Toasted sunflower seeds or small croutons
Adam’s Tip: For the most vibrant flavour, let the dressing sit in the fridge for at least 20 minutes before you start assembling the cups. This little bit of time allows the garlic and dill to really infuse the yogurt, making a huge difference to the final taste.
How to Make Individual Salad Cups
The secret to perfect party salad cups is all in the assembly. We’ll build them in careful layers to ensure every ingredient stays at its best. Have your clear cups or jars ready to go before you begin. I use 200ml clear plastic tumblers, which are the perfect size.
- Make the Dressing: In a small bowl, combine the Greek yogurt, chopped dill, crushed garlic, lemon juice, salt, and pepper. Stir until everything is well incorporated. If the dressing is too thick to spoon easily, add the teaspoon of water to loosen it slightly. Set aside.
- Prepare the Vegetables: Finely dice the cucumber into small, even pieces (about 0.5cm). Halve or quarter the cherry tomatoes depending on their size. Finely dice the red onion. Wash the lettuce leaves thoroughly and, this is crucial, dry them completely. I use a salad spinner for this, which BBC Good Food rates as an essential tool for crisp salads. Once dry, shred the lettuce finely.
- Layer 1 – The Dressing: Spoon about one tablespoon of the creamy dill dressing into the bottom of each of your 12 cups. What works best for me is using a small piping bag (or a food-safe plastic bag with the corner snipped off) to pipe the dressing in neatly without smudging the sides of the cup.
- Layer 2 – The Sturdy Base: Next, add a layer of the diced cucumber, followed by a layer of the drained sweetcorn. These firmer ingredients create a barrier that protects the delicate lettuce from the dressing.
- Layer 3 – The Colour and Flavour: Add a layer of the chopped cherry tomatoes and a sprinkle of the finely diced red onion over the sweetcorn.
- Layer 4 – The Crisp Topping: Gently pack the shredded lettuce on top, filling the cup to the brim. Don’t press it down too hard, as you want to keep the air and volume in the leaves.
- Chill and Serve: Cover the cups (you can use cling film) and place them in the refrigerator for at least 30 minutes to chill. This helps the flavours meld and ensures they are refreshingly cold when served. If using, add the sunflower seeds or croutons just before serving to keep them crunchy.
Tips From My Kitchen
- Keep it Cold: Always start with chilled vegetables straight from the fridge. This simple step helps the veggie cups stay crisp and fresh for much longer, which is especially important if they are going to sit on a buffet table for a while.
- The Secret to Crispiness: I learned that patting the shredded lettuce completely dry with a kitchen towel after washing is non-negotiable. Any residual moisture is the enemy of a crisp salad and will quickly create a watery mess at the bottom of your cups.
- Make-Ahead Magic: You can prepare all the components up to 24 hours in advance. Chop the vegetables and store them in separate airtight containers in the fridge. The dressing can also be made ahead and will taste even better for it. Assemble the cups no more than 4-6 hours before you plan to serve them for the best texture.
- Storage: Once assembled, the salad cups should be covered and kept in the fridge. They are best eaten within 6 hours. I wouldn’t recommend storing them overnight, as the lettuce will inevitably lose its fresh crunch.
Common Mistakes to Avoid
- Incorrect Layering: Putting the dressing anywhere but the bottom is the fastest way to a wilted, disappointing salad. The order—dressing, hard veg, soft veg, lettuce—is designed to protect the delicate ingredients from moisture.
- Using Wet Vegetables: As mentioned in my tips, failing to thoroughly dry your lettuce and cucumber after washing will result in soggy salad cups. Take the extra two minutes to spin or pat them dry; it makes all the difference.
- Assembling Too Far in Advance: While prepping the ingredients ahead is a great time-saver, assembling the cups too early will compromise their freshness. For the absolute best result, assemble them on the day of your event, ideally 2-4 hours before serving.
Delicious Variations to Try
Once you have the basic technique down, it’s great fun to experiment with different flavour combinations. These salad cups are wonderfully adaptable.
- Mexican-Inspired Cups: Swap the dill dressing for a lime and coriander yogurt dressing. Use black beans instead of cucumber, and top with a little crumbled feta cheese and a slice of avocado just before serving.
- Protein-Packed Version: Add a layer of cooked, shredded chicken, chickpeas, or cooked quinoa on top of the cucumber layer to make these a more substantial snack or light lunch. This is a great way to use up leftover roast chicken.
- Vegan Option: The recipe is easily made vegan. Simply substitute the Greek yogurt with a thick, plain plant-based yogurt (coconut or soy work well) for the dressing. The rest of the ingredients are already plant-based.
What to Serve With Individual Salad Cups
These little veggie cups are a versatile part of any spread. They provide a fresh, light contrast to richer dishes.
- They are a fantastic starter or side for anything off the barbecue, like grilled chicken skewers or burgers.
- For a buffet, they pair wonderfully with savoury pastries, sausage rolls, or a hearty pasta salad like our Crunchy Asian Chicken Salad with Peanut Dressing.
- For a refreshing drink pairing, a crisp Pinot Grigio, a cold lager, or a non-alcoholic elderflower spritz complements the fresh flavours beautifully.
Frequently Asked Questions
Individual Salad Cups
Ingredients
Method
- Make the Dressing: In a small bowl, combine the Greek yogurt, chopped dill, crushed garlic, lemon juice, salt, and pepper. Stir until everything is well incorporated. If the dressing is too thick to spoon easily, add the teaspoon of water to loosen it slightly. Set aside.
- Prepare the Vegetables: Finely dice the cucumber into small, even pieces (about 0.5cm). Halve or quarter the cherry tomatoes depending on their size. Finely dice the red onion. Wash the lettuce leaves thoroughly and, this is crucial, dry them completely. I use a salad spinner for this, which BBC Good Food rates as an essential tool for crisp salads. Once dry, shred the lettuce finely.
- Layer 1 - The Dressing: Spoon about one tablespoon of the creamy dill dressing into the bottom of each of your 12 cups. What works best for me is using a small piping bag (or a food-safe plastic bag with the corner snipped off) to pipe the dressing in neatly without smudging the sides of the cup.
- Layer 2 - The Sturdy Base: Next, add a layer of the diced cucumber, followed by a layer of the drained sweetcorn. These firmer ingredients create a barrier that protects the delicate lettuce from the dressing.
- Layer 3 - The Colour and Flavour: Add a layer of the chopped cherry tomatoes and a sprinkle of the finely diced red onion over the sweetcorn.
- Layer 4 - The Crisp Topping: Gently pack the shredded lettuce on top, filling the cup to the brim. Don't press it down too hard, as you want to keep the air and volume in the leaves.
- Chill and Serve: Cover the cups (you can use cling film) and place them in the refrigerator for at least 30 minutes to chill. This helps the flavours meld and ensures they are refreshingly cold when served. If using, add the sunflower seeds or croutons just before serving to keep them crunchy.
Notes
These Individual Salad Cups have become one of my most requested recipes for parties, and they always get compliments. They take the humble salad and turn it into something a bit special, all while making life easier for you as the host. Give them a try for your next get-together! I’d love to hear how they turn out for you, so please leave a comment below and let me know if you tried any delicious variations of your own.
Happy cooking,
Adam Henderson