Make This Toasted Tuna Melt Wrap Recipe at Home
There’s something deeply satisfying about a classic tuna melt. The combination of savoury tuna salad pressed against gloriously melty cheese is a formula that just works. But for years, I found the sandwich version could sometimes be a bit… heavy. The bread would occasionally get soggy, and it didn’t always travel well. That’s when I started experimenting and landed on this Tuna Melt Wrap Recipe, which solves all those problems and introduces a fantastic new texture. Friends always ask me for this recipe after trying it at lunch, and it’s become my go-to for a substantial yet speedy meal.
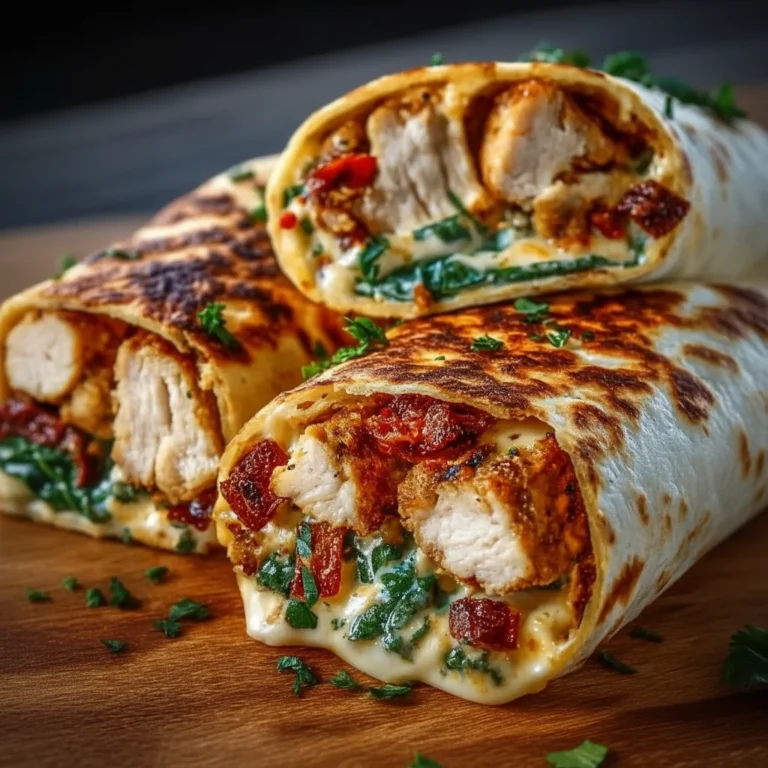
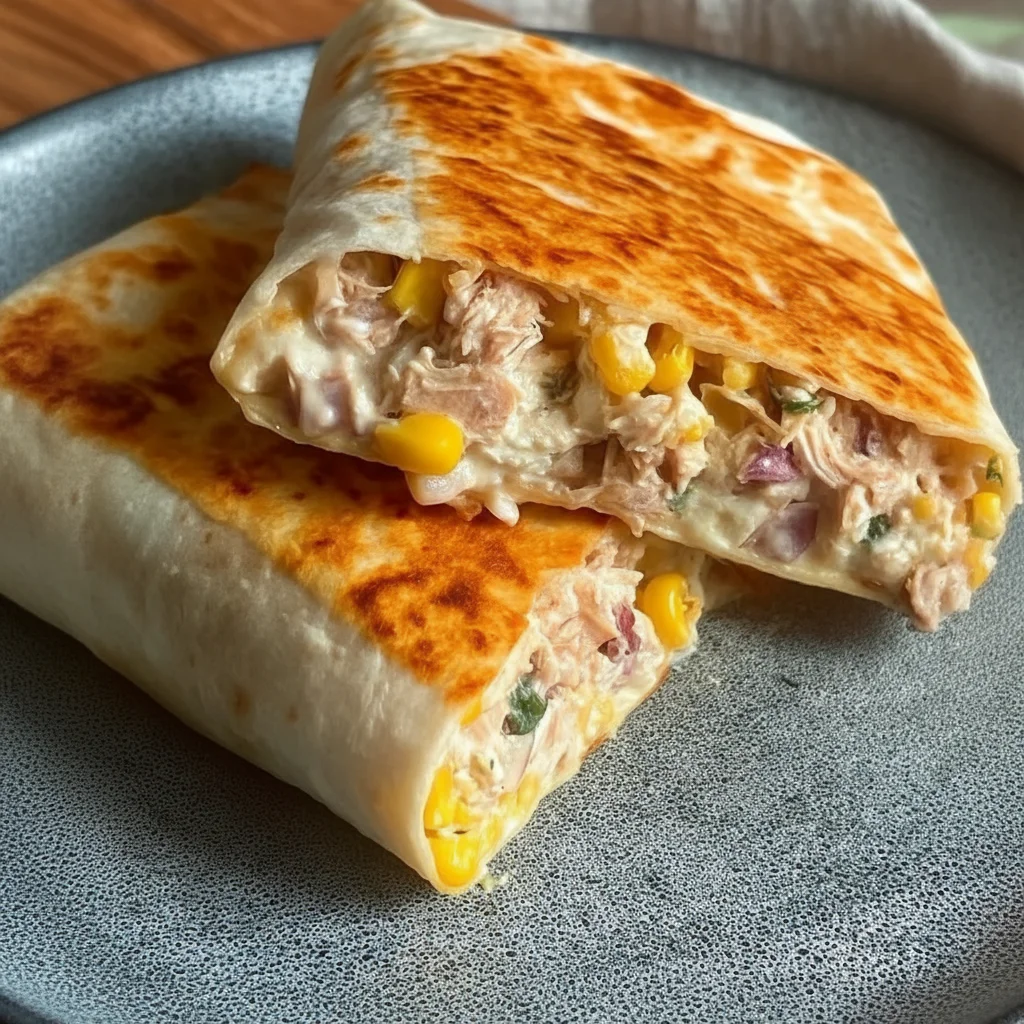
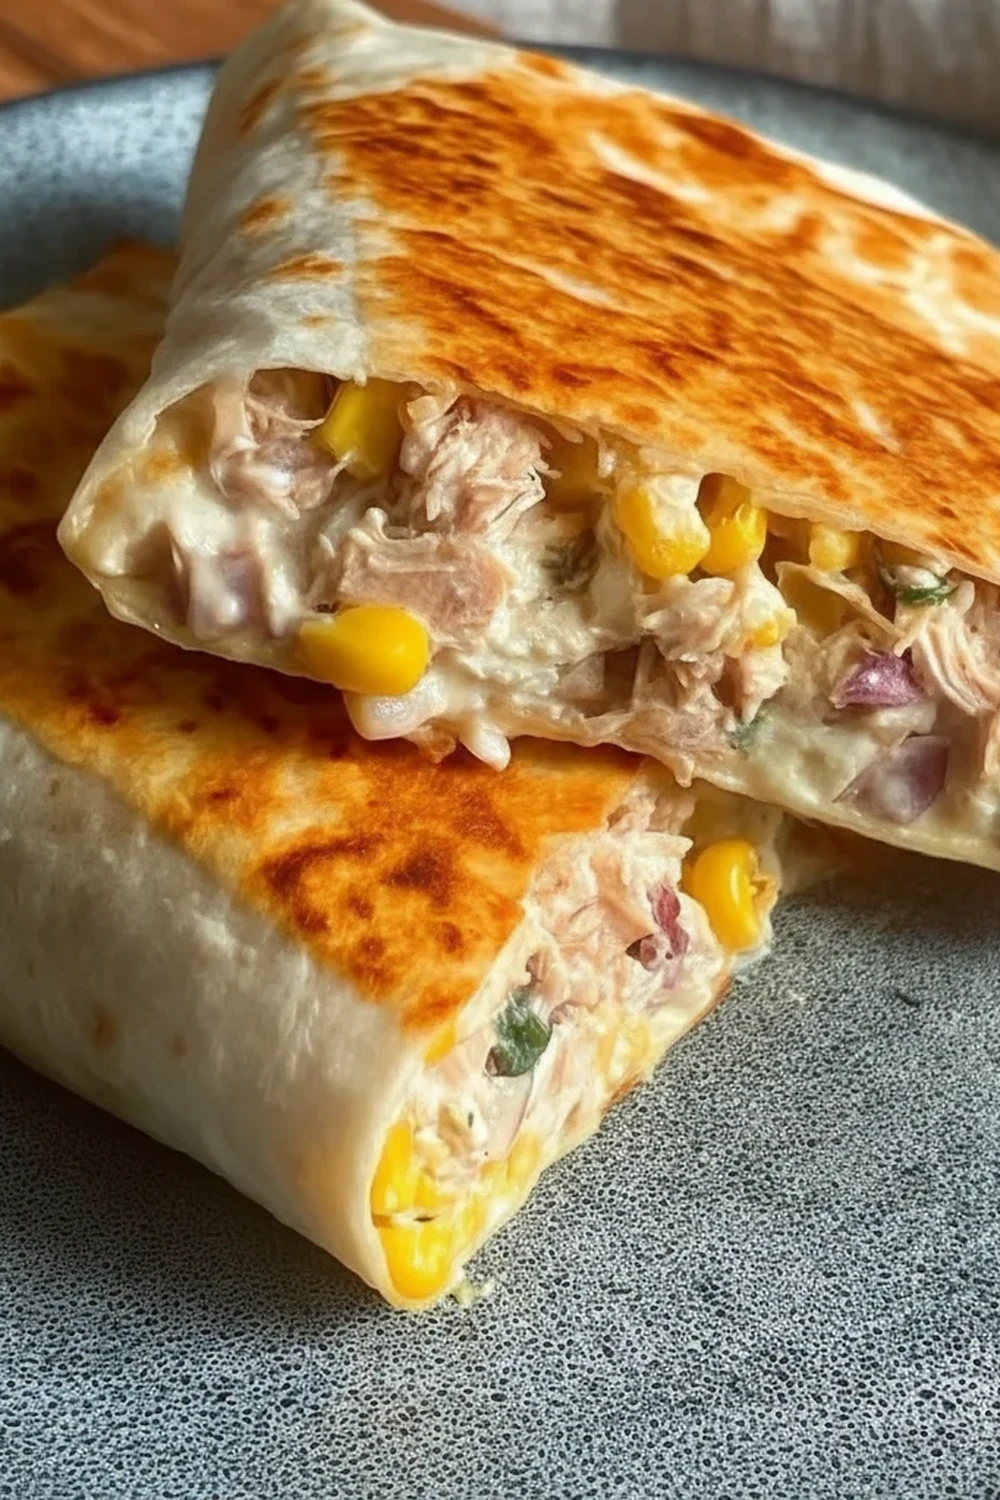
What makes this version stand out is the wrap itself. When toasted in a buttered pan, the flour tortilla becomes wonderfully crisp and golden on the outside while remaining soft and pliable on the inside. It creates the perfect vessel for the creamy, tangy tuna filling and the sharp, gooey cheddar. We’re not just putting tuna salad in a wrap here; we’re creating a sealed parcel of flavour where every component gets its moment to shine.
This recipe is ideal when you want something more exciting than a standard sandwich for your midday meal, but don’t have a lot of time to spare. It comes together in about 25 minutes and works beautifully for a working-from-home lunch, a simple weeknight dinner, or even a weekend treat. It’s hearty, flavourful, and has a satisfying crunch that will have you making it again and again.
Recipe Overview
This Tuna Melt Wrap is all about texture and balanced flavours. You get the crispy, buttery exterior of the tortilla, the rich and creamy tuna salad seasoned with sharp red onion and tangy gherkins, and a generous layer of molten cheddar cheese holding it all together. My key discovery during testing was that warming the tortilla slightly before filling makes it more pliable and less prone to tearing when you roll it tightly.
- Prep Time: 15 minutes
- Cook Time: 10 minutes
- Total Time: 25 minutes
- Servings: 2 people
- Difficulty: Easy
Why You’ll Love This Tuna Melt Wrap Recipe
- Genuine Flavour: The filling is a carefully balanced mix. Savoury flaked tuna meets creamy mayonnaise, with a sharp bite from finely diced red onion, a fresh crunch from celery, and a lovely acidic tang from chopped gherkins and a squeeze of lemon juice. The mature cheddar adds a deep, savoury note that pulls everything together.
- Ready in 25 Minutes: From gathering your ingredients to slicing the finished wrap, this entire meal is on the table in under half an hour, making it a brilliant choice for busy days.
- Flexible Recipe: This recipe is a fantastic base for customisation. You can add a handful of sweetcorn for sweetness, some capers for a briny kick, or swap the cheddar for Provolone or a spicy Monterey Jack.
- Great for a Substantial Lunch: It works wonderfully for those days when you need a proper, satisfying lunch to power you through the afternoon. It’s far more special than a simple sandwich. For a lighter meal, try our Crunchy Asian Chicken Salad with Peanut Dressing.
- Family Tested: This is a recipe that always gets compliments in my house. The combination of creamy filling and a crispy shell seems to be a universal winner, turning a simple tuna salad into something much more memorable.
Ingredients You’ll Need
For the best results, start with high-quality ingredients. I always opt for tuna packed in spring water or olive oil, as it tends to have a better texture. For the mayonnaise, a good, thick, full-fat version like Hellmann’s provides the perfect creamy base without being watery.
- 2 large (25-30cm) flour tortillas
- 1 x 185g tin of tuna in spring water, thoroughly drained
- 60g (about 4 tbsp) full-fat mayonnaise
- ¼ of a red onion, finely diced
- 1 celery stalk, finely diced
- 2 large gherkins (dill pickles), finely chopped
- 1 tbsp fresh dill, finely chopped (or 1 tsp dried)
- 1 tsp Dijon mustard
- 1 tsp fresh lemon juice
- 80g mature cheddar cheese, grated
- ¼ tsp sea salt
- ¼ tsp freshly ground black pepper
- 15g unsalted butter
Adam’s Tip: Draining the tuna properly is the most important step for avoiding a soggy wrap. After draining the liquid, I press the tuna firmly with the back of a fork against the side of a sieve to squeeze out every last drop of moisture. It makes a huge difference.
How to Make This Tuna Melt Wrap Recipe
The process is straightforward. We’ll first create the flavourful tuna filling, then carefully assemble and fold the wraps before toasting them in a pan until golden and crispy.
- Make the Tuna Filling: In a medium mixing bowl, add the thoroughly drained tuna. Use a fork to flake it into small pieces.
- Combine the Ingredients: To the bowl with the tuna, add the mayonnaise, diced red onion, celery, chopped gherkins, fresh dill, Dijon mustard, and lemon juice. Season with the salt and black pepper.
- Mix Thoroughly: Stir everything together until it’s well combined. Give it a taste and adjust the seasoning if needed. You might want a little more salt or a bigger squeeze of lemon.
- Assemble the Wrap: Lay one flour tortilla flat on your work surface. Sprinkle half of the grated cheddar cheese (40g) in a thick line down the centre of the tortilla, leaving a border of about 5cm at the top and bottom.
- Add the Filling: Spoon half of the tuna mixture evenly on top of the cheese. Don’t overfill it, or it will be difficult to roll.
- Fold the Wrap: Fold the sides of the tortilla inwards, over the edges of the filling. Then, take the bottom edge (the one closest to you) and pull it up and over the filling, tucking it in tightly. Continue to roll it away from you into a snug, compact parcel.
- Toast the Wrap: Melt half the butter (about 7g) in a large non-stick frying pan or skillet over a medium heat. Once the butter is sizzling gently, place the wrap in the pan with the seam-side facing down. I find that pressing down gently with a spatula for the first minute helps seal it perfectly.
- Cook Until Golden: Cook for 3-4 minutes on the first side, until the tortilla is a deep golden brown and crisp. Carefully flip it over and cook for another 3-4 minutes on the other side, until it’s equally golden and the cheese inside is completely melted and gooey.
- Repeat and Rest: Remove the first wrap from the pan and set it aside. Repeat the process with the remaining butter, tortilla, cheese, and tuna filling. Let the finished wraps rest on a cutting board for a minute before slicing them in half diagonally to serve.
Tips From My Kitchen
- Temperature Control: Keep your pan on a consistent medium heat. If the heat is too high, the tortilla will burn before the cheese has a chance to melt. If it’s too low, the wrap will absorb too much butter and become greasy rather than crisp.
- The Secret Step: Always start by toasting the wrap with the seam-side down. I learned that the initial blast of heat helps to fuse the fold together, effectively sealing the wrap so it doesn’t unroll when you flip it. It’s a small detail that ensures a neat finish.
- Make-Ahead: The tuna salad filling can be prepared up to 24 hours in advance. Keep it in an airtight container in the refrigerator. Assemble and toast the wraps just before you plan to eat them for the best crispy texture.
- Storage: If you have any leftovers, wrap them tightly in foil or place them in an airtight container. They will keep in the fridge for up to 2 days. To reheat, place them in a dry frying pan over a medium-low heat for a few minutes per side, or use an air fryer at 180°C for 3-5 minutes to bring back the crunch.
Equipment You’ll Need
You don’t need any fancy gadgets for this recipe, just a few kitchen basics.
- Large frying pan or skillet (non-stick is best)
- Sharp knife and cutting board
- Medium mixing bowl
- Spatula
Common Mistakes to Avoid
- Overfilling the Wrap: It’s tempting to pack in as much filling as possible, but this is the fastest way to have it burst in the pan. Stick to the quantities in the recipe for a wrap that holds together perfectly.
- Using a Watery Filling: As mentioned in my tip, failing to drain the tuna properly will result in a soggy filling that can make the tortilla weak and prone to tearing. Squeeze out that excess liquid!
- Slicing Too Soon: Let the wrap rest for at least 60 seconds after taking it out of the pan. This allows the molten cheese to set up just slightly, so when you slice into it, you get a clean cut rather than a cheesy explosion all over your board.
Delicious Variations to Try
Once you’ve mastered the basic recipe, feel free to get creative with the filling and flavours.
- Spicy Tuna Melt Wrap: Add half a finely chopped red chilli or a teaspoon of sriracha to the tuna mixture for a welcome kick of heat.
- Vegetarian ‘Tuna’ Wrap: For a plant-based version, substitute the tuna with a can of mashed chickpeas. They provide a similar texture and work wonderfully with the other filling ingredients. Just be sure to use a vegan mayonnaise and a good-quality vegan cheese.
- Different Protein: This recipe works just as well with other proteins. Try using tinned salmon, shredded rotisserie chicken, or even leftover pulled pork for a completely different but equally delicious meal. It reminds me a bit of the filling in our Parmesan Garlic Beef Bowtie Pasta, just adapted for a wrap!
What to Serve With Your Tuna Melt Wrap
While this wrap is a complete meal on its own, a few simple sides can elevate it further.
- A Crisp Green Salad: The freshness of a simple salad provides a great contrast to the rich, cheesy wrap. A Classic House Salad with Red Wine Vinaigrette is an excellent choice.
- Salted Crisps: For that ultimate lunch experience, a handful of good quality, ready-salted potato crisps on the side adds extra crunch and satisfaction.
- Soup: On a colder day, pairing half a wrap with a bowl of simple tomato soup is wonderfully comforting.
- Drink Pairing: A cold, crisp lager or a glass of chilled Sauvignon Blanc has the acidity to cut through the richness of the mayonnaise and cheese.
Frequently Asked Questions
Tuna Melt Wrap Recipe
Ingredients
Method
- Make the Tuna Filling: In a medium mixing bowl, add the thoroughly drained tuna. Use a fork to flake it into small pieces.
- Combine the Ingredients: To the bowl with the tuna, add the mayonnaise, diced red onion, celery, chopped gherkins, fresh dill, Dijon mustard, and lemon juice. Season with the salt and black pepper.
- Mix Thoroughly: Stir everything together until it's well combined. Give it a taste and adjust the seasoning if needed. You might want a little more salt or a bigger squeeze of lemon.
- Assemble the Wrap: Lay one flour tortilla flat on your work surface. Sprinkle half of the grated cheddar cheese (40g) in a thick line down the centre of the tortilla, leaving a border of about 5cm at the top and bottom.
- Add the Filling: Spoon half of the tuna mixture evenly on top of the cheese. Don't overfill it, or it will be difficult to roll.
- Fold the Wrap: Fold the sides of the tortilla inwards, over the edges of the filling. Then, take the bottom edge (the one closest to you) and pull it up and over the filling, tucking it in tightly. Continue to roll it away from you into a snug, compact parcel.
- Toast the Wrap: Melt half the butter (about 7g) in a large non-stick frying pan or skillet over a medium heat. Once the butter is sizzling gently, place the wrap in the pan with the seam-side facing down. I find that pressing down gently with a spatula for the first minute helps seal it perfectly.
- Cook Until Golden: Cook for 3-4 minutes on the first side, until the tortilla is a deep golden brown and crisp. Carefully flip it over and cook for another 3-4 minutes on the other side, until it’s equally golden and the cheese inside is completely melted and gooey.
- Repeat and Rest: Remove the first wrap from the pan and set it aside. Repeat the process with the remaining butter, tortilla, cheese, and tuna filling. Let the finished wraps rest on a cutting board for a minute before slicing them in half diagonally to serve.
Notes
This Tuna Melt Wrap Recipe really is a game-changer for a quick and satisfying meal. The crispy exterior, the creamy and flavour-packed filling, and that all-important river of melted cheese make it a truly top-tier lunch. I hope you enjoy it as much as I do. Let me know how you get on in the comments below – I’d love to hear if you’ve tried any fun variations!
Happy cooking,
Adam Henderson