
Mint Oreo Cheesecake Bars Recipe Dessert
There are some flavour combinations that are just meant to be, and for me, mint and chocolate sit right at the top of that list. There’s something about the cool, refreshing lift of mint against the deep, rich flavour of dark chocolate that just works. This no-bake Mint Oreo Cheesecake Bars recipe dessert is the ultimate celebration of that pairing. I stumbled upon this combination by accident one weekend when I had a packet of mint Oreos and a block of cream cheese to use up, and it’s been a hit ever since.
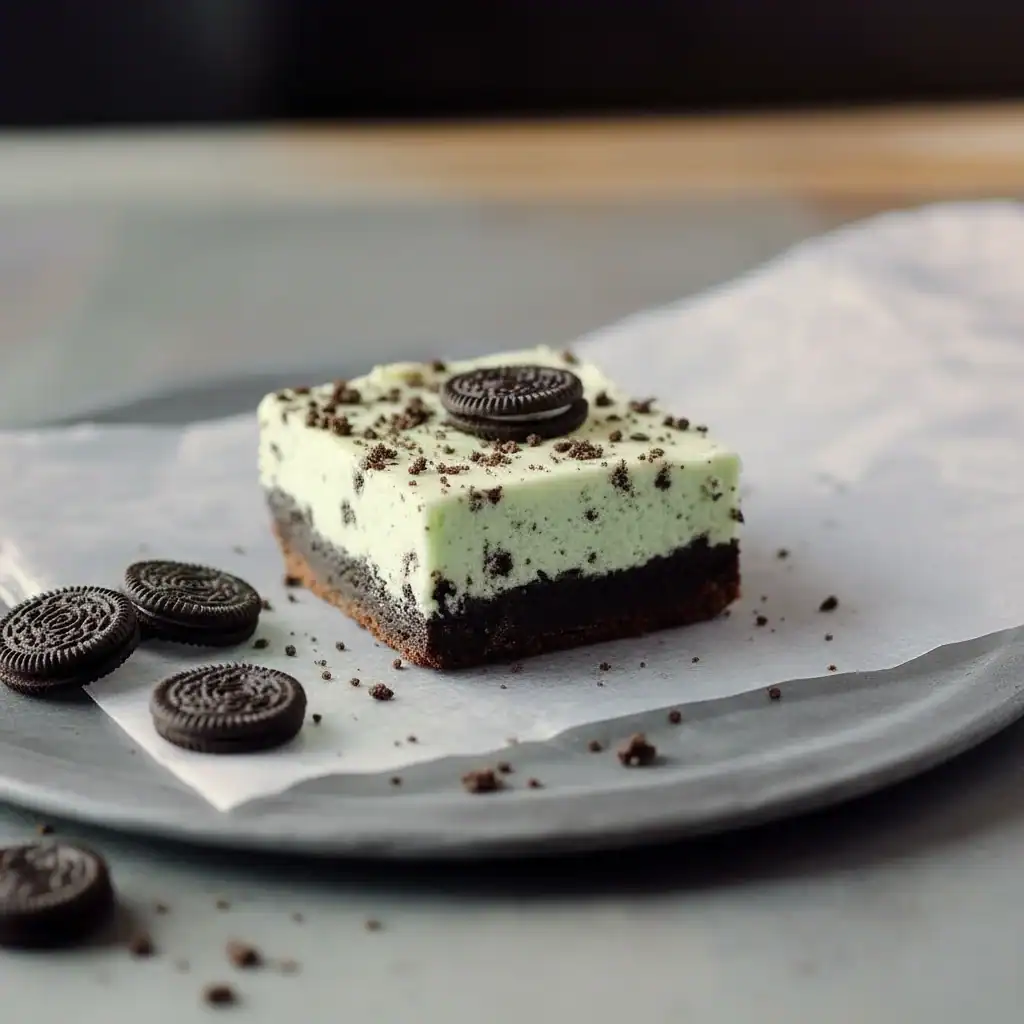
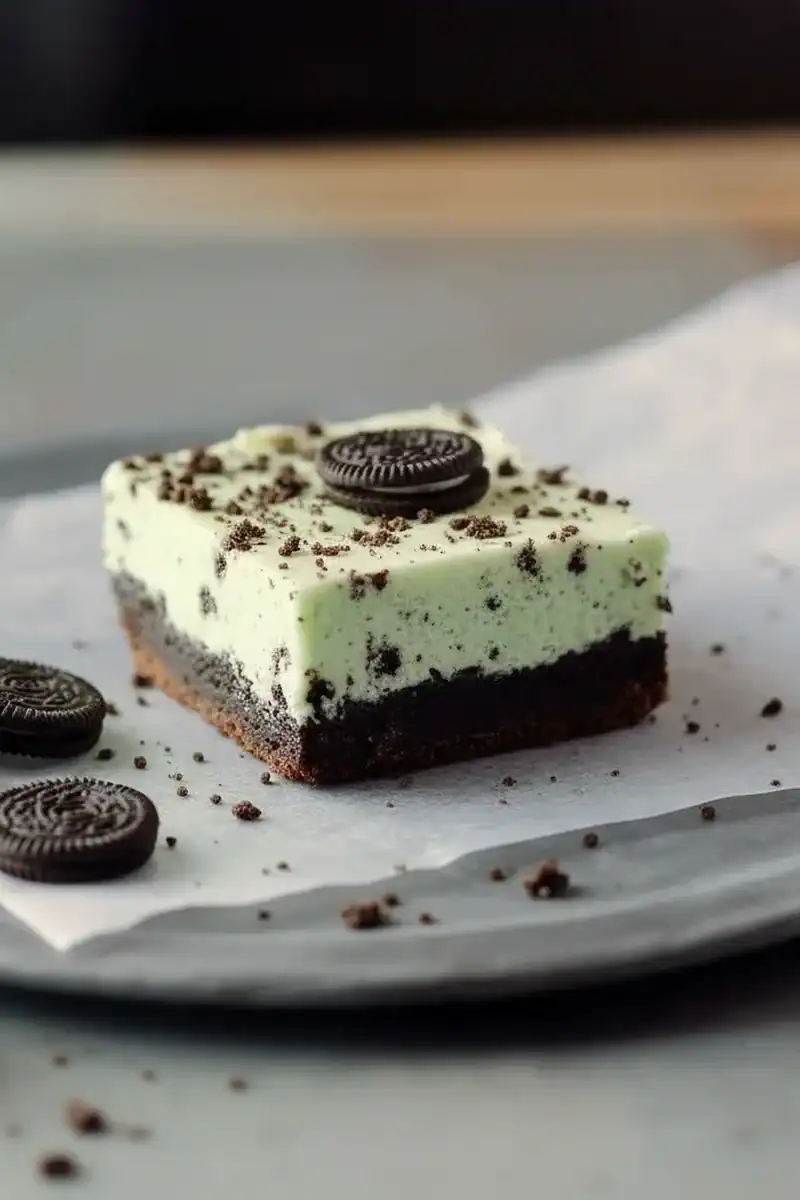
Imagine a deep, dark, crunchy chocolate biscuit base, made from those iconic Oreo biscuits, packed down to create a firm, satisfying foundation. On top of that sits a lusciously smooth and creamy cheesecake filling, infused with a distinct but not overpowering peppermint essence. We stud the filling with more chunky Oreo pieces, so you get little pockets of chocolatey crunch in every single bite. The final result is a wonderfully textured, deeply satisfying dessert that looks as good as it tastes, with its pale green hue and dark, crumbly topping.
It’s the kind of dessert that works beautifully for a weekend treat, a casual get-together with friends, or when you just need a truly satisfying sweet fix. Because it’s a no-bake recipe, it’s brilliant for warmer days when you don’t want the oven on, and it’s a fantastic make-ahead option that takes the stress out of entertaining. Everyone seems to love this, from the kids to the grandparents, making it a real family favourite in my house.
Recipe Overview
This straightforward no-bake cheesecake recipe delivers a rich, creamy texture with a refreshing minty lift, all balanced by the iconic crunch of Oreo biscuits. The process involves creating a simple pressed biscuit base, whipping up a smooth cream cheese filling, and then letting the fridge do all the hard work. I’ve tested this with both peppermint and spearmint extract; I find peppermint gives it that classic, clean after-dinner mint flavour which we much prefer.
- Prep Time: 25 minutes
- Chill Time: 4 hours (minimum)
- Total Time: 4 hours 25 minutes
- Servings: 12 bars
- Difficulty: Easy
Why You’ll Love These Mint Oreo Cheesecake Bars
- Genuine Flavour: The filling isn’t just sweet; it’s got a proper cooling peppermint kick that cuts through the richness of the cream cheese, perfectly complementing the deep cocoa flavour of the Oreo base.
- Ready for the Fridge in Under 30 Minutes: This is a brilliant make-ahead dessert that comes together very efficiently. A little bit of prep and the rest of the time is hands-off while it sets.
- A Flexible Recipe: You can adjust the mint intensity to your liking by adding more or less extract. You could even swap the mint Oreos for the classic version and use vanilla extract for a simple cookies-and-cream variation.
- Great for Get-Togethers: As it’s served cold from the fridge, this is an ideal dessert for summer barbecues or as an impressive finish to a hearty meal like my Parmesan Garlic Beef Bowtie Pasta.
- Family Tested: My kids absolutely devour these, especially the crunchy biscuit base. They always ask if they can help crush the Oreos – it’s their favourite job!
Ingredients You’ll Need
We’re using simple, readily available ingredients here. For the cream cheese, I always recommend using full-fat Philadelphia. Its firmness provides the best structure for a no-bake cheesecake, ensuring it sets properly without any gelatine. Using a low-fat version can result in a filling that’s a bit too soft.
- For the Biscuit Base:
- 300g Mint Oreo biscuits (about 2 packets)
- 100g unsalted butter, melted
- For the Cheesecake Filling:
- 500g full-fat cream cheese, at room temperature
- 150g icing sugar, sifted
- 1 tsp peppermint extract
- A few drops of green food colouring gel (optional)
- 300ml double cream, cold
- 100g Mint Oreo biscuits, roughly chopped
- For the Topping (Optional):
- 50g dark chocolate, melted
- A few extra Oreo biscuits, crushed
Adam’s Tip: Make sure your double cream is very cold, straight from the fridge. This helps it whip to stiff peaks much faster, giving your cheesecake filling that light, airy texture we’re after. A chilled bowl helps, too!
How to Make This Mint Oreo Cheesecake Bars Recipe Dessert
The process is wonderfully methodical. We’ll make the base first, let it firm up in the fridge or freezer, and then whip together the glorious minty filling. The key is to be gentle when folding the whipped cream in to keep the mixture light and airy.
- First, prepare your tin. Line a 20cm (8-inch) square baking tin with parchment paper, leaving some overhang on the sides to make it easier to lift the cheesecake out later.
- To make the base, place the 300g of Oreo biscuits into a food processor and blitz until they form fine crumbs. If you don’t have a food processor, pop them in a sturdy plastic bag and bash them with a rolling pin.
- Transfer the biscuit crumbs to a medium bowl and pour over the 100g of melted unsalted butter. Mix thoroughly with a fork until all the crumbs are evenly moistened and resemble wet sand.
- Tip the mixture into your prepared tin and press it down firmly and evenly using the back of a spoon or the base of a glass. I find that giving the base a quick 10-minute chill in the freezer while I make the filling really helps it set up perfectly.
- In a large bowl, using a stand mixer or an electric hand mixer, beat the 500g of room temperature cream cheese and 150g of sifted icing sugar together on a medium speed until completely smooth and free of lumps. This should take about 2-3 minutes.
- Add the 1 tsp of peppermint extract and a few drops of green food colouring, if using. Mix again until the colour is evenly distributed. Start with a tiny amount of colouring; you can always add more.
- In a separate, clean bowl, whip the 300ml of cold double cream until it holds stiff peaks. Be careful not to over-whip it. You can find excellent guidance on how to whip cream correctly if you’re unsure.
- Gently fold the whipped cream into the cream cheese mixture in two stages using a spatula. This keeps the filling light. Once combined, fold in the 100g of roughly chopped Oreos.
- Spoon the cheesecake filling over the chilled biscuit base and spread it out into an even layer with your spatula.
- Cover the tin with cling film and place it in the fridge to set for at least 4 hours, though overnight is even better for a really firm set.
- Once set, use the parchment paper overhang to lift the cheesecake from the tin. Drizzle with melted dark chocolate and sprinkle over extra crushed Oreos before slicing into 12 bars to serve.
Tips From My Kitchen
- Temperature Control: Room temperature cream cheese is non-negotiable for a smooth filling. If it’s too cold, it will be lumpy and won’t blend nicely with the icing sugar. I take mine out of the fridge at least an hour before I start.
- The Secret Step: I learned that folding the whipped cream into the cream cheese mixture in two stages is the key to a light texture. Fold in the first half to loosen and lighten the cheese base, then gently fold in the second half to keep as much air in the mixture as possible.
- Make-Ahead Magic: This is a fantastic dessert to make a day in advance. The flavours actually meld together and improve overnight in the fridge. Just hold off on adding the final chocolate drizzle and crushed Oreo topping until you’re ready to serve to keep it crunchy.
- Storage Savvy: Store any leftover bars in an airtight container in the fridge for up to 4 days. They are also surprisingly freezer-friendly! Wrap them individually in cling film and then a layer of foil, and they’ll keep well for up to a month. Just thaw in the fridge for a few hours before eating.
Equipment You’ll Need
- Stand mixer or electric hand mixer
- 20cm (8-inch) square baking tin
- Parchment paper
- Food processor (or a rolling pin and a zip-top bag)
- Spatula
- Large mixing bowls
What to Serve With These Mint Oreo Cheesecake Bars
These cookie bars are wonderfully rich and satisfying all on their own, but a few simple additions can complement them beautifully. The goal is to balance the creamy, minty richness.
- Dark Chocolate Sorbet: A small scoop of intensely flavoured dark chocolate sorbet creates a fantastic temperature and texture contrast that really enhances the chocolate notes in the dessert.
- Fresh Berries: A simple bowl of fresh raspberries or sliced strawberries provides a sharp, fruity counterpoint that cuts through the creaminess of the cheesecake filling.
- A Good Cup of Coffee: A freshly brewed espresso or a strong Americano works beautifully. The slight bitterness of the coffee is the perfect partner for the sweet, minty dessert.
Frequently Asked Questions
Mint Oreo Cheesecake Bars
Ingredients
Method
- First, prepare your tin. Line a 20cm (8-inch) square baking tin with parchment paper, leaving some overhang on the sides to make it easier to lift the cheesecake out later.
- To make the base, place the 300g of Oreo biscuits into a food processor and blitz until they form fine crumbs. If you don't have a food processor, pop them in a sturdy plastic bag and bash them with a rolling pin.
- Transfer the biscuit crumbs to a medium bowl and pour over the 100g of melted unsalted butter. Mix thoroughly with a fork until all the crumbs are evenly moistened and resemble wet sand.
- Tip the mixture into your prepared tin and press it down firmly and evenly using the back of a spoon or the base of a glass. I find that giving the base a quick 10-minute chill in the freezer while I make the filling really helps it set up perfectly.
- In a large bowl, using a stand mixer or an electric hand mixer, beat the 500g of room temperature cream cheese and 150g of sifted icing sugar together on a medium speed until completely smooth and free of lumps. This should take about 2-3 minutes.
- Add the 1 tsp of peppermint extract and a few drops of green food colouring, if using. Mix again until the colour is evenly distributed. Start with a tiny amount of colouring; you can always add more.
- In a separate, clean bowl, whip the 300ml of cold double cream until it holds stiff peaks. Be careful not to over-whip it. You can find excellent guidance on how to whip cream correctly if you're unsure.
- Gently fold the whipped cream into the cream cheese mixture in two stages using a spatula. This keeps the filling light. Once combined, fold in the 100g of roughly chopped Oreos.
- Spoon the cheesecake filling over the chilled biscuit base and spread it out into an even layer with your spatula.
- Cover the tin with cling film and place it in the fridge to set for at least 4 hours, though overnight is even better for a really firm set.
- Once set, use the parchment paper overhang to lift the cheesecake from the tin. Drizzle with melted dark chocolate and sprinkle over extra crushed Oreos before slicing into 12 bars to serve.
Notes
I really hope you give this Mint Oreo Cheesecake Bars recipe a go. It’s a straightforward, no-fuss dessert that always delivers on flavour and satisfaction. If you find yourself with overripe bananas after your shopping trip, you might also like my wonderfully simple Moist Banana Bread Recipe. Let me know how you get on with these cheesecake bars in the comments below – I love hearing about your kitchen adventures! Happy baking,
Adam


