
No-Bake Mini Banana Cream Pies Recipe
There are some desserts that just feel like a hug in a bowl, and for me, a classic banana cream pie is right at the top of that list. This recipe, however, takes that comforting, nostalgic flavour and turns it into something a bit more special: individual, no-bake mini banana cream pies. They have all the creamy, dreamy texture of the original but in a delightful single-serving portion that looks brilliant when you bring it to the table. Friends always ask me for this recipe after trying it at dinner parties, and I’m always happy to share it.
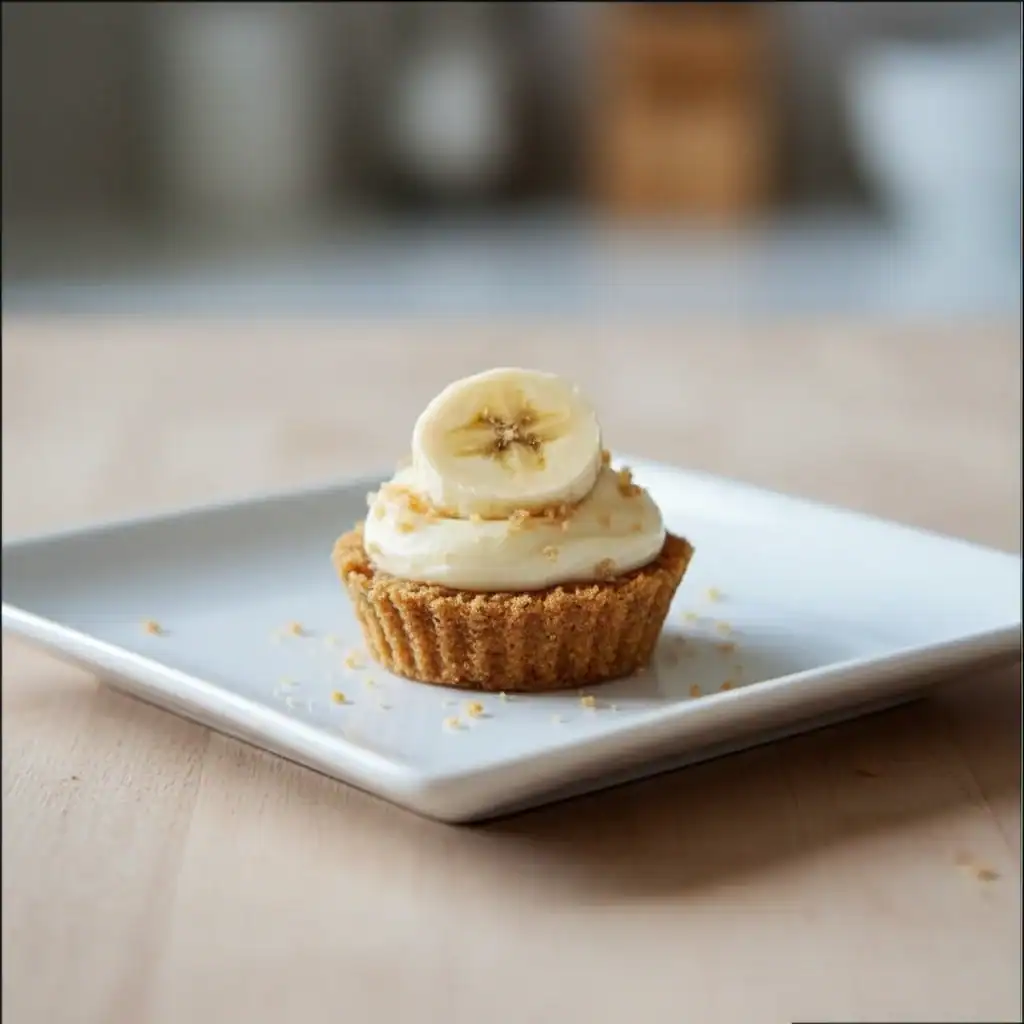
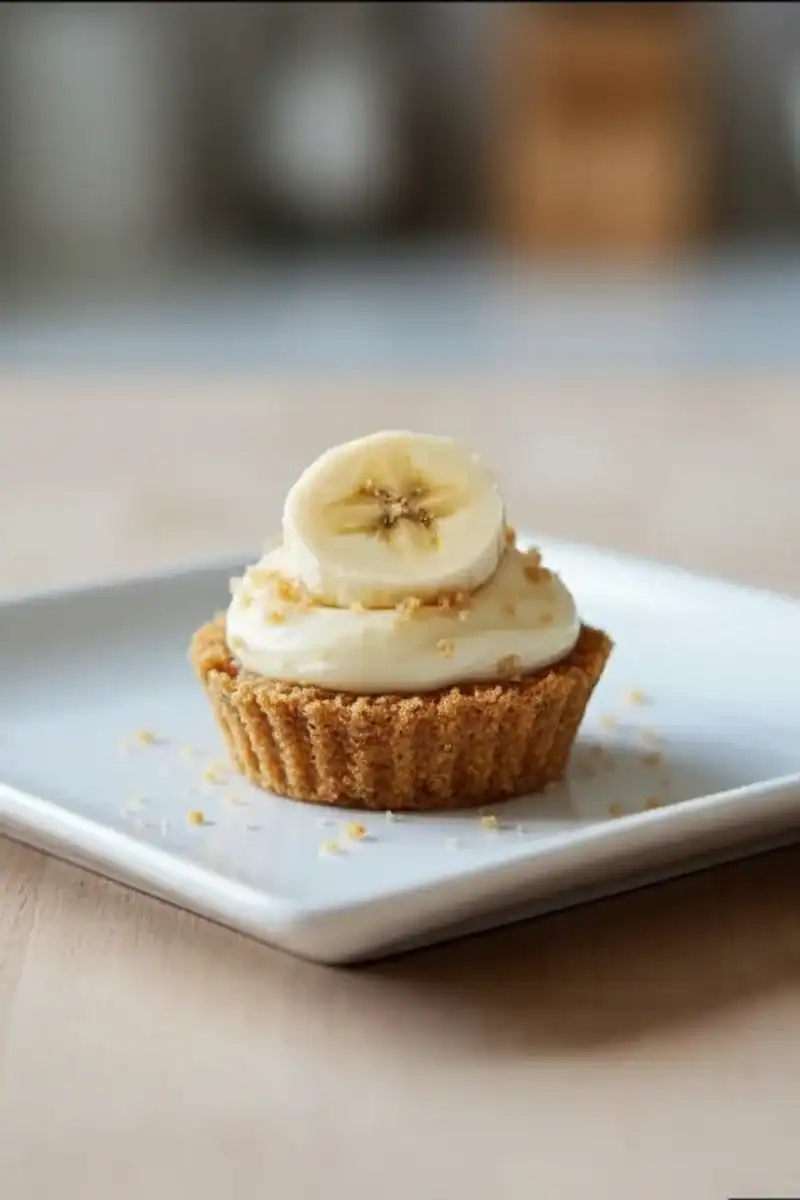
What we’re creating here is a dessert that balances textures beautifully. It starts with a buttery, crunchy biscuit base, which gives way to a layer of sweet, ripe banana slices. On top of that, we pile a rich, silky smooth cream cheese and vanilla filling that’s much lighter than you’d expect. It’s not quite a cheesecake, not quite a banana pudding, but a glorious hybrid of the two. A final swirl of freshly whipped cream and a dusting of chocolate shavings finish it off.
These mini pies are a fantastic solution when you need a stunning dessert without switching on the oven. They work beautifully for summer gatherings, afternoon tea, or simply when you want to treat the family after a Sunday roast. Because they are individually portioned, serving is a breeze – no messy slicing required. Let’s get started.
Recipe Overview
This No-Bake Mini Banana Cream Pies recipe layers a crunchy digestive biscuit base with fresh banana and a light, vanilla-spiked cream cheese filling. I’ve found that letting the cream cheese soften to true room temperature is non-negotiable; it’s the only way to get that perfectly smooth, lump-free texture in the filling.
- Prep Time: 25 minutes
- Cook Time: 0 minutes
- Total Time: 4 hours 25 minutes (including chilling)
- Servings: 8 mini pies
- Difficulty: Easy
Why You’ll Love This No-Bake Mini Banana Cream Pies Recipe
- Genuine Flavour: We use real, ripe bananas and pure vanilla extract for a flavour that is authentic and not artificially sweet. The slight tang from the cream cheese cuts through the richness, creating a wonderfully balanced bite.
- Ready in Under 30 Minutes: The active preparation time is remarkably short. The entire assembly process comes together in about 25 minutes, then the fridge does the rest of the work.
- Flexible Recipe: You can easily adapt the base using different biscuits. I’ve tried it with Hobnobs for a more oaty texture and even ginger nuts for a bit of spice. You could also fold in a tablespoon of Biscoff spread into the filling for a caramel note.
- Great for Entertaining: These individual portions look so elegant and are incredibly practical for serving at a dinner party or BBQ. No slicing, no fuss, just grab and go.
- Family Tested: My kids absolutely adore these. They love helping to crush the biscuits (in a sealed bag, of course!) and are always first in line to ‘test’ the finished product.
Ingredients You’ll Need
For the best results, use full-fat dairy products. The fat content is crucial for the structure and rich flavour of the filling. I always use Philadelphia full-fat cream cheese as I find its texture is consistently smooth and reliable for no-bake desserts.
- For the Biscuit Base:
- 200g digestive biscuits
- 100g unsalted butter, melted
- For the Cream Filling:
- 250g full-fat cream cheese, at room temperature
- 75g icing sugar, sifted
- 1 tsp pure vanilla extract
- 300ml double cream, cold
- For the Assembly & Topping:
- 3 large, ripe bananas
- 1 tbsp lemon juice
- 200ml double cream, cold (for topping)
- 1 tbsp icing sugar (for topping)
- 25g dark chocolate, for shaving
Adam’s Tip: Make sure your bananas are ripe with a few brown spots. This is where the deepest, sweetest banana flavour comes from. Underripe, green-tinged bananas will be starchy and lack the necessary sweetness, which can really affect the final dessert. If you have extra, they are great for my classic Banana Bread Recipe.
How to Make No-Bake Mini Banana Cream Pies
The process is all about simple layers. We’ll create the base, whip up the filling, and then assemble everything before letting it chill to perfection. Having your ingredients prepped and ready makes this go very smoothly.
- Prepare the Base: Place the digestive biscuits in a food processor and blitz into fine crumbs. Alternatively, put them in a sturdy food bag and crush them with a rolling pin. Pour in the melted butter and mix until the crumbs are evenly coated and resemble wet sand.
- Form the Mini Crusts: Divide the biscuit mixture evenly between 8 small dessert glasses or individual tartlet tins (about 8-10cm in diameter). Press the crumbs down firmly and evenly across the bottom and slightly up the sides to form a crust. I find using the back of a teaspoon helps to get a neat finish. Place them in the fridge to set for at least 30 minutes.
- Make the Creamy Filling: In a large bowl, beat the room-temperature cream cheese with an electric mixer until it’s completely smooth and free of lumps. Sift in the 75g of icing sugar and add the vanilla extract. Beat again until everything is well combined.
- Whip the Cream: In a separate, clean bowl, whip the 300ml of cold double cream until it forms stiff peaks. Be careful not to overwhip it, or it will become grainy.
- Combine the Filling: Gently fold about a third of the whipped cream into the cream cheese mixture to lighten it. Then, add the remaining whipped cream and fold carefully with a spatula until just combined. You want to keep as much air in the mixture as possible.
- Prepare the Bananas: Slice two of the bananas into thin rounds. Toss them gently in the lemon juice – this will stop them from browning.
- Assemble the Pies: Remove the chilled bases from the fridge. Arrange a single layer of banana slices over the biscuit base in each glass or tin. Spoon or pipe the cream cheese filling evenly over the bananas, smoothing the top.
- Chill to Set: Place the assembled mini pies back in the fridge and chill for at least 4 hours, or preferably overnight. This step is crucial for the filling to set properly.
- Decorate and Serve: Just before serving, whip the remaining 200ml of double cream with 1 tbsp of icing sugar until soft peaks form. Pipe or spoon a dollop onto each pie. Garnish with a few fresh slices from the third banana and some dark chocolate shavings. Serve immediately.
Tips From My Kitchen
- Temperature Control: The double cream for both the filling and the topping must be very cold, straight from the fridge. This helps it whip up quickly and hold its shape. Conversely, the cream cheese must be at room temperature to avoid a lumpy filling.
- The Secret Step: I learned that adding a tiny pinch of salt to the biscuit base really enhances the flavour and balances the sweetness of the filling. It’s a small detail that makes a noticeable difference.
- Make-Ahead: You can make these pies a day in advance. Assemble them completely but leave off the final whipped cream topping and garnish. Cover them loosely with cling film in the fridge, then decorate just before you plan to serve them for the freshest look.
- Storage: Leftovers will keep in the fridge for up to 2 days. The bananas inside may soften and brown slightly over time, so they are definitely best enjoyed on the day they are served or the day after.
Equipment You’ll Need
You don’t need much in the way of specialist equipment for this recipe, which is part of its charm.
- Food processor (or a rolling pin and a food bag)
- Electric hand mixer or stand mixer
- Large mixing bowls
- 8 individual dessert glasses or mini tartlet tins
- Spatula
- Piping bag and star nozzle (optional, for decoration)
Common Mistakes to Avoid
- Using Warm Cream: Attempting to whip double cream that isn’t properly chilled is a recipe for disaster. It will struggle to thicken and won’t form stable peaks, resulting in a runny filling. Always use it straight from the fridge.
- Lumpy Cream Cheese: If your cream cheese is too cold, it will never beat into a smooth consistency, leaving you with small lumps in your filling. Let it sit on the counter for at least an hour before you begin.
- Skipping the Chill Time: I know it’s tempting to dig in, but the 4-hour chilling period is non-negotiable. It allows the filling to firm up properly, so the pies hold their shape and the flavours have a chance to meld together.
What to Serve With No-Bake Mini Banana Cream Pies
These little pies are a complete dessert on their own, but a few simple additions can complement them nicely.
- A Drizzle of Sauce: A light drizzle of salted caramel or a rich chocolate sauce over the top just before serving adds another layer of indulgence.
- Fresh Berries: A small handful of fresh raspberries or blueberries on the side provides a lovely, sharp contrast to the creamy sweetness of the pie.
- Coffee or Tea: This dessert pairs wonderfully with a strong cup of coffee or a classic English breakfast tea to cut through the richness.
Frequently Asked Questions
No-Bake Mini Banana Cream Pies Recipe
Ingredients
Method
- Prepare the Base: Place the digestive biscuits in a food processor and blitz into fine crumbs. Alternatively, put them in a sturdy food bag and crush them with a rolling pin. Pour in the melted butter and mix until the crumbs are evenly coated and resemble wet sand.
- Form the Mini Crusts: Divide the biscuit mixture evenly between 8 small dessert glasses or individual tartlet tins (about 8-10cm in diameter). Press the crumbs down firmly and evenly across the bottom and slightly up the sides to form a crust. I find using the back of a teaspoon helps to get a neat finish. Place them in the fridge to set for at least 30 minutes.
- Make the Creamy Filling: In a large bowl, beat the room-temperature cream cheese with an electric mixer until it's completely smooth and free of lumps. Sift in the 75g of icing sugar and add the vanilla extract. Beat again until everything is well combined.
- Whip the Cream: In a separate, clean bowl, whip the 300ml of cold double cream until it forms stiff peaks. Be careful not to overwhip it, or it will become grainy.
- Combine the Filling: Gently fold about a third of the whipped cream into the cream cheese mixture to lighten it. Then, add the remaining whipped cream and fold carefully with a spatula until just combined. You want to keep as much air in the mixture as possible.
- Prepare the Bananas: Slice two of the bananas into thin rounds. Toss them gently in the lemon juice – this will stop them from browning.
- Assemble the Pies: Remove the chilled bases from the fridge. Arrange a single layer of banana slices over the biscuit base in each glass or tin. Spoon or pipe the cream cheese filling evenly over the bananas, smoothing the top.
- Chill to Set: Place the assembled mini pies back in the fridge and chill for at least 4 hours, or preferably overnight. This step is crucial for the filling to set properly.
- Decorate and Serve: Just before serving, whip the remaining 200ml of double cream with 1 tbsp of icing sugar until soft peaks form. Pipe or spoon a dollop onto each pie. Garnish with a few fresh slices from the third banana and some dark chocolate shavings. Serve immediately.
Notes
I hope you enjoy making this No-Bake Mini Banana Cream Pies recipe as much as my family and I do. They are such a satisfying treat to make and share. If you do give them a go, I’d love it if you left a comment below to let me know how they turned out for you. Happy dessert making!
All the best,
Adam Henderson


