
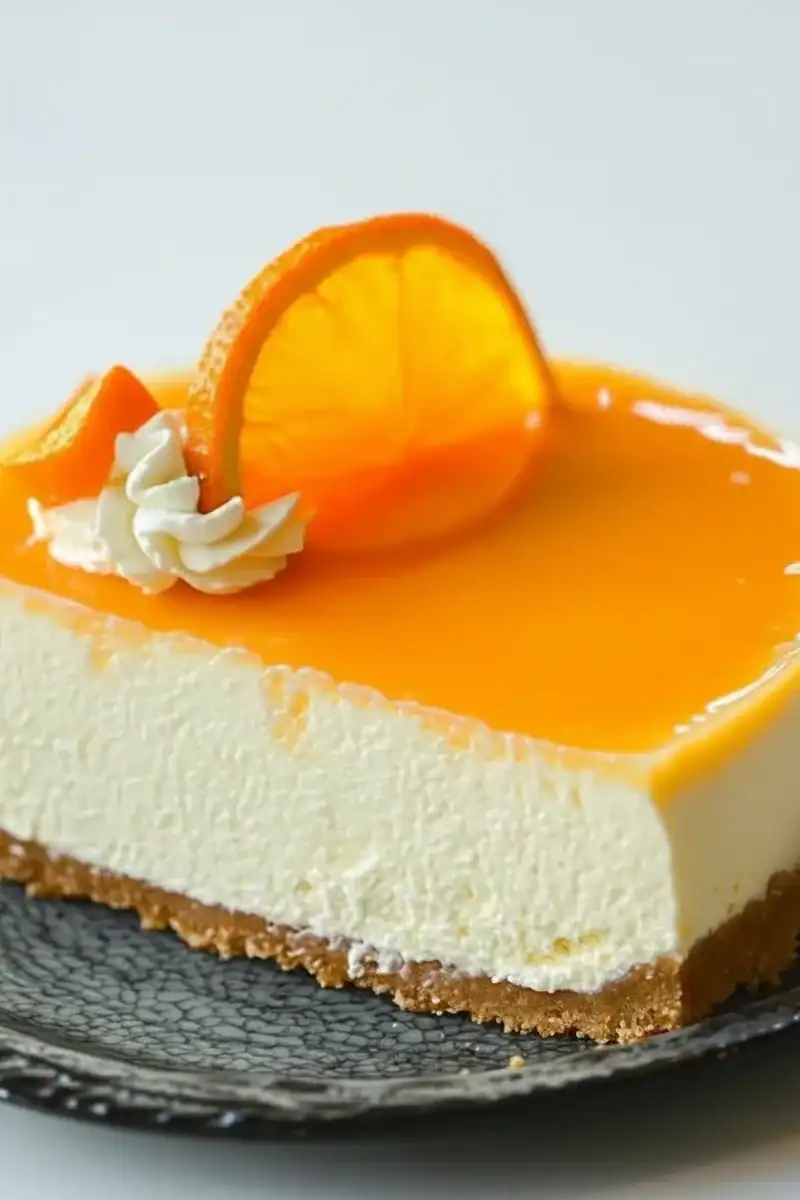
No Bake Orange Creamsicle Cheesecake Recipe
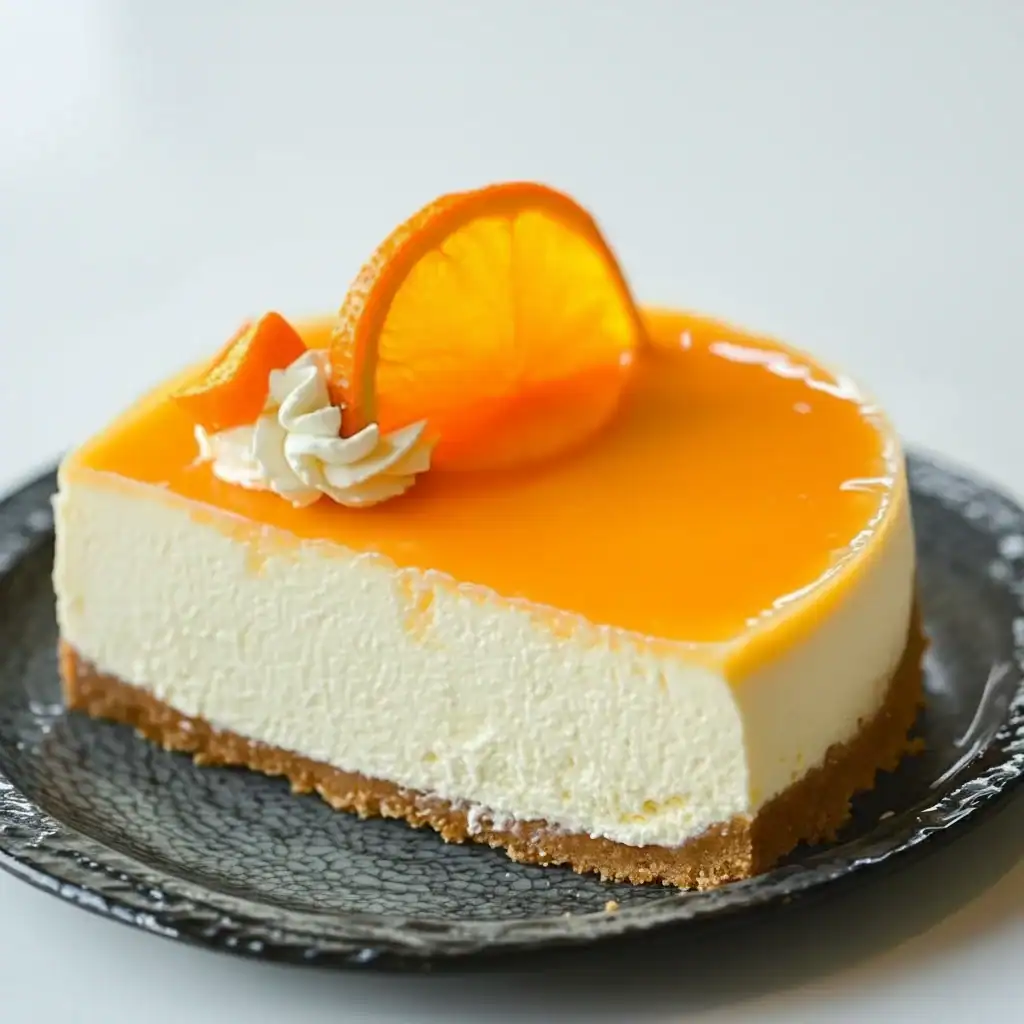
There are some flavours that instantly transport you back to childhood, and for me, the combination of zesty orange and creamy vanilla is one of them. It’s the taste of long summer holidays, of chasing the ice cream van down the street for a classic Creamsicle lolly. This No Bake Orange Creamsicle Cheesecake Recipe captures that exact nostalgic magic in a smooth, luscious dessert that requires absolutely no time in the oven. It’s become one of my go-to recipes for gatherings because everyone seems to love it, and the bright, sunny appearance makes it a real centrepiece.
What we’re creating here is a dessert that balances vibrant citrus with rich, creamy sweetness. The base is a buttery, crisp Digestive biscuit crust that provides the perfect textural contrast to the velvety filling. The filling itself is where the magic happens: full-fat cream cheese, whipped double cream, a hint of high-quality vanilla, and a generous amount of fresh orange zest and juice. I stumbled upon this combination by accident one summer when I had a surplus of oranges, and it’s been a hit ever since. This is the ultimate summer pie, ideal for garden parties, barbecues, or any time you need a stunning dessert without heating up your kitchen.
Recipe Overview
This no bake orange creamsicle cheesecake is all about celebrating simple, fresh flavours. The texture is incredibly light and mousse-like, thanks to the way we whip the cream separately before folding it in. The orange flavour is bright and natural, not artificial, because we use both the zest and the juice. When I first tested this, I found that letting it set overnight yields the best results; the flavours have more time to meld together and the cheesecake firms up beautifully for clean, perfect slices.
- Prep Time: 25 minutes
- Chill Time: 6 hours (or overnight)
- Total Time: 6 hours 25 minutes
- Servings: 10-12 people
- Difficulty: Easy
Why You’ll Love This No Bake Orange Creamsicle Cheesecake Recipe
- Genuine Creamsicle Flavour: We use the zest of two whole oranges and a splash of pure vanilla extract. This combination creates a deep, authentic flavour that perfectly mimics the classic ice lolly, with bright citrus notes and a mellow, creamy background.
- Comes Together in 25 Minutes: The active preparation time is remarkably short. Once you’ve made the base and the filling, the refrigerator takes over, making it a brilliant make-ahead dessert.
- A Versatile Recipe: Don’t have Digestive biscuits? Gingernuts add a wonderful warmth that complements the orange. You can also swap the orange for lime or lemon for a different citrus twist.
- Works Beautifully for Gatherings: Because it needs to be made in advance, it’s a stress-free option for when you have guests. It’s a stunning dessert to present after a summer meal, like my Crunchy Asian Chicken Salad with Peanut Dressing.
- Family Tested and Approved: My entire family adores this cheesecake. The kids love the sweet, familiar flavour, and the adults appreciate that it isn’t overly sugary. It always gets compliments at our family get-togethers.
Ingredients You’ll Need
For the best results, use full-fat ingredients. Low-fat cream cheese and cream contain more water and will not set properly, leading to a disappointingly soft cheesecake. I always reach for Philadelphia Original Full Fat Cream Cheese; its firm texture provides a reliable structure every time.
- For the Biscuit Base:
- 300g Digestive biscuits
- 150g unsalted butter, melted
- For the Orange Cheesecake Filling:
- 600g full-fat cream cheese, at room temperature
- 150g icing sugar, sifted
- 1 tsp pure vanilla extract
- Zest of 2 large oranges
- 60ml fresh orange juice (from one of the zested oranges)
- 300ml double cream, cold
- A few drops of orange food colouring (optional, for a more vibrant colour)
- For the Garnish (Optional):
- Whipped cream
- Fresh orange slices or zest curls
Adam’s Tip: Make sure your cream cheese is genuinely at room temperature. If it’s too cold, it won’t blend smoothly with the sugar and you’ll end up with small, unappealing lumps in your final cheesecake filling.
How to Make This No Bake Orange Creamsicle Cheesecake
The process for this orange cheesecake is straightforward. The key is to work with the right temperature ingredients and to be gentle when folding, which ensures a light, airy final texture. We’ll make the base first, let it chill, and then prepare the creamy filling.
- Prepare the Tin: Lightly grease a 23cm (9-inch) springform cake tin and line the base with a circle of baking parchment. This makes it much easier to release the cheesecake later.
- Make the Biscuit Base: Place the Digestive biscuits in a food processor and blitz until they form fine crumbs. Alternatively, put them in a sealed plastic bag and bash them with a rolling pin. Pour the crumbs into a bowl.
- Combine and Press the Base: Pour the melted butter over the biscuit crumbs and mix with a fork until all the crumbs are evenly coated and the mixture resembles wet sand. Tip this into your prepared tin and press it down firmly and evenly with the back of a spoon or the base of a glass. I find using a glass gives me the most even, compact layer. Place the tin in the fridge to chill for at least 30 minutes while you make the filling.
- Start the Filling: In a large mixing bowl, beat the room-temperature cream cheese with an electric mixer (or a whisk and some effort) until it is smooth and there are no lumps. Sift in the icing sugar and beat again until fully combined and creamy.
- Add the Flavour: Add the vanilla extract, orange zest, and fresh orange juice to the cream cheese mixture. Beat on a low speed until everything is just incorporated. If you’re using food colouring, add a few drops now and mix until you have a pale, even orange hue.
- Whip the Cream: In a separate, clean bowl, whip the cold double cream until it forms stiff peaks. You should be able to turn the whisk upside down without the cream falling off. For a great guide on this technique, Serious Eats explains the stages of whipped cream perfectly.
- Fold Everything Together: Gently fold the whipped cream into the orange cream cheese mixture using a large metal spoon or spatula. Use a light touch, cutting and folding until just combined. Over-mixing will knock the air out, resulting in a denser cheesecake.
- Assemble and Chill: Spoon the filling over your chilled biscuit base and smooth the top with an offset spatula or the back of a spoon. Cover the tin with cling film, making sure it doesn’t touch the surface of the cheesecake.
- The Final Chill: Place the cheesecake in the fridge to set for at least 6 hours, but overnight is even better for the firmest set. Once set, run a thin knife around the edge before releasing the springform collar. Garnish with whipped cream and orange slices just before serving.
Tips From My Kitchen
- Room Temperature is Key: For the smoothest possible filling, your cream cheese must be at room temperature. Cold cream cheese is the number one cause of lumpy cheesecake. I take mine out of the fridge a good hour before I start.
- The Secret to Lightness: I learned that the best way to achieve a light, mousse-like texture is to whip the double cream to stiff peaks in a separate bowl *before* folding it in. Simply mixing liquid cream into the cheese base will give you a much denser result.
- Make-Ahead Magic: This creamsicle dessert is ideal for making ahead. You can prepare it completely up to two days in advance. Just keep it covered in the fridge and add any fresh garnishes right before you plan to serve it.
- Storing Leftovers: Leftover cheesecake will keep well in the fridge for up to 3 days. Cover it tightly with cling film or store it in an airtight container to prevent it from absorbing any fridge odours. It doesn’t freeze well as the texture can become grainy upon thawing.
Common Mistakes to Avoid
- A Greasy, Leaky Base: This often happens if the melted butter is too hot when mixed with the biscuit crumbs. It can separate out and create a greasy layer. Let your melted butter cool for a few minutes before you mix it in to prevent this.
- A Filling That Doesn’t Set: The most common reasons for a no bake recipe failing to set are using low-fat ingredients or not whipping the double cream sufficiently. The fat content and the air whipped into the stiff cream are what provide the structure. Don’t be tempted to cut corners here!
- Skipping the Full Chill Time: Patience is a virtue with no-bake cheesecakes. It needs that minimum of 6 hours for the fats to solidify and the structure to become stable. Cutting it too early will result in a soft, messy slice. Trust the process and give it the time it needs.
What to Serve With This Orange Cheesecake
This creamsicle pie is a delight on its own, but a few simple accompaniments can elevate it further. The creaminess works well with contrasting textures and flavours.
- Fresh Berries: A small bowl of fresh raspberries or blueberries provides a lovely tartness that cuts through the richness of the cheesecake.
- White Chocolate Shavings: The sweet, milky flavour of white chocolate is a natural partner for orange. Use a vegetable peeler to shave curls from a bar of good-quality white chocolate over the top before serving.
- A Glass of Prosecco: For an adult pairing, the crisp bubbles and slight sweetness of a good Prosecco work beautifully with the creamy citrus dessert. For a non-alcoholic option, a sparkling elderflower pressé is equally refreshing.
Frequently Asked Questions
No Bake Orange Creamsicle Cheesecake
Ingredients
Method
- Prepare the Tin: Lightly grease a 23cm (9-inch) springform cake tin and line the base with a circle of baking parchment. This makes it much easier to release the cheesecake later.
- Make the Biscuit Base: Place the Digestive biscuits in a food processor and blitz until they form fine crumbs. Alternatively, put them in a sealed plastic bag and bash them with a rolling pin. Pour the crumbs into a bowl.
- Combine and Press the Base: Pour the melted butter over the biscuit crumbs and mix with a fork until all the crumbs are evenly coated and the mixture resembles wet sand. Tip this into your prepared tin and press it down firmly and evenly with the back of a spoon or the base of a glass. I find using a glass gives me the most even, compact layer. Place the tin in the fridge to chill for at least 30 minutes while you make the filling.
- Start the Filling: In a large mixing bowl, beat the room-temperature cream cheese with an electric mixer (or a whisk and some effort) until it is smooth and there are no lumps. Sift in the icing sugar and beat again until fully combined and creamy.
- Add the Flavour: Add the vanilla extract, orange zest, and fresh orange juice to the cream cheese mixture. Beat on a low speed until everything is just incorporated. If you're using food colouring, add a few drops now and mix until you have a pale, even orange hue.
- Whip the Cream: In a separate, clean bowl, whip the cold double cream until it forms stiff peaks. You should be able to turn the whisk upside down without the cream falling off. For a great guide on this technique, Serious Eats explains the stages of whipped cream perfectly.
- Fold Everything Together: Gently fold the whipped cream into the orange cream cheese mixture using a large metal spoon or spatula. Use a light touch, cutting and folding until just combined. Over-mixing will knock the air out, resulting in a denser cheesecake.
- Assemble and Chill: Spoon the filling over your chilled biscuit base and smooth the top with an offset spatula or the back of a spoon. Cover the tin with cling film, making sure it doesn't touch the surface of the cheesecake.
- The Final Chill: Place the cheesecake in the fridge to set for at least 6 hours, but overnight is even better for the firmest set. Once set, run a thin knife around the edge before releasing the springform collar. Garnish with whipped cream and orange slices just before serving.
Notes
I really hope you enjoy making this No Bake Orange Creamsicle Cheesecake. It’s a simple, elegant dessert that brings a little bit of sunshine to the table, no matter the weather. It always feels like a special treat, yet it’s so straightforward to put together. If you do give it a try, I’d love to hear how it turned out. Please leave a comment and a rating below to share your experience! Happy baking (or, in this case, chilling)!
– Adam Henderson
You might also like these recipes
Bake This Sweet Tart Cranberry Crumble Bars Recipe
There’s a particular magic to a traybake, something comforting and…
Light Japanese Strawberry Sponge Cake Recipe
There’s something uniquely special about a Japanese Strawberry Sponge Cake….
Cinnamon Sugar Air Fryer Churro Bites Recipe
There’s something universally comforting about the scent of cinnamon and…
Bake This Bright Lemon Raspberry Cookies Recipe
There’s something truly special about a biscuit tin filled with…
Bake This Gourmet Brownie Cookies Recipe Today
There are moments in the kitchen that call for a…
Try This Layered Black Forest Trifle Recipe
There’s something wonderfully nostalgic about a trifle. It’s a dessert…


