Rosemary Pan Seared Red Snapper
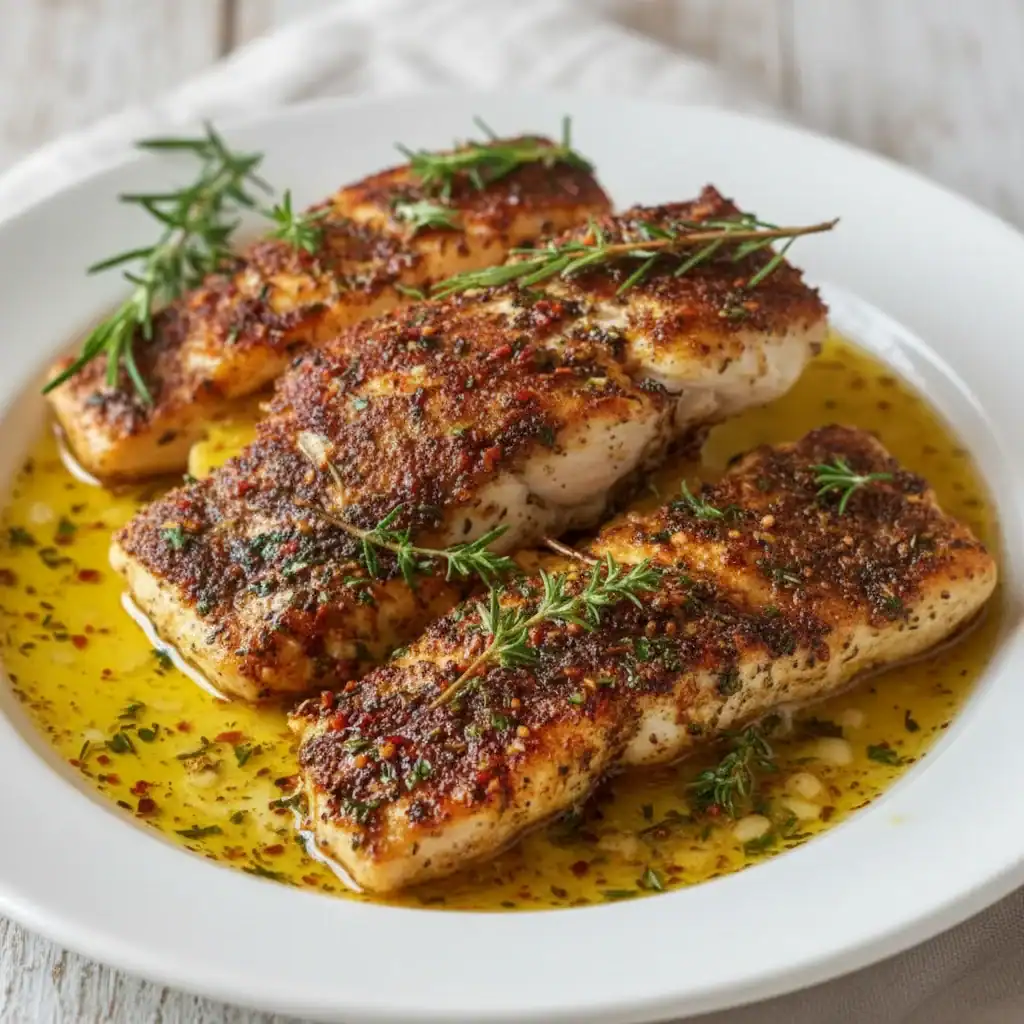
There’s something uniquely satisfying about a perfectly cooked piece of fish. The sound it makes as it hits a hot, oiled pan; the sight of the skin turning a deep, burnished gold; and the final, glorious moment when you take that first bite—crisp skin giving way to moist, flaky flesh. This Pan Seared Red Snapper recipe is the embodiment of that satisfaction. It’s a dish that feels elegant and special, yet it comes together so straightforwardly that it has become a staple in my kitchen. Friends always ask me for this recipe after trying it at dinner parties, and I’m thrilled to be sharing it with you today.
What we’re creating here is more than just cooked fish. We are carefully building layers of texture and flavour. The red snapper itself, a fish known for its subtly sweet taste and firm texture, is the star. We treat it with respect, allowing its natural qualities to shine. The simple pan sauce, a vibrant mix of garlic, lemon, capers, and butter, doesn’t mask the fish but elevates it, adding a bright, zesty counterpoint to the richness of the seared skin. It’s a beautiful balance.
This recipe works wonderfully for a multitude of occasions. It’s refined enough for a date night or a special Saturday seafood dinner, but because it’s ready in under 30 minutes, it’s also a fantastic way to elevate a simple weeknight meal. If you appreciate healthy fish recipes that don’t compromise on flavour, you are going to absolutely love this.
Recipe Overview
This recipe focuses on achieving the two most important elements of a pan-seared fish: incredibly crisp skin and perfectly cooked, tender flesh. We’ll accomplish this with a few key techniques, finishing with a classic and zesty pan sauce made right in the same skillet. When I was first testing this, I realized that getting the pan to the right temperature before the fish goes in is half the battle – don’t rush that step!
- Prep Time: 10 minutes
- Cook Time: 12 minutes
- Total Time: 22 minutes
- Servings: 2 people
- Difficulty: Easy-Medium
Why You’ll Love This Pan Seared Red Snapper
- Genuine Flavour: The natural sweetness of the red snapper is beautifully complemented by the sharp, briny capers and the bright acidity of fresh lemon, all brought together by the richness of browned butter.
- Ready in Under 30 Minutes: From fridge to table, this impressive seafood dinner is ready in about 22 minutes, making it a brilliant option for when you want something special without spending hours in the kitchen.
- A Flexible Recipe: This method works beautifully with other firm, skin-on white fish. Sea bass, bream, or even gurnard would be excellent substitutes if you can’t find red snapper.
- Great for a Special Weeknight: It’s the kind of meal that can turn an ordinary Tuesday into a memorable one. It’s also sophisticated enough to serve when you have guests over.
- Family Tested: This is a recipe I make frequently. My partner loves the contrast between the crispy skin and the soft fish, and it always gets compliments.
Ingredients You’ll Need
The quality of your ingredients, especially the fish, will make all the difference here. I always recommend visiting a trusted fishmonger and asking for thick, centre-cut fillets that are a similar size, which helps them cook evenly. Ask them to scale and pin-bone the fish for you to save a bit of time.
- 2 Red Snapper fillets, about 170g each, skin on and scaled
- 1 tbsp olive oil
- 50g unsalted butter, divided
- 2 cloves garlic, thinly sliced
- 2 tbsp capers, rinsed and drained
- 60ml dry white wine (like a Sauvignon Blanc or Pinot Grigio)
- Juice of 1/2 a large lemon
- 1 tbsp fresh parsley, finely chopped
- 1/2 tsp sea salt
- 1/4 tsp freshly ground black pepper
Adam’s Tip: Ensure your fish fillets are completely dry before you season them. I pat them thoroughly on both sides with kitchen paper. Any surface moisture will create steam in the pan and prevent that skin from getting exceptionally crispy.
How to Make Pan Seared Red Snapper
The process is straightforward. We’ll focus on getting a perfect sear on the fish first, then use the same pan to quickly build our delicious lemon-caper sauce. This method ensures all the flavourful bits left in the pan from searing the fish become the foundation of your sauce.
- Prepare the Fish: Pat the red snapper fillets completely dry with kitchen paper. Using a sharp knife, make 2-3 shallow scores across the skin of each fillet, being careful not to cut too deeply into the flesh. Season both sides generously with the sea salt and black pepper.
- Heat the Pan: Place a large, heavy-bottomed frying pan (cast iron or stainless steel work best) over a medium-high heat. Add the olive oil. You know the pan is ready when the oil shimmers slightly.
- Sear the Fish Skin-Side Down: Carefully place the fillets in the hot pan, skin-side down. Immediately, use a fish slice or flexible spatula to gently press down on each fillet for about 30 seconds. I find this simple action is crucial because it prevents the fish skin from curling up and ensures it makes full contact with the pan for an even, crispy sear.
- Cook the First Side: Let the fish cook, undisturbed, for 4-6 minutes. The timing will depend on the thickness of your fillet. You can watch the flesh turn opaque as it cooks up the side. The skin should be deep golden brown and very crisp.
- Flip and Finish Cooking: Flip the fillets over and cook for another 1-2 minutes on the flesh side, just until cooked through. The fish should be firm to the touch but still tender. Remove the fish from the pan and set aside on a warm plate.
- Start the Sauce: Reduce the heat to low-medium. Add 25g of the butter to the same pan. Once it has melted and is foaming, add the sliced garlic and cook for about 30-60 seconds until fragrant. Be careful not to let it burn.
- Deglaze the Pan: Pour in the white wine and lemon juice to deglaze the pan, scraping up any flavourful browned bits from the bottom with a wooden spoon. Let it bubble and reduce by about half, which should only take a minute or two.
- Finish the Sauce: Stir in the rinsed capers. Remove the pan from the heat and swirl in the remaining 25g of butter and the chopped fresh parsley. This will create a slightly thicker, glossy sauce.
- Serve Immediately: To serve, place a fillet on each plate, skin-side up to keep it crisp. Spoon the beautiful lemon-caper butter sauce over and around the fish. Serve at once.
Tips From My Kitchen
- Temperature Control: A common mistake is having the pan either too hot or not hot enough. Medium-high is the sweet spot. Too hot, and the skin will burn before the inside is cooked. Too cool, and the skin will stick and never get crisp. For a more detailed guide on searing, Serious Eats has a great scientific breakdown.
- The Secret Step: Don’t skip pressing the fish down when it first enters the pan. Fish proteins contract with heat, causing the fillet to curl. That initial 30-second press ensures the entire surface of the skin gets direct heat, which is the key to a uniformly crisp result.
- Make-Ahead: While the fish is best cooked right before serving, you can absolutely prep the sauce ingredients ahead of time. Have your garlic sliced, parsley chopped, and lemon juiced. It makes the final cooking process feel even faster.
- Storage: If you have any leftovers, store them in an airtight container in the refrigerator for up to two days. Reheat gently in a pan over a low heat. The skin won’t regain its original crispness, but the flavour will still be wonderful.
Equipment You’ll Need
- A large, heavy-bottomed frying pan or skillet (non-stick, stainless steel or cast iron)
- A sharp knife and cutting board
- A fish slice or flexible spatula
- Kitchen paper
Delicious Variations to Try
Once you’ve mastered the basic technique, feel free to experiment. This recipe is a fantastic canvas for other flavours.
- Spicy Version: Add a generous pinch of red pepper flakes to the pan along with the garlic to give the sauce a gentle, warming heat.
- Add Some Veg: Sauté some cherry tomatoes or asparagus spears in the pan before you make the sauce, then add them back in at the end for an all-in-one meal.
- A Creamier Sauce: For a more decadent finish, add a splash (about 50ml) of double cream to the sauce after the wine has reduced. Let it bubble for a minute until it thickens slightly.
What to Serve With Pan Seared Red Snapper
This fish pairs beautifully with a wide range of sides. You want something that will complement the delicate fish and zesty sauce without overpowering them.
- Potatoes: Simple boiled new potatoes tossed in butter and fresh mint are a classic pairing that works perfectly.
- Greens: Steamed asparagus, tenderstem broccoli, or green beans drizzled with a little olive oil provide a fresh, healthy accompaniment.
- Salad: A light, crisp green salad is an excellent choice. Our Classic House Salad with Red Wine Vinaigrette offers the perfect fresh crunch.
- Wine Pairing: A crisp, dry white wine like a Sauvignon Blanc, Pinot Grigio, or an unoaked Chardonnay is the ideal match for the lemon and caper notes in the sauce.
Frequently Asked Questions
Pan Seared Red Snapper
Ingredients
Method
- Prepare the Fish: Pat the red snapper fillets completely dry with kitchen paper. Using a sharp knife, make 2-3 shallow scores across the skin of each fillet, being careful not to cut too deeply into the flesh. Season both sides generously with the sea salt and black pepper.
- Heat the Pan: Place a large, heavy-bottomed frying pan (cast iron or stainless steel work best) over a medium-high heat. Add the olive oil. You know the pan is ready when the oil shimmers slightly.
- Sear the Fish Skin-Side Down: Carefully place the fillets in the hot pan, skin-side down. Immediately, use a fish slice or flexible spatula to gently press down on each fillet for about 30 seconds. I find this simple action is crucial because it prevents the fish skin from curling up and ensures it makes full contact with the pan for an even, crispy sear.
- Cook the First Side: Let the fish cook, undisturbed, for 4-6 minutes. The timing will depend on the thickness of your fillet. You can watch the flesh turn opaque as it cooks up the side. The skin should be deep golden brown and very crisp.
- Flip and Finish Cooking: Flip the fillets over and cook for another 1-2 minutes on the flesh side, just until cooked through. The fish should be firm to the touch but still tender. Remove the fish from the pan and set aside on a warm plate.
- Start the Sauce: Reduce the heat to low-medium. Add 25g of the butter to the same pan. Once it has melted and is foaming, add the sliced garlic and cook for about 30-60 seconds until fragrant. Be careful not to let it burn.
- Deglaze the Pan: Pour in the white wine and lemon juice to deglaze the pan, scraping up any flavourful browned bits from the bottom with a wooden spoon. Let it bubble and reduce by about half, which should only take a minute or two.
- Finish the Sauce: Stir in the rinsed capers. Remove the pan from the heat and swirl in the remaining 25g of butter and the chopped fresh parsley. This will create a slightly thicker, glossy sauce.
- Serve Immediately: To serve, place a fillet on each plate, skin-side up to keep it crisp. Spoon the beautiful lemon-caper butter sauce over and around the fish. Serve at once.
Notes
I really hope you enjoy making this Pan Seared Red Snapper. It’s a dish that proves a healthy seafood dinner can be incredibly satisfying and full of robust flavour. It’s one of my go-to recipes for a reason, and I hope it becomes one of yours too. Please let me know how you get on in the comments below – I love hearing about your experiences in the kitchen!
Happy cooking,
Adam