Homemade Chili Seasoning Spices Mix
There’s a world of difference between a chili made with a sachet of seasoning from the supermarket and one built on a truly thoughtful blend of chili seasoning spices. Those packets are often packed with salt, sugar, and anti-caking agents. A homemade spice mix, however, is pure flavour. It allows you to control the heat, the smokiness, and the deep, earthy notes that make a bowl of chili so satisfying. I’ve been making this for over 7 years, and it never disappoints; it’s the secret behind why my chili always gets compliments.
This isn’t just a random assortment of spices from the cupboard. It’s a balanced, robust blend designed to create layers of flavour. We use a combination of different chili powders for complexity, smoked paprika for a gorgeous campfire aroma, and a secret ingredient or two that adds a background richness you can’t quite put your finger on. The result is a deep, savoury, and warming foundation for any chili recipe.
This homemade seasoning is ideal for anyone who wants to elevate their cooking without a huge amount of effort. It works wonderfully for batch cooking, as you can make a large jar and have it ready to go for months. It transforms a simple weeknight meal into something genuinely special. It’s also a great starting point; once you’ve made the base recipe, you can start to tweak it and create your own signature blend.
Recipe Overview
This recipe creates a rich, smoky, and deeply savoury chili seasoning spice mix. The flavour is complex, with mild background heat and earthy undertones from cumin and oregano, lifted by the subtle sweetness of two types of paprika. After testing this recipe five times, I finally got it just right by adding a touch of ancho chili for its fruity notes and a little cocoa powder for unparalleled depth.
- Prep Time: 10 minutes
- Cook Time: 0 minutes
- Total Time: 10 minutes
- Servings: Makes approx. 170g (enough for 4-5 large batches of chili)
- Difficulty: Easy
Why You’ll Love This Chili Seasoning Spices Blend
- Genuine Flavour: You get a pure, unadulterated taste. The blend is built on a base of mild chili powder, deepened with smoky chipotle and fruity ancho chili. There are no fillers, just a robust and authentic spice mix that tastes like it was made with care.
- Ready in 10 Minutes: It takes less than 10 minutes to measure and mix these spices together. That small investment of time pays off massively in the final dish, saving you from relying on store-bought packets.
- Flexible Recipe: You are in complete control. If you love heat, double the chipotle powder. For an even smokier profile, add an extra teaspoon of smoked paprika. You can easily adjust the salt to your personal preference.
- Great for Meal Prep: I always make a double or triple batch of this chili seasoning. Having a large jar in the cupboard means a flavourful dinner is always within reach on a busy Tuesday night.
- Family Tested: The first time I swapped our usual chili seasoning for this homemade version, my family noticed immediately. They couldn’t pinpoint exactly what had changed, just that the chili tasted richer and more complex.
Ingredients You’ll Need
The quality of your spices really matters here. I try to buy them from shops with a high turnover to ensure they are as fresh as possible. For the smoked paprika, I always reach for a La Chinata tin; its flavour is consistently excellent. The combination of these specific powders is what gives the blend its signature character.
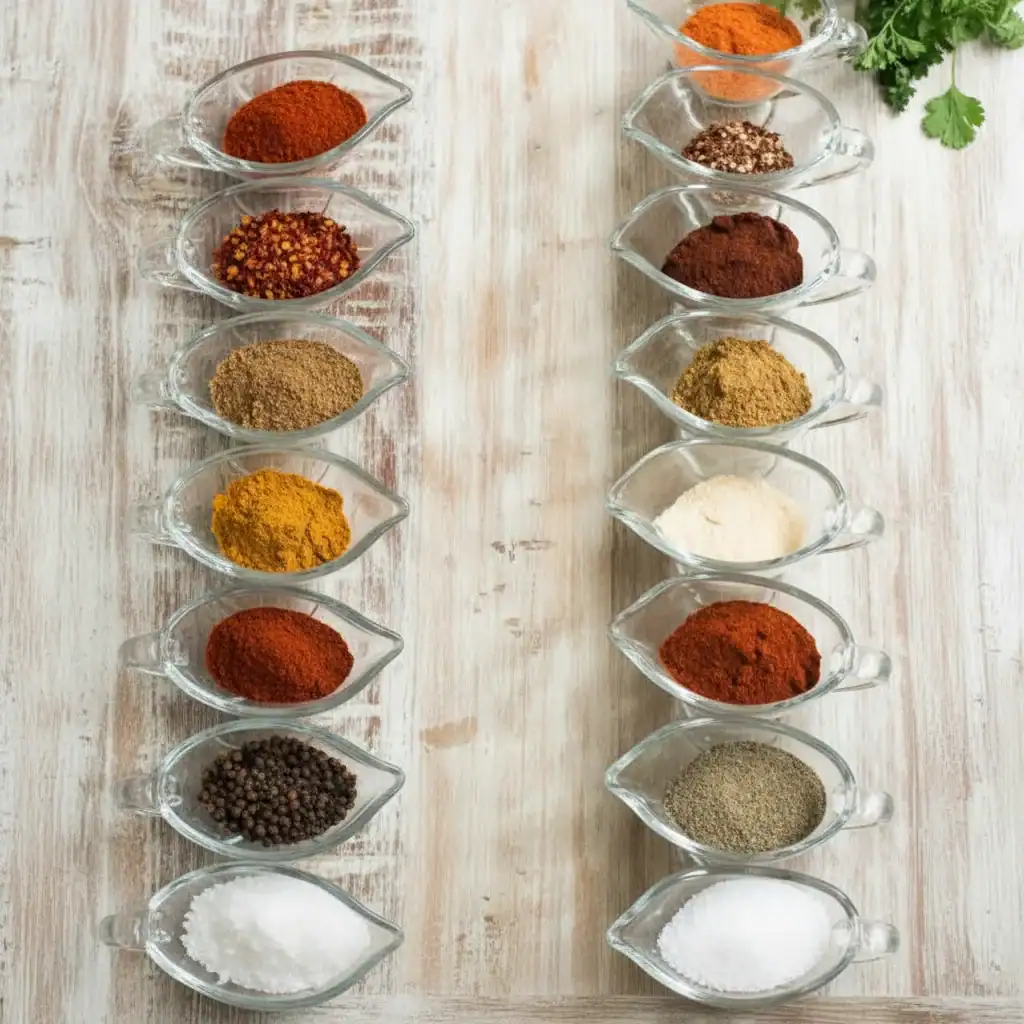
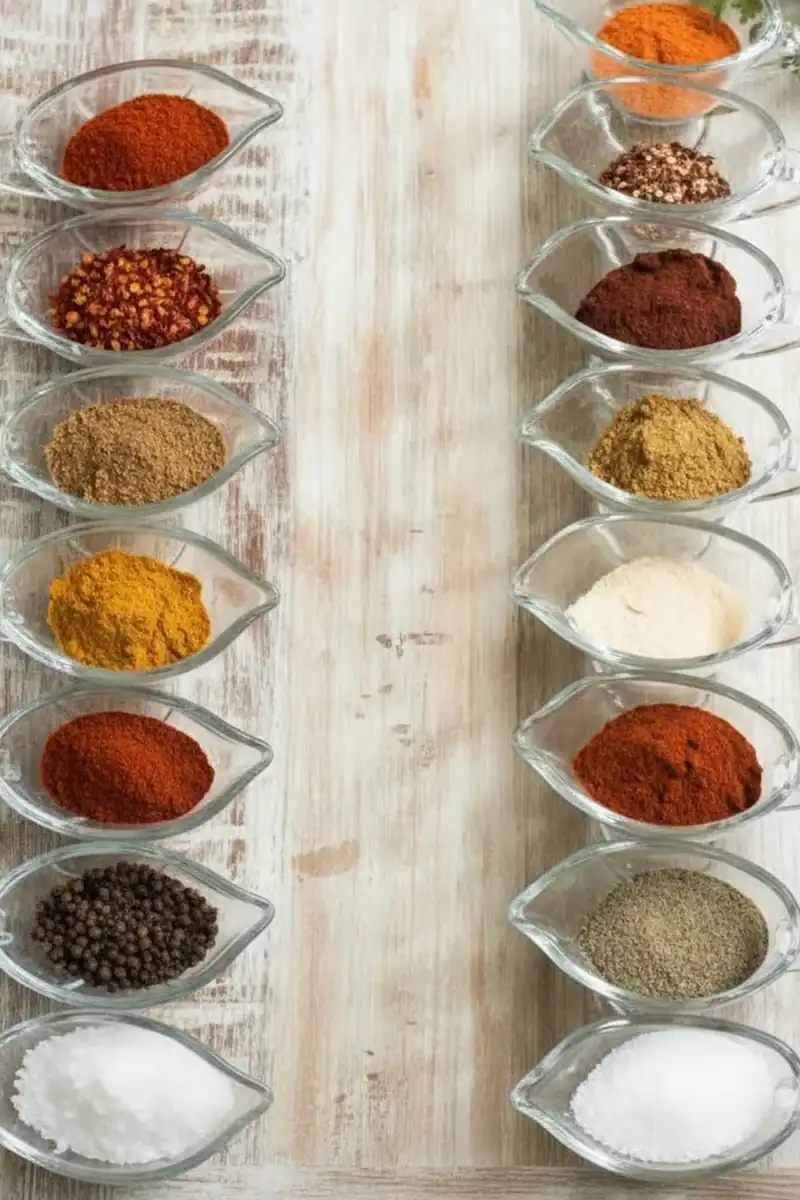
- 6 tbsp (60g) mild chili powder
- 2 tbsp (20g) ground cumin
- 1 tbsp (10g) smoked paprika
- 1 tbsp (10g) ancho chili powder
- 2 tsp (6g) chipotle powder
- 2 tsp (6g) dried oregano
- 2 tsp (8g) garlic powder
- 2 tsp (8g) onion powder
- 1 tsp (4g) ground coriander
- 1 tsp (3g) unsweetened cocoa powder
- 1 tsp (6g) fine sea salt
- 1 tsp (3g) freshly ground black pepper
Adam’s Tip: For the most vibrant flavour, buy whole cumin seeds. Toast them in a dry pan for 1-2 minutes until fragrant, let them cool, and then grind them yourself in a spice grinder or with a pestle and mortar. It makes a noticeable difference.
How to Make These Chili Seasoning Spices
The process is incredibly straightforward. The main goal is to ensure all the different spices are mixed together so thoroughly that every spoonful you take from the jar has the perfect balance of flavours. A simple whisk does the job beautifully.
- Gather Your Spices: Measure out all 12 ingredients into a medium-sized mixing bowl. Having everything ready before you start mixing prevents any mistakes.
- Check for Clumps: Some spices, particularly onion and garlic powder, can form small clumps. Use the back of a spoon or a fork to gently break these up against the side of the bowl before you start mixing.
- Whisk Thoroughly: Using a small wire whisk, mix the spices together for a good 1-2 minutes. I find that lifting the spices up and letting them fall back into the bowl as you whisk helps to aerate and combine them evenly. You’re looking for a uniform colour and texture throughout the blend.
- Let it Settle: Let the spice blend sit for a minute before transferring it. This allows any fine dust to settle so you don’t breathe it in.
- Store Properly: Carefully funnel the finished chili seasoning into a clean, dry, airtight glass jar. A jam jar or a dedicated spice jar works perfectly.
- Label and Date: Always label your homemade spice mixes with the name and the date you made them. This helps you keep track of freshness. It will be at its best within 6 months.
Tips From My Kitchen
- Bloom Your Spices: When you make your chili, don’t just dump the seasoning into the liquid. After you’ve browned your mince and softened your onions, add the chili seasoning directly to the pan with a little oil and cook for 1 minute, stirring constantly. This technique, called blooming, awakens the oils in the spices and dramatically deepens their flavour.
- The Secret Step: The teaspoon of cocoa powder is non-negotiable for me. I learned that it doesn’t make the chili taste of chocolate; instead, it adds an incredible, savoury depth and a lovely dark colour. It complements the smoky notes of the chipotle and paprika in a way that is just magical.
- Make-Ahead: This recipe is designed to be made ahead. I recommend making a big batch that will last you for several months. It’s a fantastic gift for any food-loving friends, too. Just pop it in a nice jar with a handwritten label.
- Storage: To keep your chili seasoning spices vibrant, store the jar in a cool, dark place like a kitchen cupboard or pantry. Direct sunlight and heat will cause the flavours and colours to fade much more quickly. It should last for up to 6 months, though it’s so good, you’ll likely use it up faster.
Equipment You’ll Need
- Medium mixing bowl
- Measuring spoons
- Small whisk or fork
- Airtight glass jar (approx. 200-250ml capacity)
- Small frying pan (optional, for toasting whole spices)
Delicious Variations to Try
One of the best things about making your own spice mix is tailoring it to your exact taste. Here are a few variations I’ve enjoyed over the years:
- Extra Spicy Version: For those who like a serious kick, increase the chipotle powder to 1 full tablespoon or add 1-2 teaspoons of cayenne pepper to the mix.
- Smokier Blend: If you adore that smoky flavour, increase the smoked paprika to 2 tablespoons and reduce the regular mild chili powder by one. This gives a deep, barbecue-like undertone.
- Lower Sodium Option: Simply omit the salt from the blend itself. This allows you to control the seasoning in your final dish, which is ideal if you’re using salted stock or other salty ingredients. You can then salt the chili to taste during cooking.
How to Use Your Homemade Chili Seasoning
This blend is incredibly versatile. While it’s designed for chili, its balanced, savoury profile works beautifully in many other dishes. Here are a few of our favourite ways to use it:
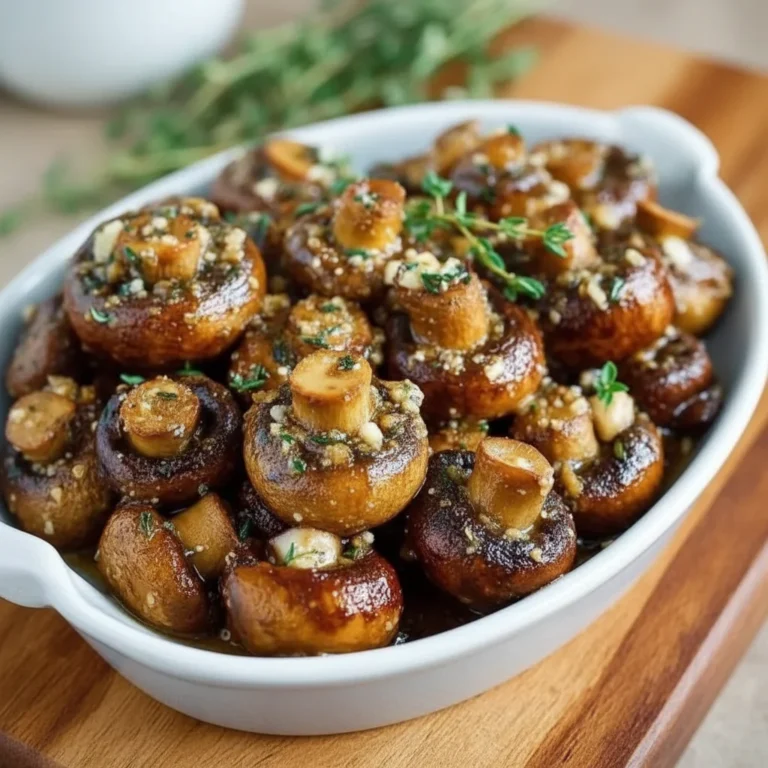
- Classic Chili Con Carne: The ultimate use! For a chili serving 4-6 people (using around 500g of beef mince), I recommend starting with 3-4 tablespoons of this seasoning. Add it after browning the meat and let it bloom for a minute before adding your tomatoes and beans.
- Taco and Fajita Seasoning: This spice mix works as a brilliant substitute for taco seasoning. Use it to flavour minced beef, chicken strips, or black beans for your next taco night. It pairs wonderfully with a fresh side like this Tangy and Refreshing Green Papaya Salad.
- Roast Potatoes and Veg: Toss chunks of potato, sweet potato, or butternut squash with a little olive oil and a generous sprinkle of this seasoning before roasting. The spices create a fantastic crust.
- A Savoury Rub: It’s a fantastic dry rub for chicken thighs, pork chops, or even a whole brisket before slow cooking. Pat it generously onto the meat an hour before cooking. It would also be great on the chicken in this Garlic Parmesan Chicken Pasta recipe if you fancy a different flavour profile.
Frequently Asked Questions
Chili Seasoning Spices
Ingredients
Method
- Gather Your Spices: Measure out all 12 ingredients into a medium-sized mixing bowl. Having everything ready before you start mixing prevents any mistakes.
- Check for Clumps: Some spices, particularly onion and garlic powder, can form small clumps. Use the back of a spoon or a fork to gently break these up against the side of the bowl before you start mixing.
- Whisk Thoroughly: Using a small wire whisk, mix the spices together for a good 1-2 minutes. I find that lifting the spices up and letting them fall back into the bowl as you whisk helps to aerate and combine them evenly. You're looking for a uniform colour and texture throughout the blend.
- Let it Settle: Let the spice blend sit for a minute before transferring it. This allows any fine dust to settle so you don't breathe it in.
- Store Properly: Carefully funnel the finished chili seasoning into a clean, dry, airtight glass jar. A jam jar or a dedicated spice jar works perfectly.
- Label and Date: Always label your homemade spice mixes with the name and the date you made them. This helps you keep track of freshness. It will be at its best within 6 months.
Notes
I truly hope this homemade chili seasoning spices blend becomes a staple in your kitchen, just as it is in mine. Taking ten minutes to mix up a jar of this is one of the best returns on investment you can make for future meals. It adds a depth and richness to so many dishes beyond just a simple bowl of chili. If you give it a try, please let me know how you get on in the comments below – I’d love to hear how you use it!
– Adam Henderson